
Change to Studio Brand and Login Method
Change the system's default appearance to your own, focusing on three areas: Make the homepage look like yours, allow customers to log in, and ensure they can find you if they encounter issues.
From the official Studio's "My Subsite," click Manage to enter the target subsite. Prepare your Logo, Favicon (browser icon), and customer service contact information.
¶ First, Change the Name, Icon, and Color
Open Site Settings, click the pencil icon next to the title or image to edit, fill in the title, and upload the Logo and Favicon; continue down to find the theme color, set it, and confirm to save.
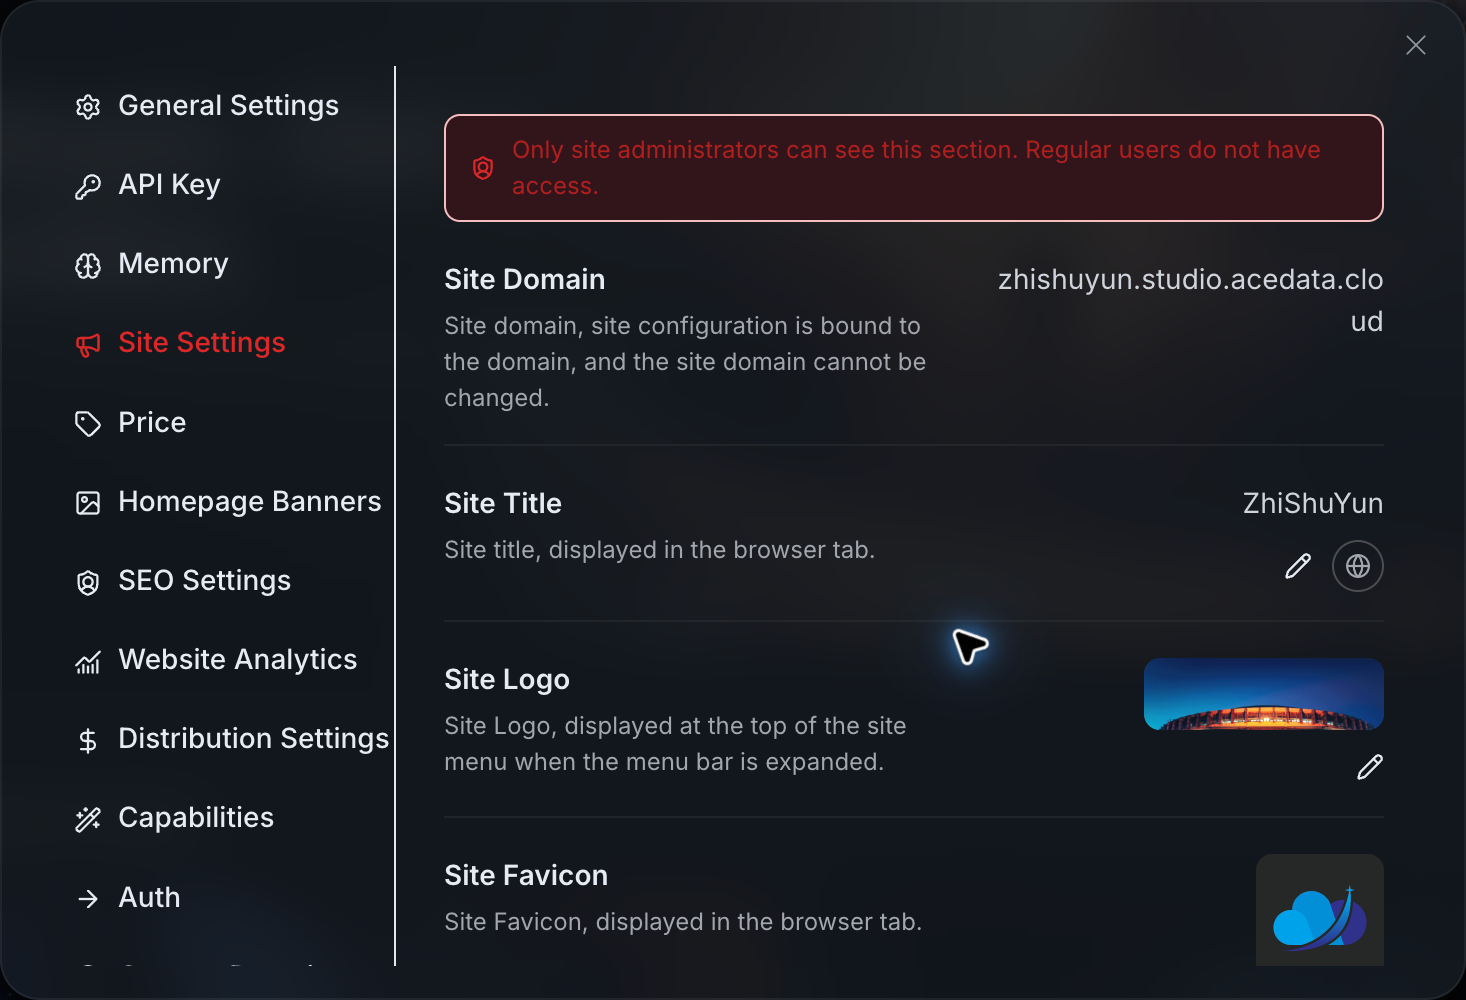
The Logo is the brand image on the page, and the Favicon is the small icon on the browser tab; both need to be set separately.
Continue down to find the brand color and language settings:
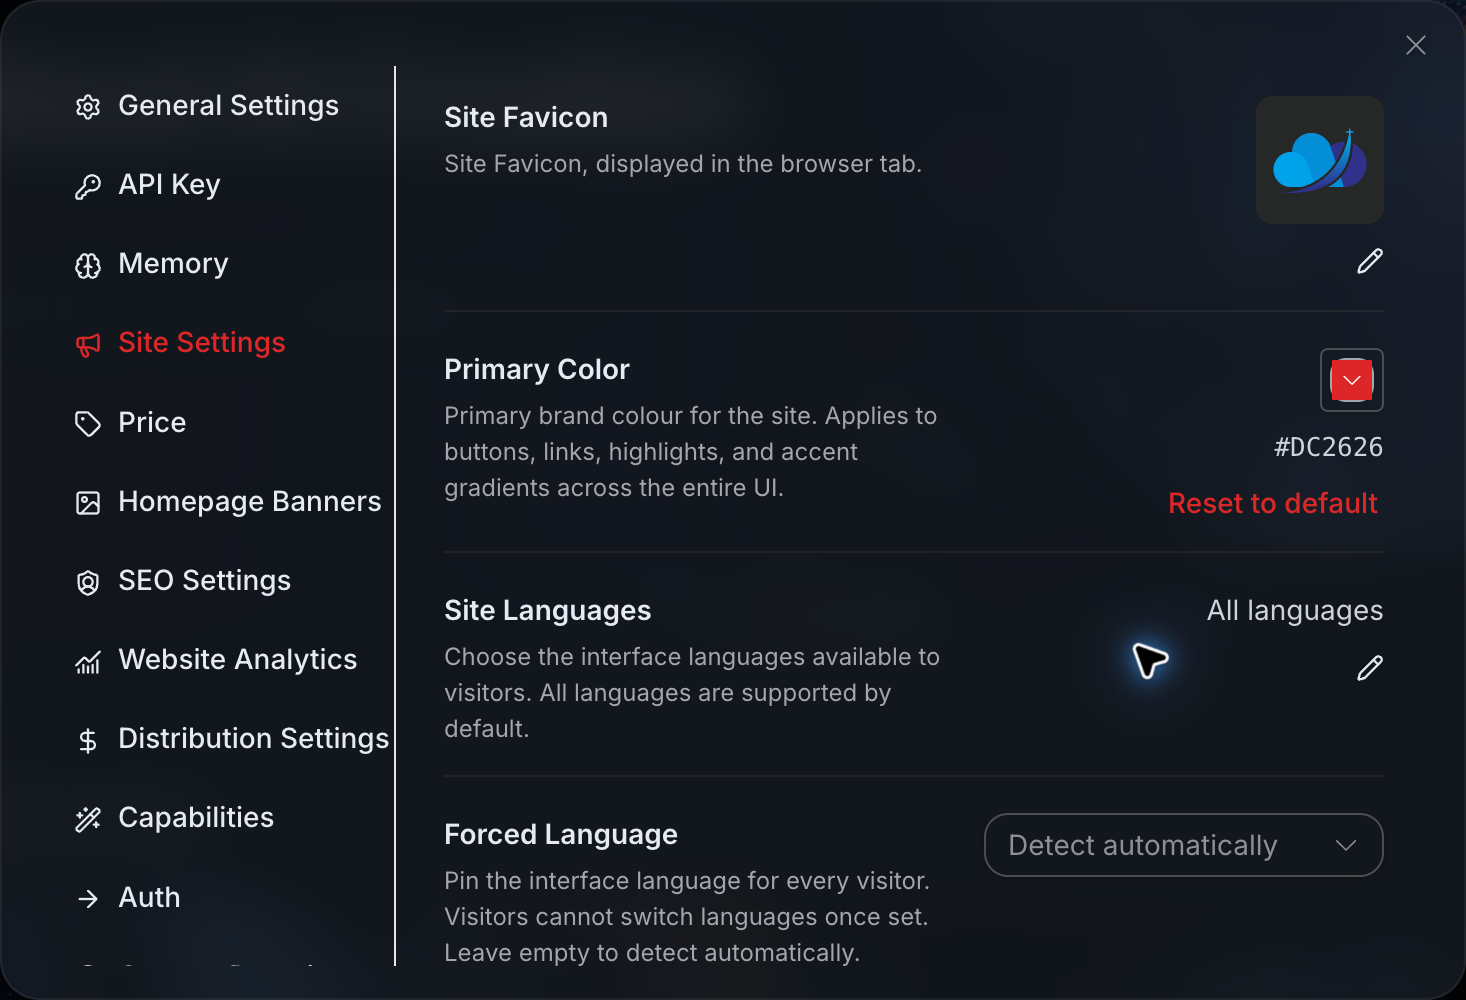
- Primary Color: Affects buttons, links, and highlight colors.
- Site Languages: Determines which languages visitors can choose. When targeting international customers, keep the languages you plan to support.
- Forced Language: Once set, all visitors will use the same language and cannot switch. If you want the website to automatically detect the language, keep Detect automatically.
Do not confuse "I view the backend in English" with "force all customers to use English." The tutorial screenshots use the English interface, and you are not required to enable forced language.
Fill in a real contact method in the customer service area that someone will respond to. After saving, open it in an incognito window to ensure customers can contact you without admin privileges.
¶ Write a Clear Introduction
Open SEO Settings. SEO can be understood as "telling search tools what this site is about."
Click the edit button next to Site Description and write a brief introduction:
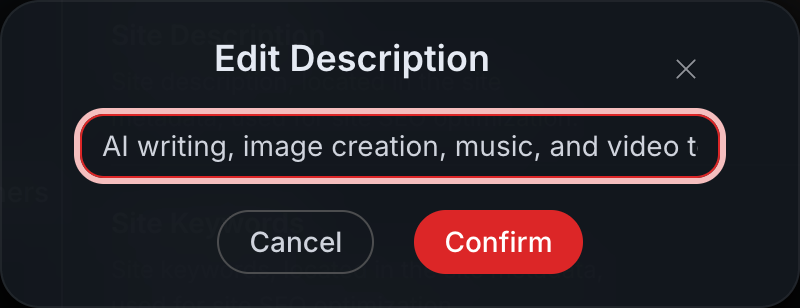
The image shows an unsaved English example, which will only apply to the site after confirmation.
You can refer to this writing style and change it to fit your business:
Provide AI writing, article illustration, and short video creation tools for self-media creators, completing daily content preparation on one website.
Choose a few keywords related to your business. Do not write a long string of model names; first clarify "who it's for and what it does."
¶ Ensure Customers Have a Login Entry
Open Authentication, enable the methods you plan to support, and select a default method from the enabled options. At least one must be retained; you cannot turn them all off.
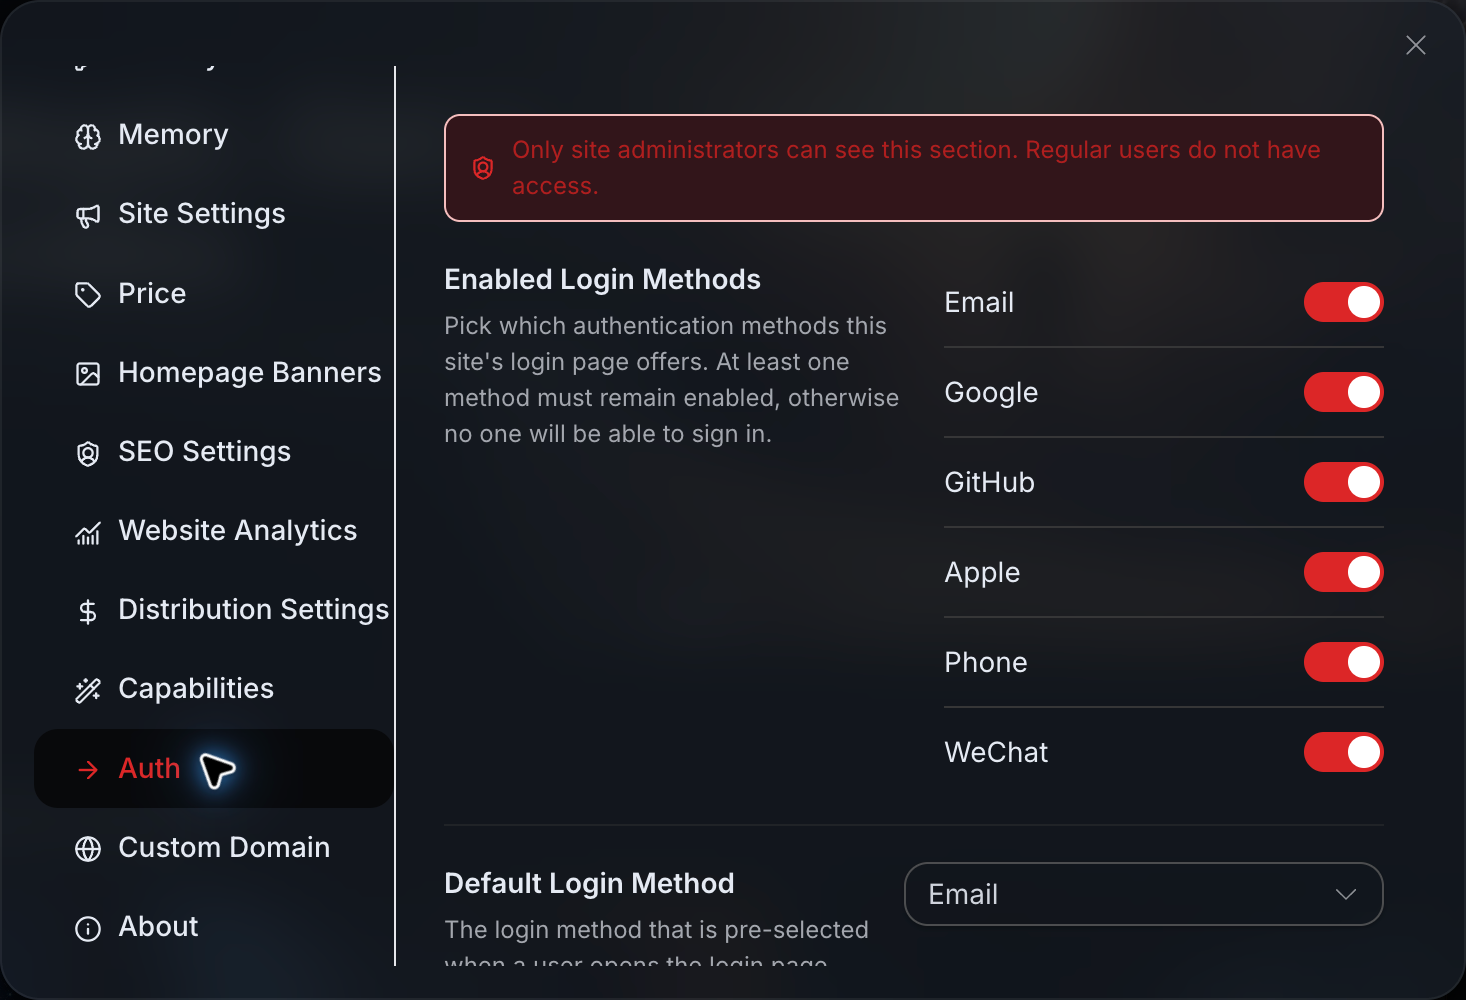
After saving, log in from an incognito window, complete a login, and check if you return to your subsite.
You can also set Login Mode further down. For example, Embedded popup will pop up the login interface within the current website; this is different from "default to email or phone login."
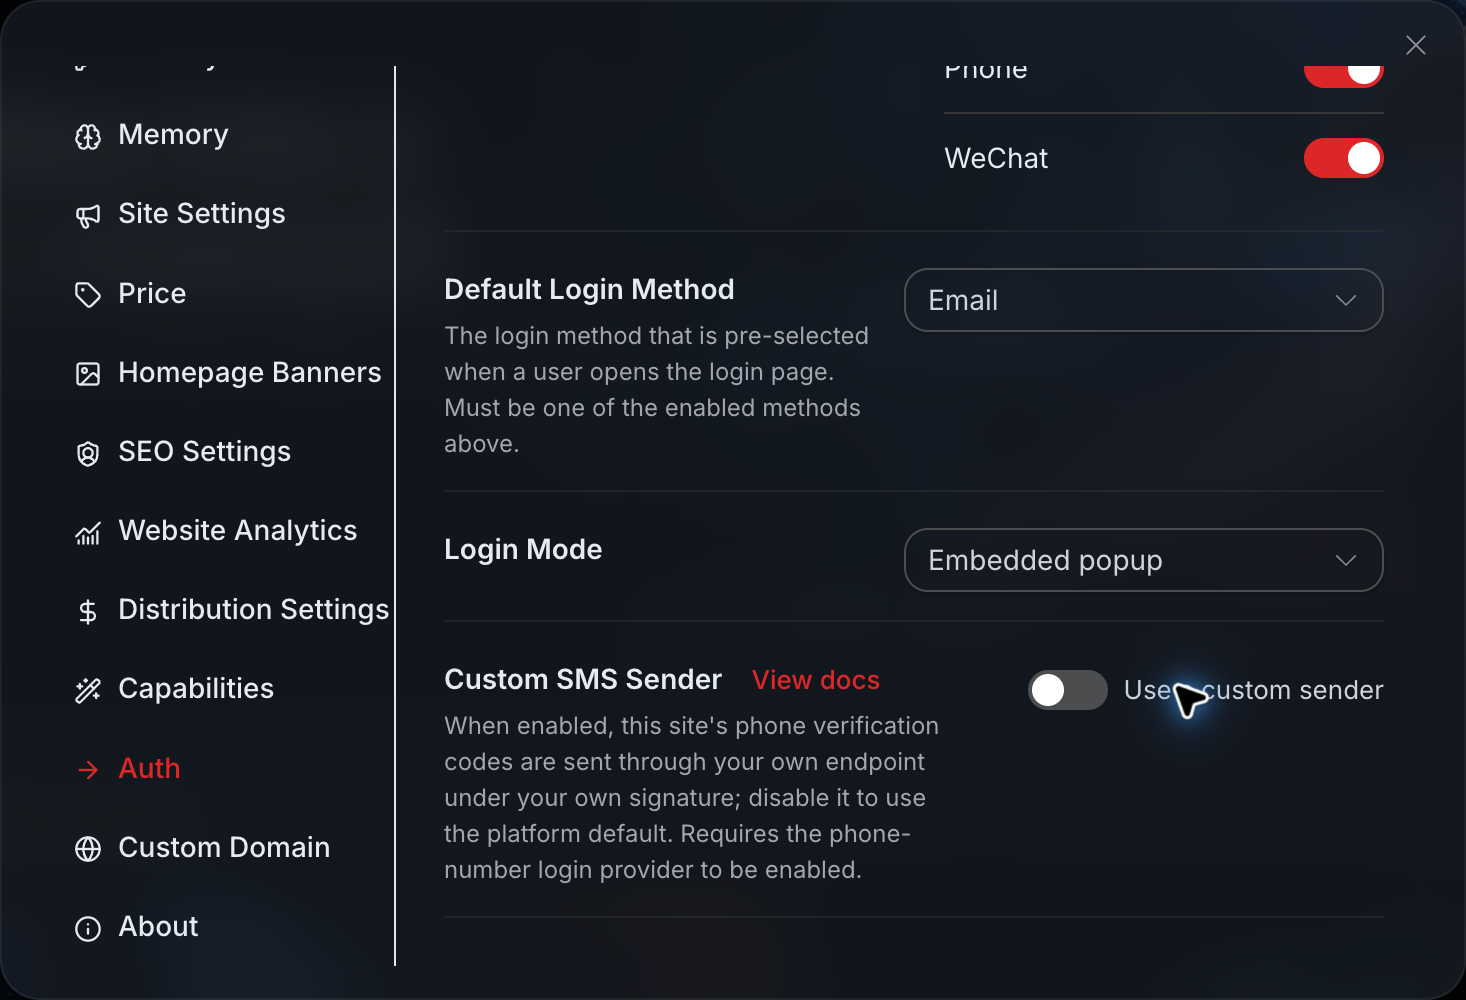
Logging in through a unified authentication domain is normal. Brand information will load asynchronously, and on slow networks, the platform's default appearance may appear first.
¶ Homepage Banner, Add When You Have Content
There is no need to rush to fill the page with a banner. Open Homepage Banner only when you have a clear main service to promote, and fill in the image, title, subtitle, and target link.
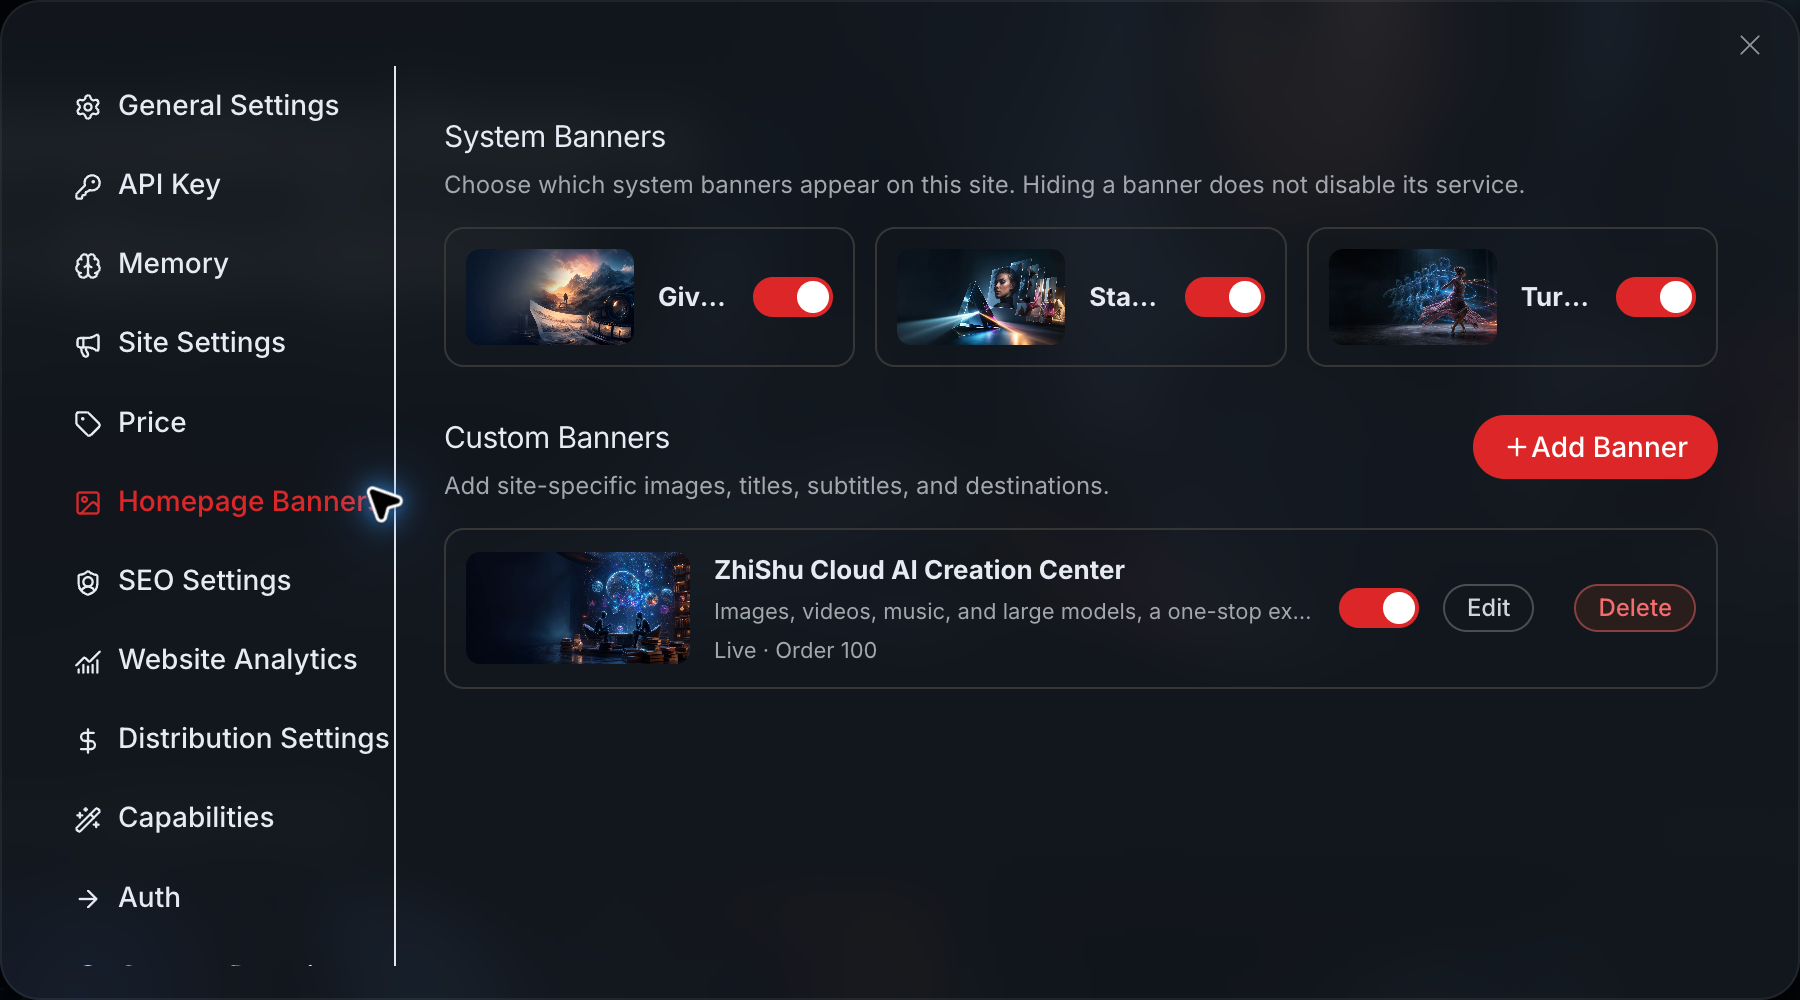
Click Add Banner, and a form will open below:
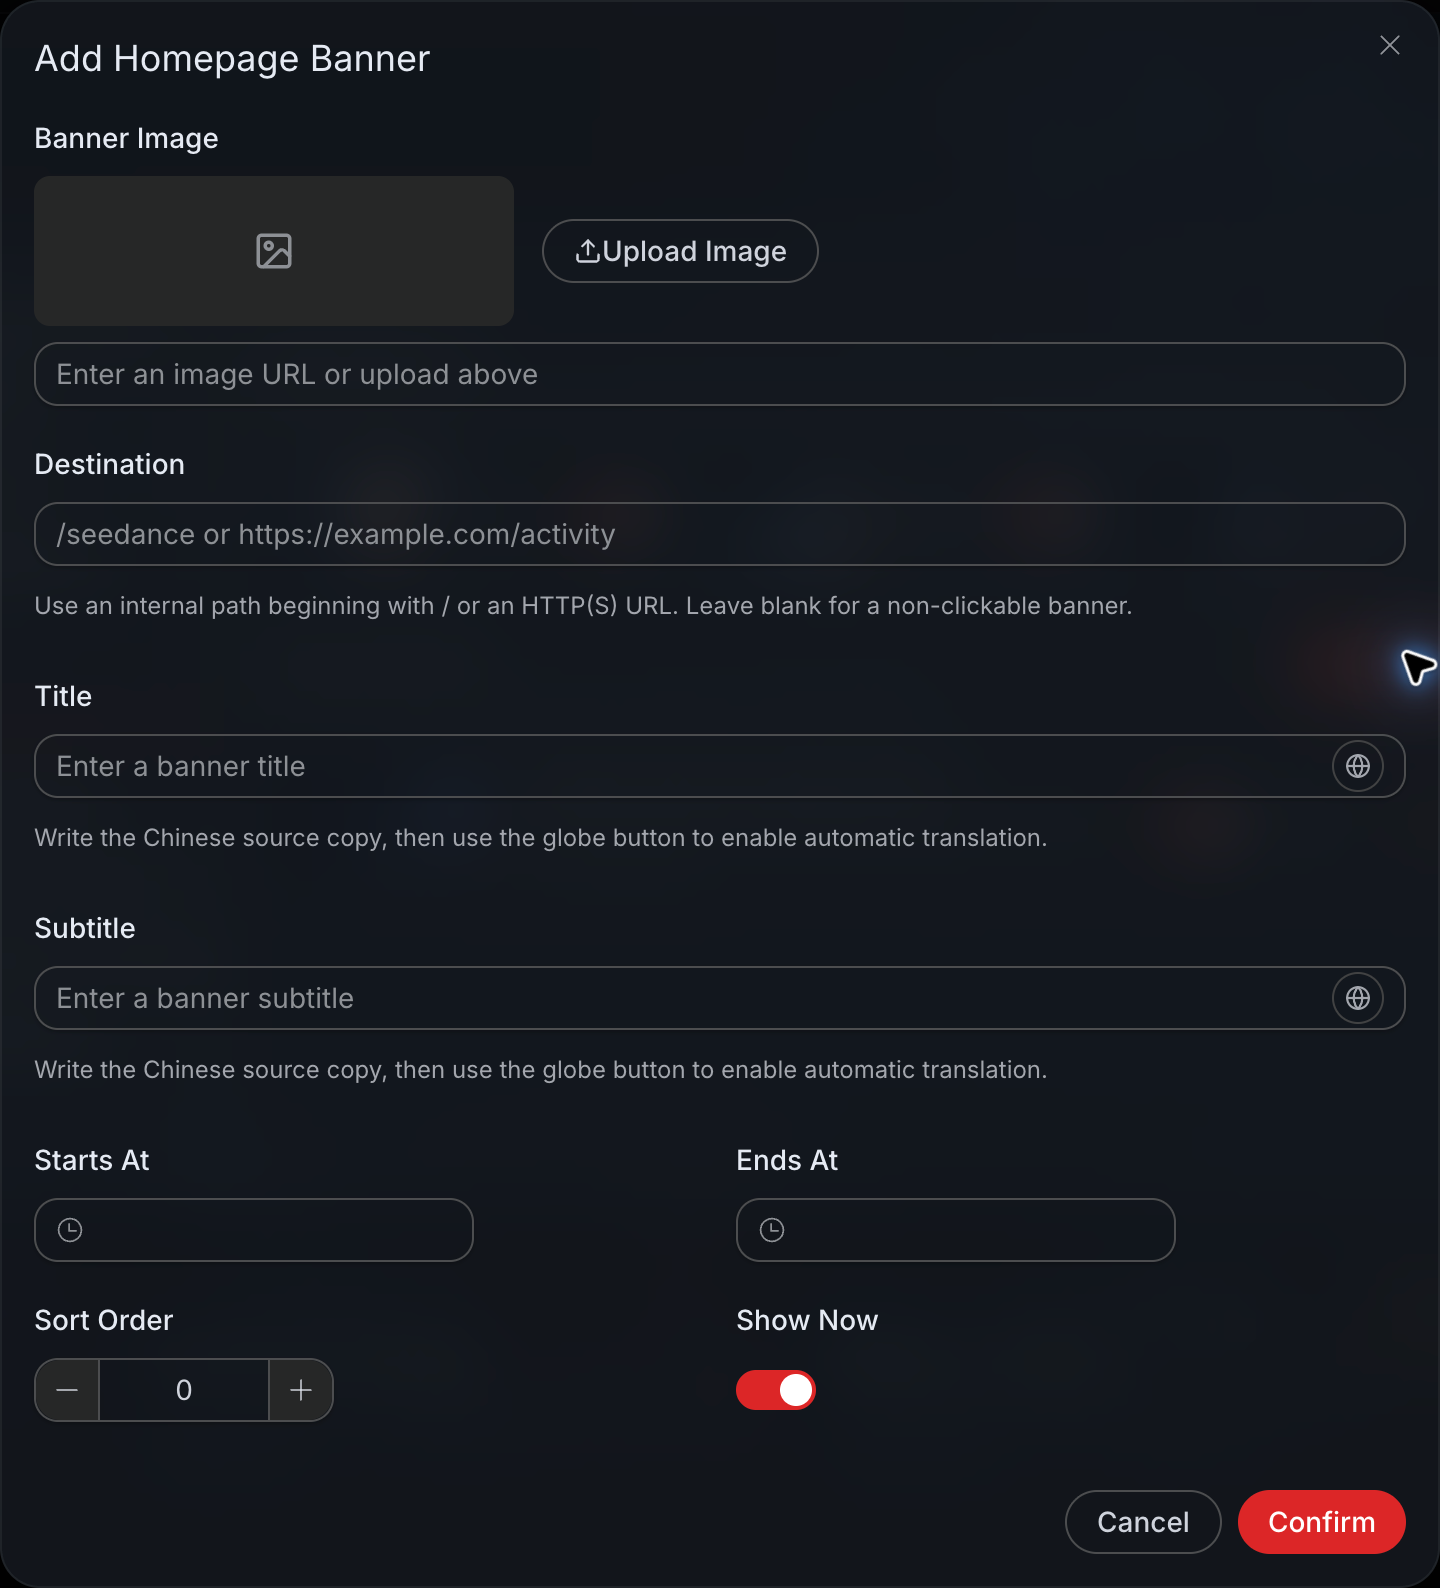
For example, if promoting article illustrations, fill in the corresponding tool path in Destination, not an unrelated homepage. Internal addresses start with /, and you can also fill in a complete HTTP(S) link; leaving it blank will make the banner unclickable.
After filling in Title and Subtitle, save first, then enable automatic translation using the globe button. Starts At / Ends At is an optional validity period; Show Now determines whether to display, and Sort Order determines the order. After saving, return to the homepage and click to confirm it leads to the correct page.
¶ Now Check These Four Areas
| Open Where | Should See What |
|---|---|
| Computer and Mobile Homepage | New site name, Logo, color normal, not overflowing the screen |
| Browser Tab | Your own title and Favicon |
| Login Entry | At least one method to complete login and return to the subsite |
| Customer Service Entry | Unlogged customers can also open it |
Is the small icon still old? Confirm that the Favicon has been saved separately, then check the cache in an incognito window or another device.
¶ Configurations Not Needed for Now Can Be Skipped
Website Statistics is used to understand visitor situations. Fill in the supported platform's ID when needed later, and update the privacy statement accordingly; do not paste any random scripts.
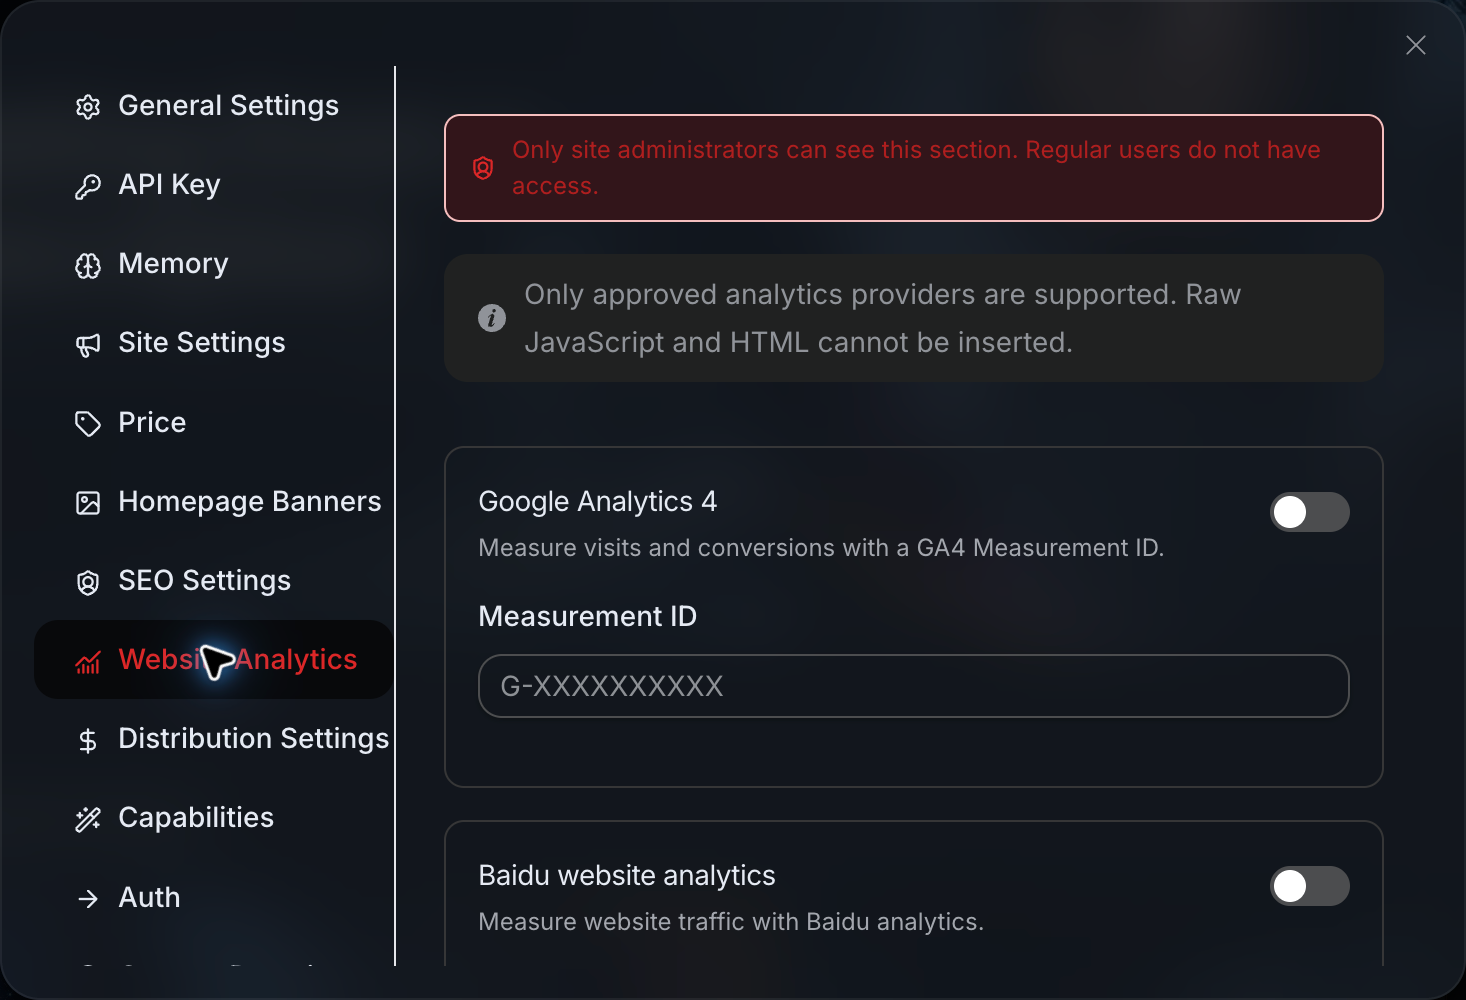
Custom SMS is only suitable for those who already have SMS sending services. It requires HTTPS webhook and signature verification, and it is recommended to let technical personnel configure it according to the page instructions; do not disclose signature keys, phone numbers, or verification codes.
Search and Share Preview also needs to be checked separately: Studio primarily loads the brand after the webpage runs, and sharing tools that do not execute JavaScript or use the original HTML may still see the default page. Just because it looks correct in the browser does not mean all share previews have been updated.
Next article: Choosing Studio Features and Pricing · Return to Route Map