
Turn AI Station into Your Own Business: Set Up a Branded AI Station in 5 Minutes Without Writing Code
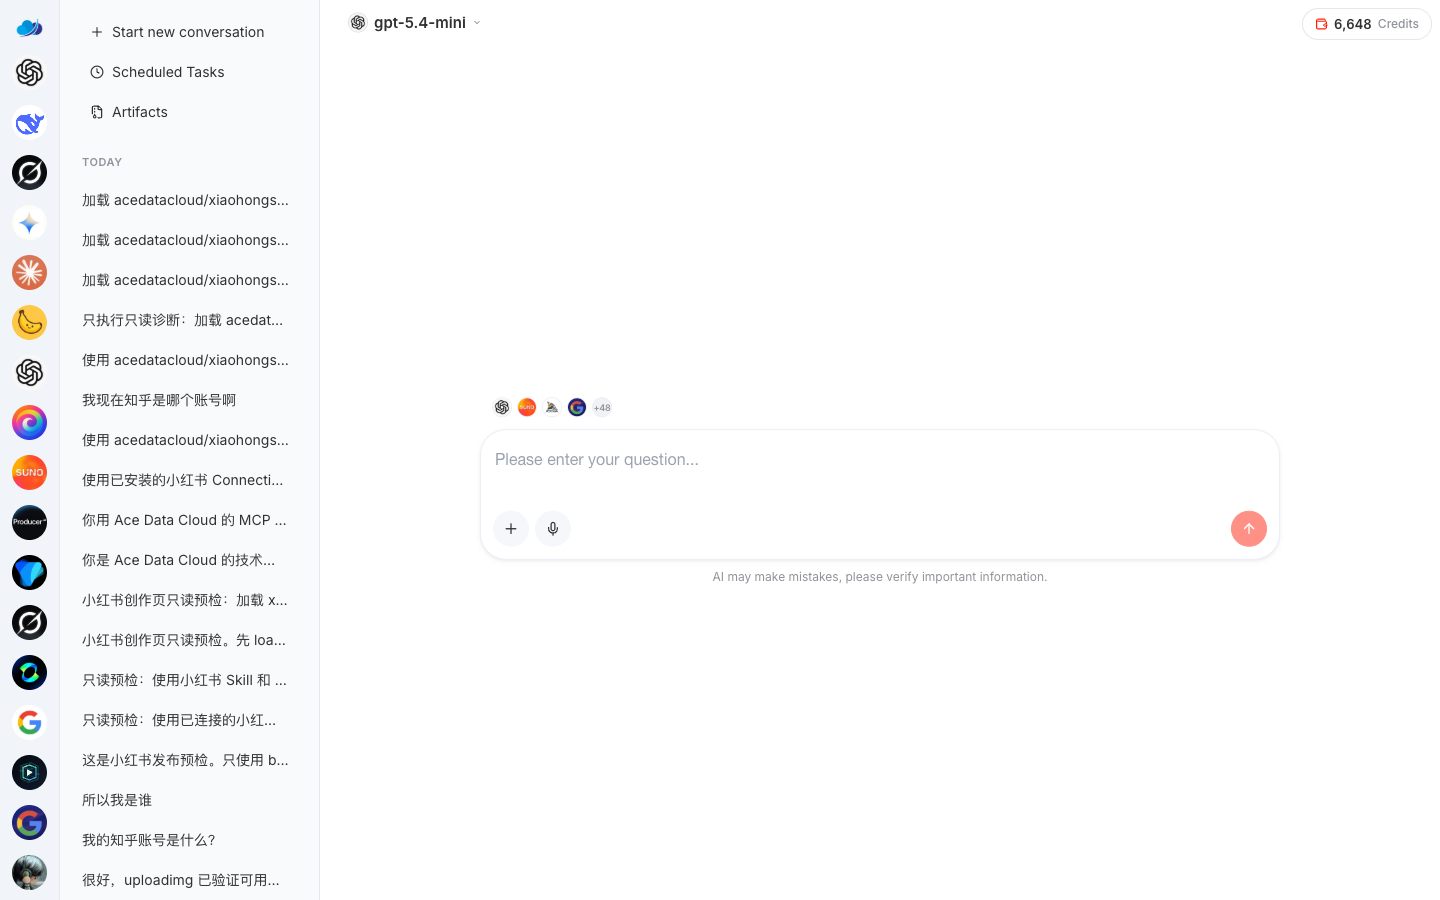
Let’s get to the conclusion: You can now have an AI website as powerful as studio.acedata.cloud—with over thirty capabilities including chat, image generation, music creation, and video production—but it features your logo, your site name, your domain, and your pricing. Users register and make purchases all related to you.
And all of this, without writing a single line of code, without renting a server, and without integrating any models. It doesn’t require you to clone open-source code and deploy it yourself (that path is exhausting and hard to maintain; when the main site upgrades, you have to rebuild). It’s simply a feature in Studio called "Custom Substation (White Label)"—everything is set up with just a few clicks in the Studio settings popup.
In this article, I will guide you step by step to get it running: from building the site, changing the brand, binding the domain, to setting prices, selecting capabilities, and attributing visitors to your name. The entire process includes real screenshots and real operations.
¶ 1. What Is It: Not "Deployment," But "Configuration"
In one sentence, the principle is clear: It doesn’t require you to redeploy a website; instead, the main site dynamically loads "your configuration" based on the incoming domain.
   Your domain / your prefix.studio.acedata.cloud
        │
        ▼
   Studio Main Site  +  Your brand / pricing / capabilities / attribution configuration
        │
        ▼
   Shared platform's dozens of models, GPU computing power, payment, points ledger
There’s a particularly nice aspect to this design: When the main site upgrades, your site automatically upgrades too. When we add new models, fix bugs, or add new features, you don’t have to do anything; your users will be able to use them the next day. You will never be stuck in the quagmire of "having to pull code, refactor, and not being able to run it."
What you own is a layer of your own things—brand, domain, pricing, user attribution; while the heavy and costly underlying components—dozens of model integrations, computing power, payment channels, risk control, multilingual support—are still handled by the platform.
¶ 2. Build a Site in 5 Minutes: Access in Studio Settings Popup
Log in to studio.acedata.cloud using any method (WeChat, Google, GitHub, email are all fine), and click the gear in the bottom right corner to open Settings. This popup is the entire control center for the white label, with a navigation bar on the left, listed from top to bottom as:
General / API Key / Memory / Site Settings / Price / SEO / Distribution / Capabilities / Auth / Custom Domain / About
To configure a site that belongs to you, mainly use the following sections: Site Settings (Brand), Capabilities (Abilities), Price (Pricing), Auth (Login Method), Custom Domain (Domain), Distribution (Attribution). Go through each section one by one.
A limitation to mention upfront: Each account can currently create a maximum of 5 sub-sites. This is sufficient for most people—if you really want to scale, doing one well is much better than having five mediocre ones.
¶ 3. Site Settings: Change It to Your Brand
Open Site Settings, where you can modify "everything users see at first glance."
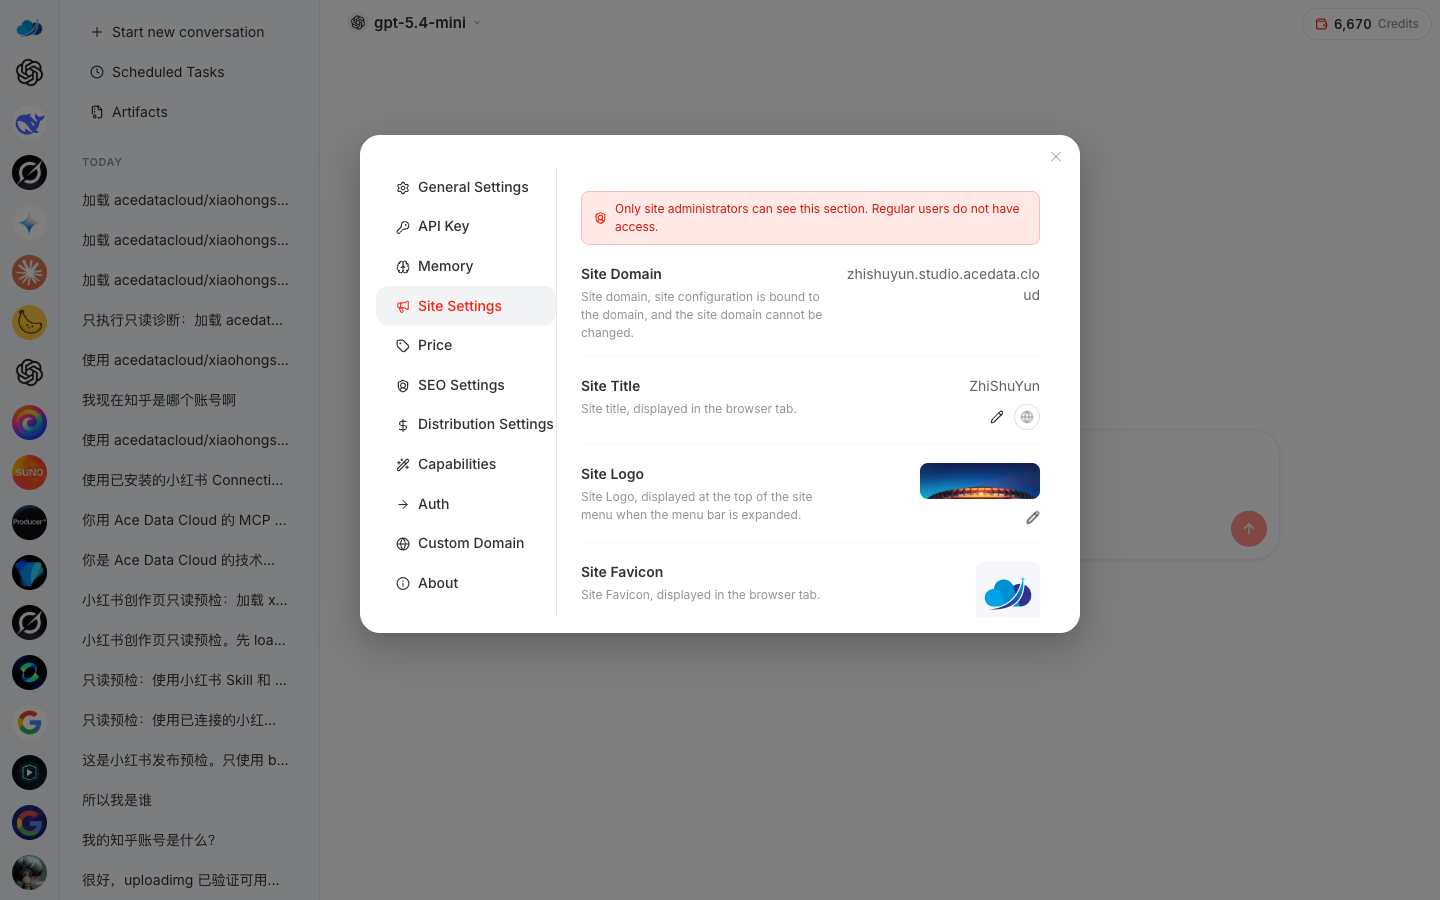
Change each item:
- Site Name (Title): This will be displayed everywhere from the browser tab to the page title. Don’t call it "Studio" anymore; use your own product name, like "Inspiration Studio" or "XX Smart Assistant." Keep it short, easy to pronounce, and relevant to your audience.
- Logo: The image in the top left corner of the site. Upload your own, a transparent PNG is the most reliable. Don’t have a ready-made logo? Generate one using gpt-image-2 in this site—that’s the fun of white labeling: using it to create its own brand materials.
- Favicon: The small icon in the tab. Don’t overlook it—though small, whether it has been changed or not can immediately indicate professionalism.
- Theme Color (Primary Color): Change it to your brand color (the site in the screenshot uses
#ff210c). Changing one primary color will adjust all buttons, highlights, and emphasis colors across the site, instantly changing the visual experience. Don’t overdo it; one primary color is enough. - Customer Service / Contact Information: Many people overlook this step, but it’s crucial—replace the default customer service with your own WeChat/email/customer group. Think through this chain: users encounter problems and contact customer service → they reach you. This way, you truly capture the customer relationship instead of sending them back to the platform.
¶ 4. Capabilities: Choose the Abilities You Want to Sell, and Rename Each App
Open Capabilities, where all thirty-plus AI capabilities of Studio are listed—chat, image generation, music creation, video production, various models—each can be turned on or off individually.
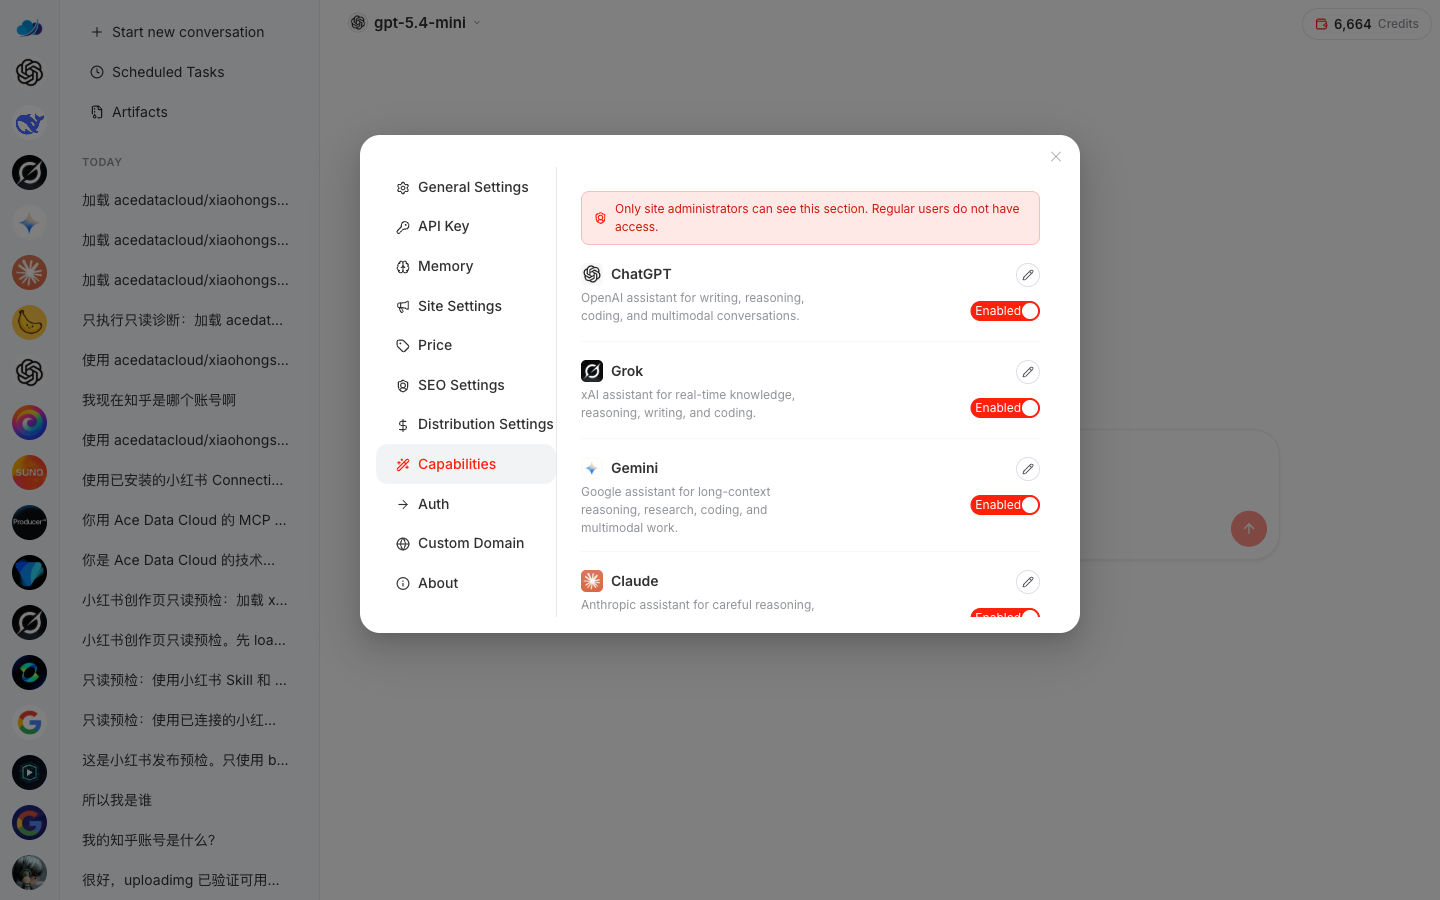
My suggestion is: Don’t turn everything on; simplify.
- If you’re creating "an AI drawing site for designers," focus on image generation, turning off music and video for a clean interface and clear positioning;
- If you’re creating "a one-stop creation platform for self-media," keep chat + image generation + video production.
Users facing a site that "can do everything but don’t know where to start" will instead leave. Simplifying is more professional than piling on features.
Each capability also has a Customize app option on the right—clicking in allows you to rename and change the icon for that app:
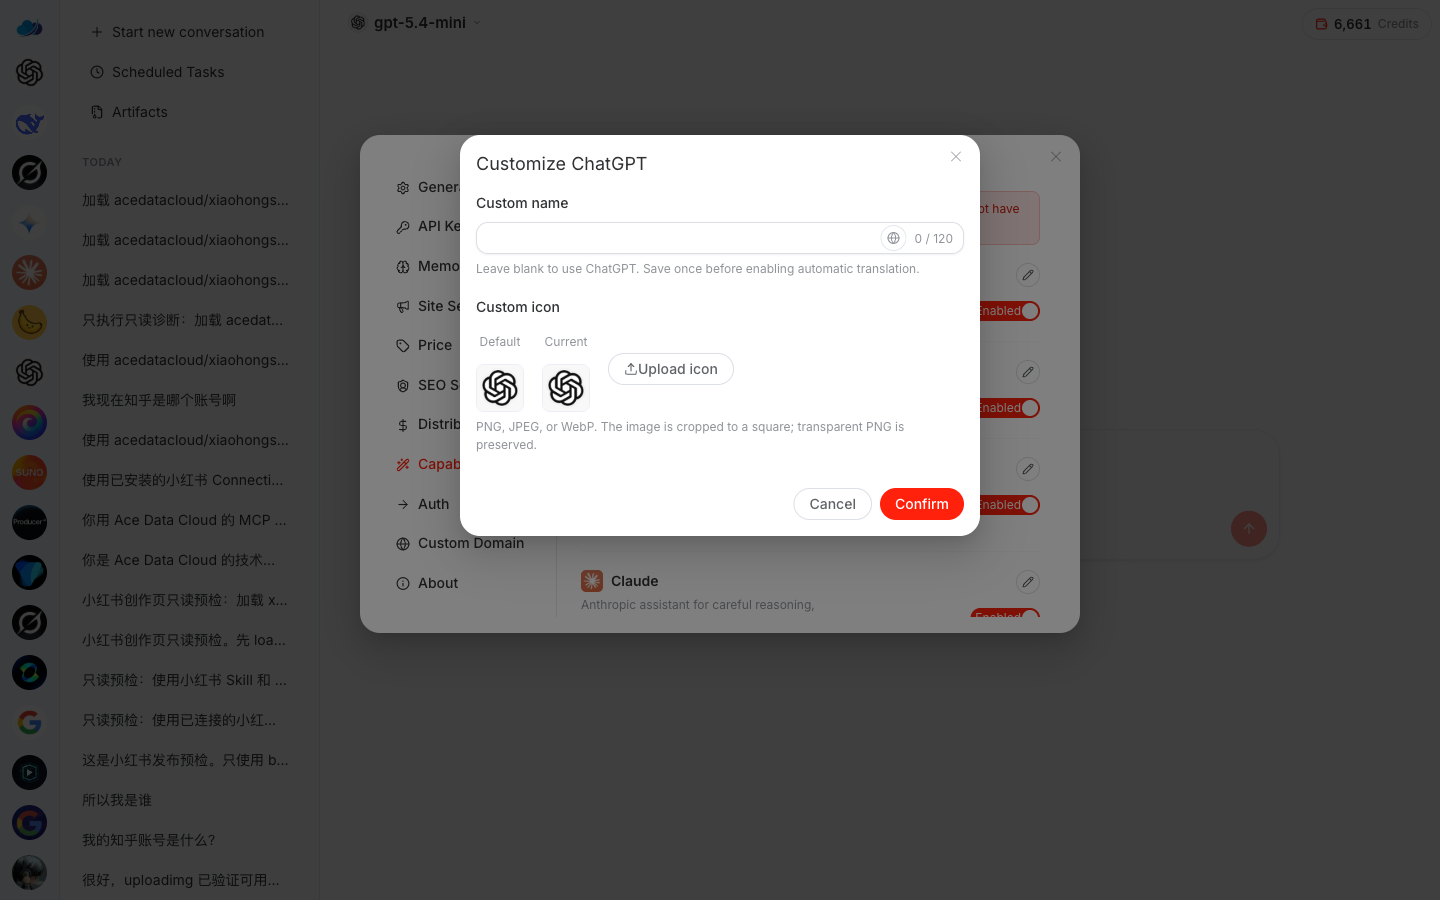 For example, call "Midjourney" as "AI Drawing" on your site, along with your own icon; call "Suno" as "One-Click Songwriting." After the changes, what users see on your site is a set of capabilities named by you, rather than a bunch of unrecognizable third-party names.
¶ Five, Price: Site-wide markup of 0–500%, can also cover single services
Open Price. Here, let's clarify how white-labeling makes money, so as not to create a misunderstanding of "taking the price difference."
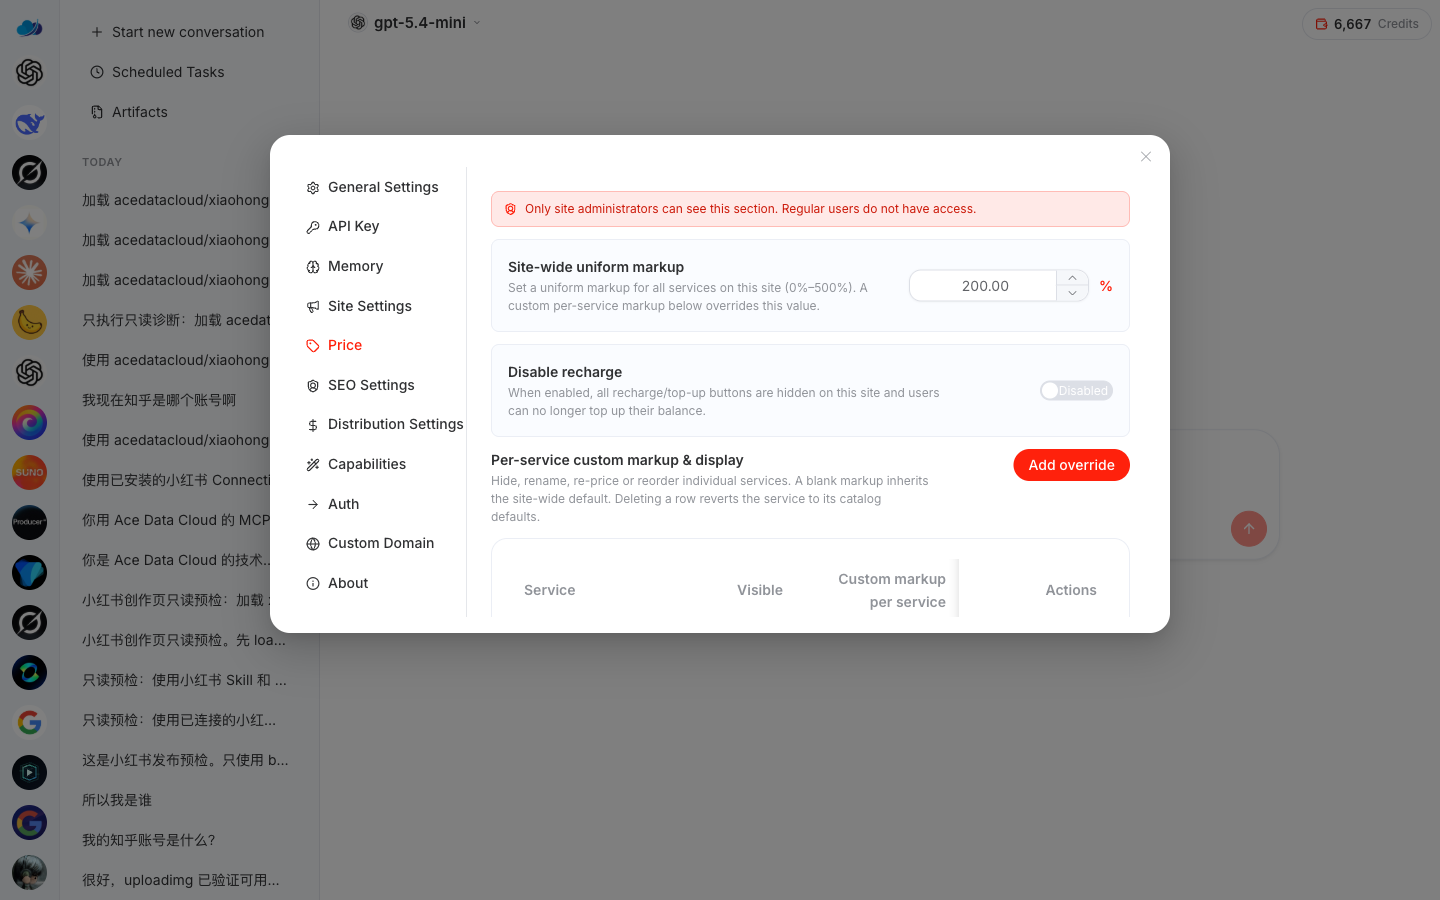
The mechanism is as follows:
- The platform prices each order at the official price;
- You can set a markup ratio (range 0%–500%, meaning you can sell up to 6 times the official price), and the actual amount users see and pay is the transaction amount after markup;
- However, the markup itself is not a direct "price difference" that goes into your pocket—it raises the transaction amount of this order, which is the calculation base for subsequent distribution commissions;
- The money you actually receive is the portion returned to you by the platform based on the distribution commission ratio multiplied by this transaction amount.
In short: Markup is responsible for making the cake bigger, and commission determines how big a piece you get. The higher the markup, the larger the commission base, and the more you get at the same ratio.
There are two granularities for markup:
- Site-wide uniform ratio: Set a markup for the entire sub-site, and all capabilities will follow it. This is the easiest and suitable for starting out.
- Single service coverage: Set a separate markup, visibility, and display name for a specific service (like video generation) in the table below, overriding the default value for the entire site. This is suitable for "different capabilities wanting to pursue different premiums" for refined strategies.
This section also has a turn off recharge switch—if you don't want users to recharge on your site (for example, if you want to handle it offline or recharge on their behalf), you can turn it off.
¶ Six, Auth: Choose which login methods customers can use, and change SMS signatures
Open Auth, where you decide "how users log in to your site."
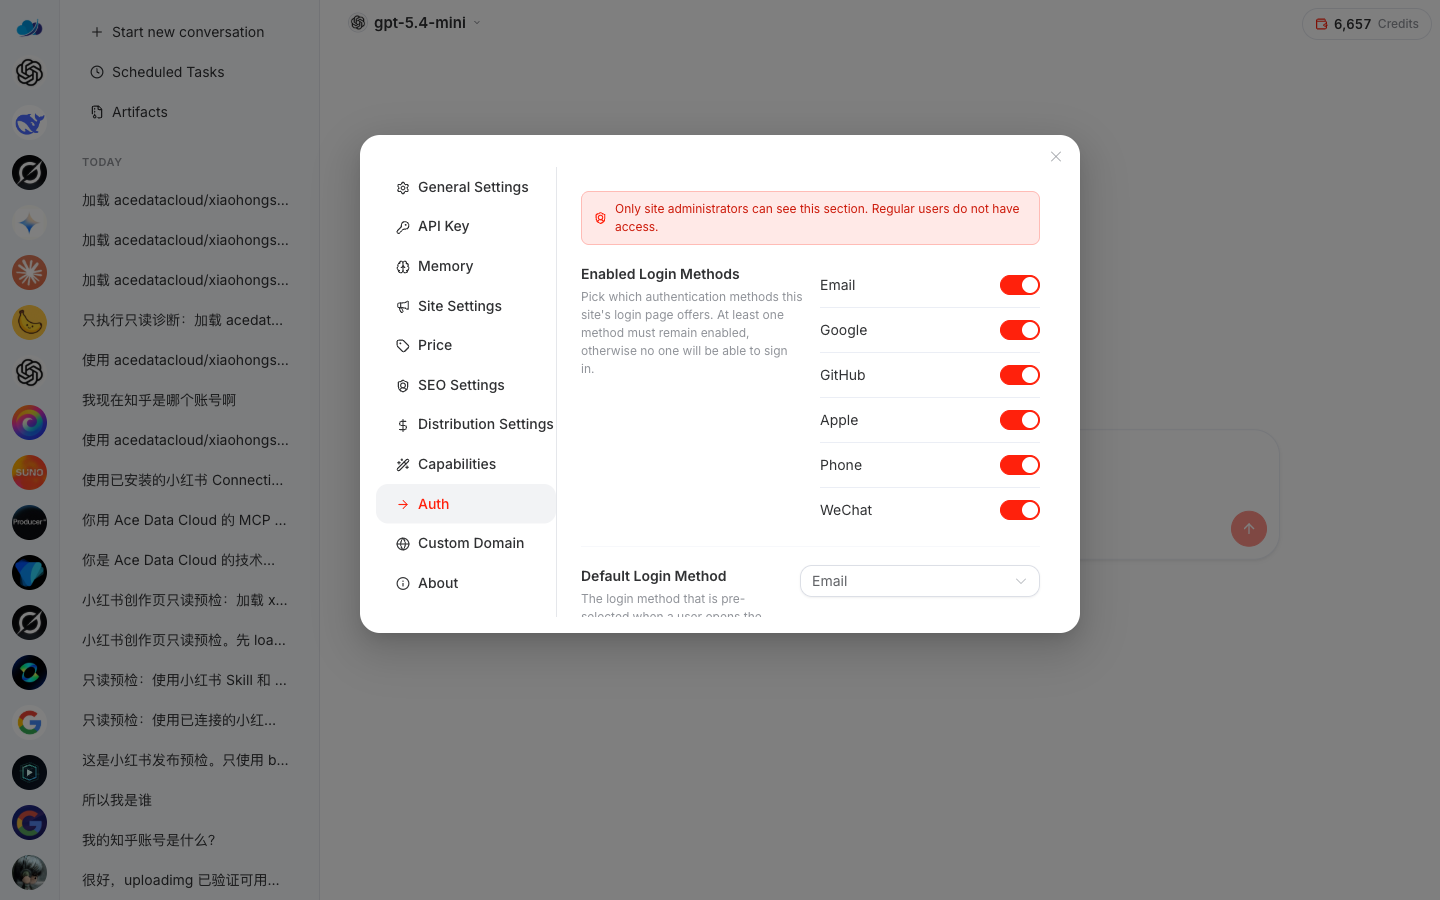
You can:
- Check which login methods to enable: Email, Google, GitHub, Apple, phone number, WeChat—only keep those your target audience will use. For domestic media, keep WeChat + phone number; for overseas, keep Google + Apple + Email.
- Set the default login method and login form (embedded pop-up, etc.).
- Customize the SMS signature: The verification code SMS sent for phone number login can have the signature changed to your own name—so the verification code received by users is prefixed with your brand, not the platform's. This step greatly enhances "hiding platform traces."
¶ Seven, Custom Domain: Bind your own domain name, HTTPS fully automated
Open Custom Domain. By default, your site address is yourprefix.studio.acedata.cloud, which clearly indicates "hosted under someone else." Bind your own domain name (like ai.yourbrand.com), and it will truly look like an independent product.
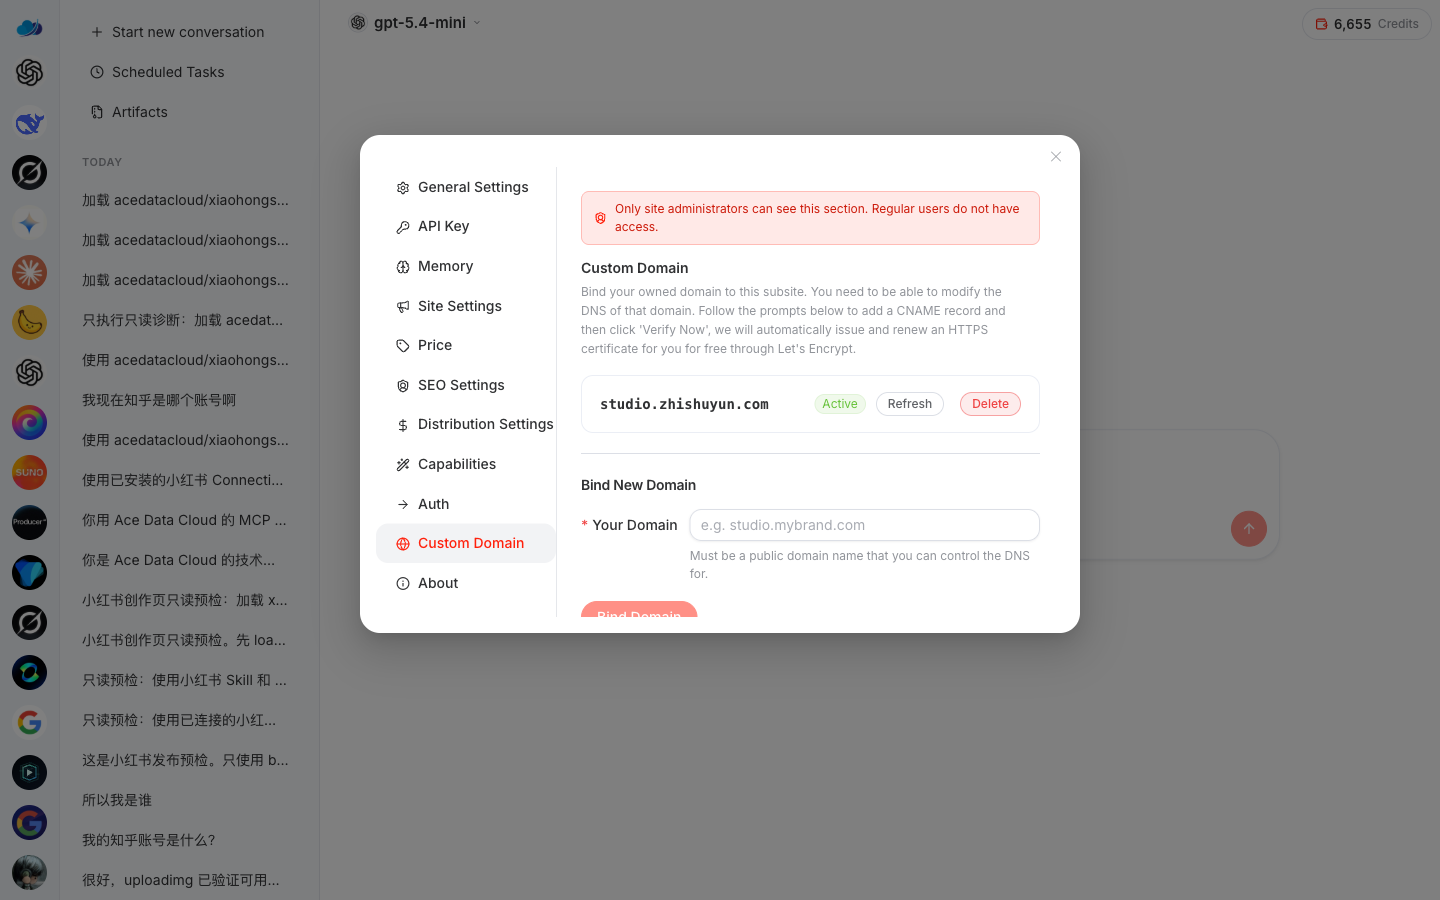
This feature is now fully available (the early version did not support it, but it is now online). You only need two things: a domain name you own + access to its DNS backend. Steps:
- Fill in the complete domain name you want to bind in this section, for example,
ai.yourbrand.com; the page will tell you which target address to CNAME to (follow the actual display on the page). - Go to your domain registrar's DNS console, add a CNAME record, pointing
ai(or the subdomain you want) to the target address provided by the platform. - Wait for DNS to propagate (a few minutes to several minutes), and the platform will automatically issue an HTTPS certificate using Let's Encrypt and renew it automatically—you don't have to touch the certificate or manage operations.
After it takes effect, open https://ai.yourbrand.com, and if you see a padlock + your brand, it has been successfully bound. The status in the screenshot for studio.zhishuyun.com is Active, which is a real example of a successful binding.
Using a subdomain (
ai.yourbrand.com) is the easiest. Some DNS providers do not support CNAME for root domains (bare domainyourbrand.com), requiring the use of ALIAS/ANAME or flattening CNAME (Cloudflare, DNSPod both support).
¶ Eight, Distribution: Automatically assign every registered user to your account
This is the easiest section to overlook, but it is the most valuable. No matter how beautifully your site is built, if users register and are not bound to your account, then the increased transaction amount from markup and the tiered calculated ratio have nothing to do with you.
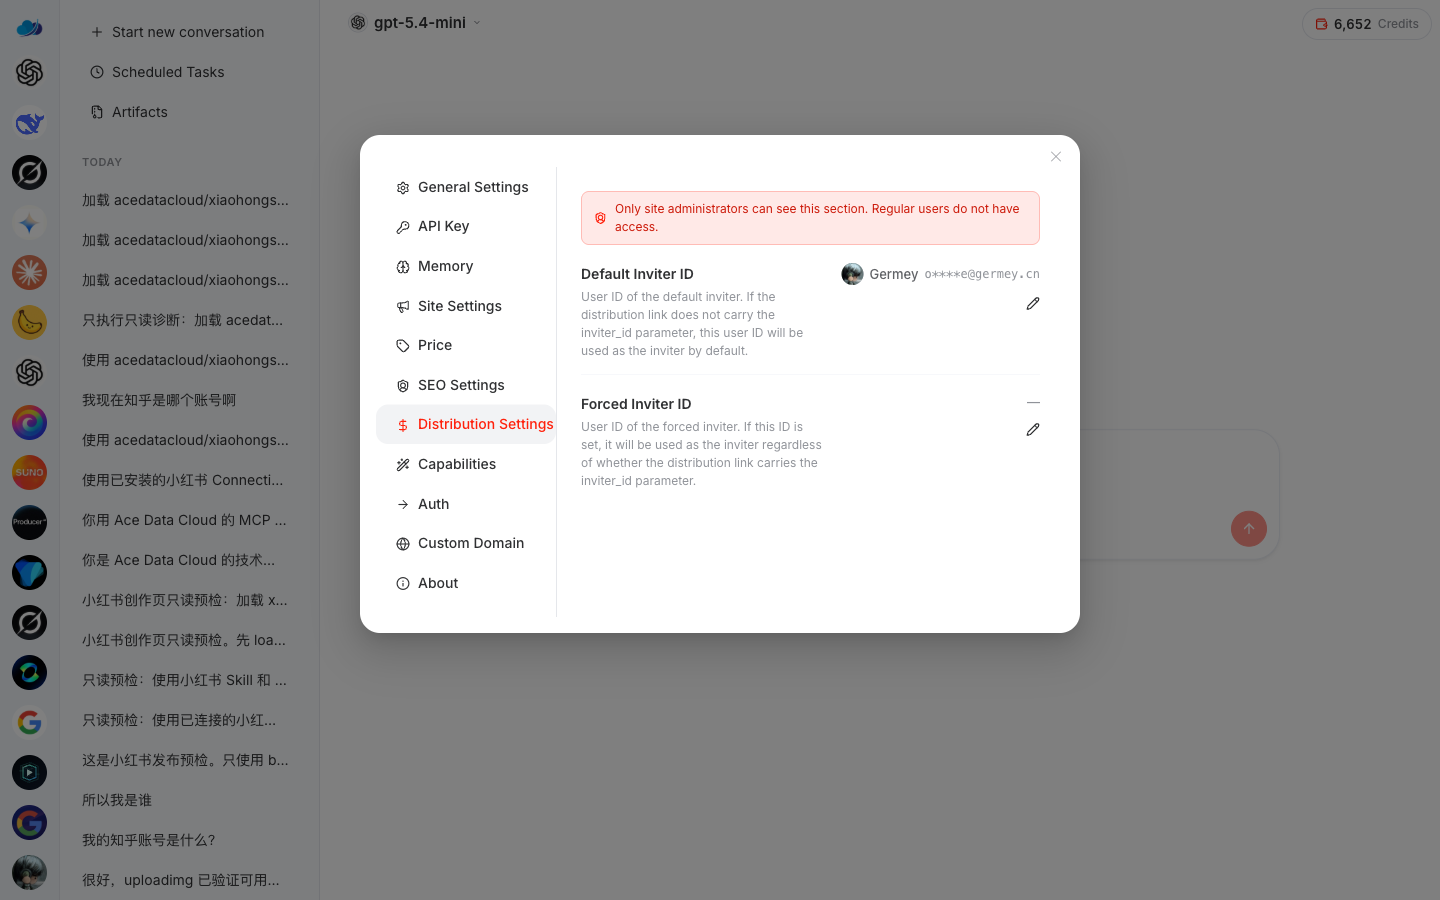
After setting the default Inviter ID (fill in your own user ID) in Distribution: all new users who come in from this sub-site and register will automatically be bound to your account, without you having to manually send invitation links to each person.
Its underlying mechanism is consistent with the platform's general invitation attribution: after visitors enter the site, the browser records an INVITER_ID, which is saved for 7 days; as long as the visitor completes registration within this 7-day window, they will be bound as your subordinate. Once the binding is established, the relationship is long-term valid (the 7 days is just the window for "clicking the link to register," not that the binding expires after 7 days).
If you want to manually create a universal link with your identifier to send out, the format is:
https://platform.acedata.cloud/?inviter=<your user ID>
Also, fill in the SEO section (site description + keywords), which will be useful when your site relies on search engine organic traffic for customer acquisition.
¶ Nine, Clarify How You Make Money (Honest Version, No Empty Promises)
The revenue of the white label has only one engine: distribution commission; markup and attribution are the two levers that maximize it. Don't misunderstand it as "two independent sources of income."
Lever One · Markup (Price) — Determines "How Big the Cake Is." You add 0–500% to the official price, and users pay based on the transaction amount after the markup. The extra money does not go directly to you, but raises the commission calculation base for this order.
Lever Two · Distribution Commission — Determines "How Big a Slice You Get." When users registered under your account (based on the above Distribution) make each real purchase, they return a commission to you according to the platform's 13-level ladder. The ratio is determined by the cumulative spending amount of all customers under your name, only increasing, never decreasing:
| Level | Cumulative Customer Spending (USD) | Commission Ratio |
|---|---|---|
| L1 | $0 (starting) | 10% |
| L2 | $150 | 12% |
| L3 | $700 | 13% |
| L4 | $1,400 | 14% |
| L5 | $3,000 | 15% |
| L6 | $7,000 | 16% |
| L7 | $14,000 | 17% |
| L8 | $28,000 | 18% |
| L9 | $50,000 | 19% |
| L10 | $100,000 | 20% |
| L11 | $250,000 | 21% |
| L12 | $500,000 | 22% |
| L13 | $1,000,000 | 24% |
If you were invited by someone else (having an upline), this commission is split 80 / 20: you (the direct inviter) get ratio × 0.8, and your upline gets ratio × 0.2; if there is no upline, then the 20% does not apply, and you get ratio × 0.8.
Here’s an example that only discusses the mechanism (algorithm demonstration, not income promise): You are at L1 (10%), and set the markup at 100%. An item with an official price of $1 will be sold for $2. The commission base for this order is $2, and you actually receive $2 × 10% × 0.8 = $0.16 (in the case where you have an upline). Similarly, if you set the markup to 0, the base is $1, and you actually receive $1 × 10% × 0.8 = $0.08. See, the markup doubles the base, and the commission follows suit — this is the effect of the markup lever. When your cumulative customer spending reaches L10 (20%), the same order will double again.
A truthful reminder: After the commission is credited, there is a pending period of about 3 days for confirmation before it can be withdrawn — this is the normal rhythm to align with refund/risk control windows, not "instant withdrawal." Do not promise customers or yourself "immediate credit."
¶ Ten, Go Ahead and Set One Up Now
After saying so much, it’s better to take action. Review the entire process:
Build a site (5 minutes)
  → Site Settings change brand (Logo/site name/theme color/customer service)
  → Capabilities select capabilities + rename and change icons for each app
  → Price set markup (0–500%)
  → Auth choose login method + change SMS signature
  → Custom Domain bind your own domain (automatic HTTPS)
  → Distribution let visitors register under your name
After completing these six steps, you will have a fully owned AI site that can continuously generate commissions.
Open studio.acedata.cloud, click the gear in the lower right corner, and start setting up your first sub-site. The best position in this wave of AI is not to stand on the shore watching, but to hold something of your own — the white label is that low-threshold, truly yours "own thing."
Once the site is built, the next step is to drive traffic to it. How to use AI to write once and spread the content linking you across platforms like Zhihu, Juejin, Xiaohongshu, CSDN, Bilibili, Medium, and more — that is what the entire series of "Connector Content Marketing Practice" will cover. The site is a "container for capturing traffic," and Connector is the "engine for generating traffic." Only by using the two together can you truly get moving.