
Kilo Code for VS Code Custom Model Configuration
¶ 1. Obtain the API Key
Open the Ace Data Cloud application list, enter an available application, and copy the API Key.

¶ 2. Add a Custom provider
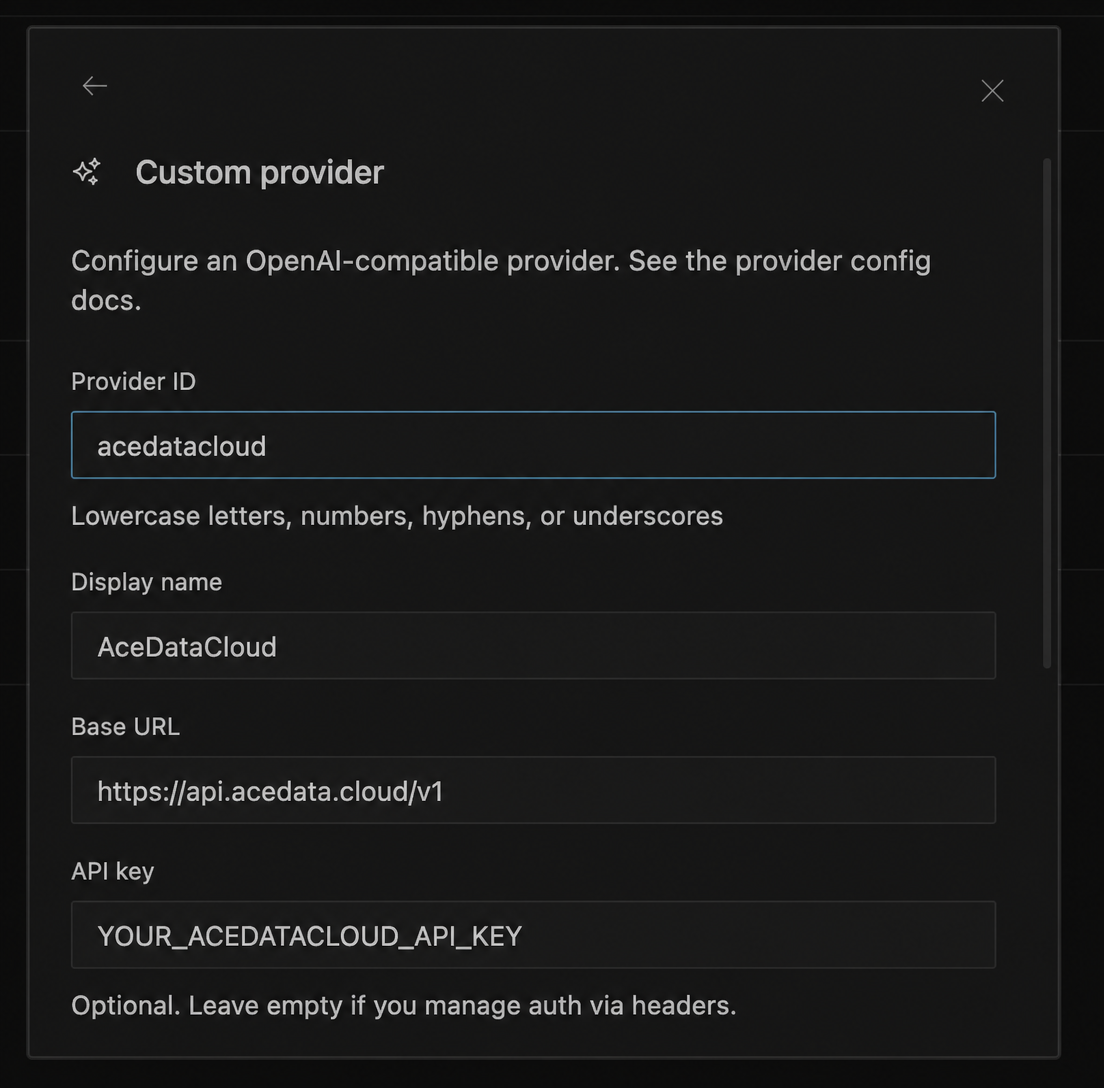
Open Settings → Providers in Kilo Code, click Custom provider, then fill in:
| Field | Value |
|---|---|
| Provider ID | acedatacloud |
| Display name | AceDataCloud |
| Provider API | OpenAI Compatible |
| Base URL | https://api.acedata.cloud/v1 |
| API key | The API Key copied just now |
| Models | Go to the model catalog to view and add the model names to use, for example, claude-opus-5 and gpt-6-sol |
The model id here is the model name used by the model parameter in API requests, not the UUID of the service or API. You can first check it in the model catalog; for precise validation, copy it exactly from the data array in the /v1/models response, and do not guess or abbreviate it yourself.
Click Submit, and the model will appear in the selector. When team sharing or more detailed configuration is needed, you can also edit the user-level ~/.config/kilo/kilo.jsonc or project-level ./kilo.jsonc according to the official documentation.
¶ 3. Verify
Select acedatacloud/MODEL_ID and send Reply only OK, then perform a read-only file operation once. If the model does not appear, check whether the Provider has been submitted, whether the model name exactly matches the id in the catalog, and whether the Base URL is correct.
¶ Official References
Return to the Coding Plan Configuration Center.