
Website Building Practice: From 0 to Launch, Get Your First White Label AI Site Running
In the previous article "Own Your AI Site in 5 Minutes," I explained what a white label is and why it's worth doing. This article won't discuss theories; it will focus on one thing—guiding you step by step to actually build, open, and use your first sub-site.
I suggest you open studio.acedata.cloud now and follow along. No coding required throughout the process.
¶ Step 0: Log into the Main Site
Log into Studio using any method—WeChat, Google, GitHub, or email.
There is a premise to clarify: The configuration entry for the white label is in the settings pop-up of the official main site. This means you need to log in with your main account at studio.acedata.cloud to configure and manage it, not by logging into the sub-site you created.
¶ Step 1: Open the Settings Pop-up and Familiarize Yourself with These 11 Tabs
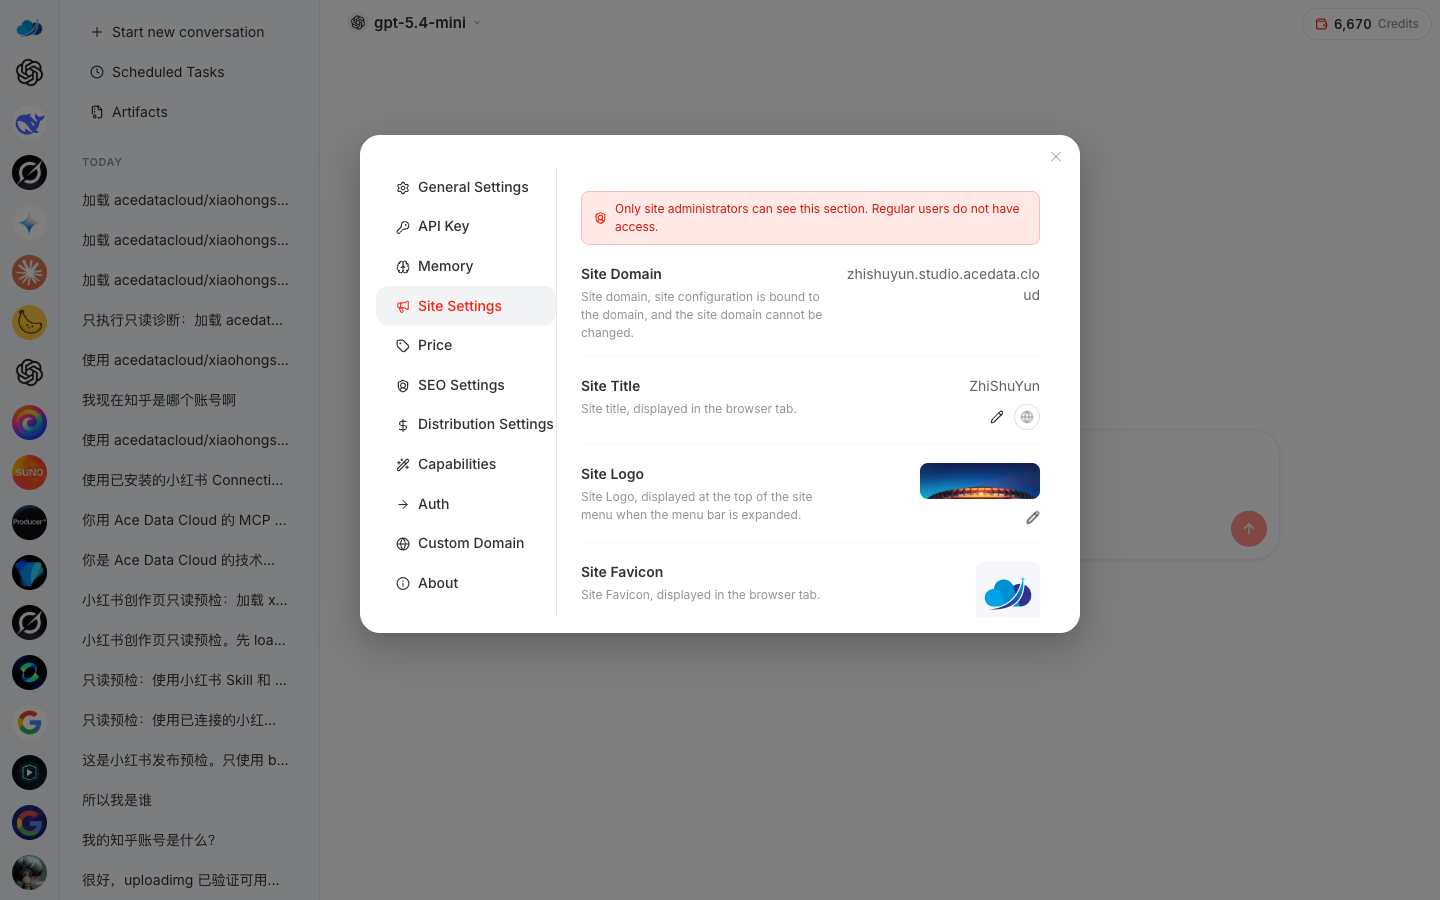
After logging in, click the gear icon in the bottom right corner to open Settings. This is a pop-up window with a navigation bar on the left, containing these 11 tabs from top to bottom:
- General
- API Key
- Memory
- Site Settings (Site: Brand, Logo, Theme Color, Customer Service)
- Price (Pricing: Markup)
- SEO
- Distribution
- Capabilities (Ability switches + Rename and change icons for each app)
- Auth (Login methods + SMS signature)
- Custom Domain (Bind your own domain)
- About
This pop-up is the entire control center for the white label. To create a site that belongs to you, you will mainly use Site Settings, Capabilities, Price, Auth, Custom Domain, Distribution—these 6 sections.
¶ Step 2: Your Site is Already Running
The good news is: You don't need to "manually create" anything—at the moment you log into Studio, a fully functional site is already running. What you need to do is not "build a site from scratch," but rather configure, change the skin, and make it "yours" for this already capable site that can chat, generate images, and create audio and video.
Your site's default address is:
yourprefix.studio.acedata.cloud
Now open it in a new window to take a look. It can chat and generate images—it is already alive. Everything you do next is to make it "yours": change the brand, bind the domain, select capabilities, set pricing, and configure distribution. Want to change the address to your own domain (
ai.yourbrand.com)? That will be covered in Step 4, Custom Domain, which is now fully supported.
¶ Step 3: Configure This Site to Be "Yours" in Order
From the settings pop-up, configure each section one by one. I have broken down each part into separate articles, but here’s a sequential chart to follow so you won’t get lost:
| Order | What to Do | In Which Section | Article |
|---|---|---|---|
| 1 | Change Logo, Site Name, Theme Color, Customer Service | Site Settings | "Customizing Your Brand" |
| 2 | Select AI capabilities to sell + Rename and change icons for apps | Capabilities | "What to Sell, How Much to Sell" |
| 3 | Set your markup (0–500%) | Price | "What to Sell, How Much to Sell" |
| 4 | Choose login methods + Change SMS signature | Auth | "One-Click to Hide Platform Traces" |
| 5 | Bind your own domain (automatic HTTPS) | Custom Domain | "Binding Your Own Domain" |
| 6 | Ensure visitors register under your name | Distribution | "Make Every Visitor Yours" |
¶ A Common Pitfall for Beginners
"I changed the configuration, why hasn't the site changed?"
The most common reason is browser cache. When changing front-end resources like Logo and theme color, you may need to refresh the page (Ctrl/Cmd + Shift + R) or simply open an incognito window to check—validating from the perspective of a "new visitor" is more accurate.
¶ Clarifying Two Boundaries Upfront
To avoid discovering "why can't I change this" halfway through your configuration, let me clarify:
- Each account can currently create a maximum of 5 sub-sites. This is sufficient for most people—if you want to scale, focusing on one well-done site is far better than five mediocre ones.
- The login process currently still uses the
auth.acedata.clouddomain: The brand and login methods can be changed (configured in the Auth section), but the domain field during the login step has not yet been changed to yours. We are working on this. Note: The main domain of the site can now be changed—binding your own domain (in the Custom Domain section) is fully supported, so don’t confuse this boundary with the login process.
¶ You Now Have a Site
It's that simple. You now have an AI site that can chat, generate images, and create music videos, with the address being yours, and the facade will soon be yours as well.
In the next article "Customizing Your Brand: Making It Look Completely Yours," I will guide you to change the default skin so that it looks like your product at first glance.