
Sora Videos Generation API Integration Instructions
This article will introduce the integration instructions for the Sora Videos Generation API, which allows you to input custom parameters to generate videos from Sora. This API supports two version modes:
- Version 1 (Classic Mode): Supports
duration(10/15/25 seconds),orientation(landscape/portrait),size(small/large resolution), reference imageimage_urls, character ###character_url, and other parameters. - Version 2 (Partner Mode): Supports
seconds(4/8/12 seconds), pixel-level resolutionsize(e.g., 1280x720), reference imageinput_reference, and other parameters.
¶ Application Process
To use the Sora Videos Generation API, first go to the Ace Data Cloud Console to obtain your API Token for future use.

If you are not logged in or registered, you will be automatically redirected to the login page to invite you to register and log in. After completing this, you will be automatically returned to the current page.
One API Token can call all services on the platform without needing to apply separately for each service. The first application will grant a free quota for a trial experience; when the quota is insufficient, you can recharge the general balance in the console.
📘 Complete Documentation: Sora Videos Generation API →
¶ Basic Usage (Version 1)
First, understand the basic usage of Version 1, which involves inputting the prompt prompt, an array of reference image links image_urls, and the model model to obtain the processed result. The specific content is as follows:

Here we can see that we have set the Request Headers, including:
accept: The format of the response result you want to receive, filled in asapplication/json, which means JSON format.authorization: The key to call the API, which can be selected directly after application.
Additionally, the Request Body is set, including:
model: The model for generating the video, supportingsora-2(standard mode) andsora-2-pro(high-definition mode). Thesora-2-prosupports videos with adurationof 25 seconds, whilesora-2only supports 10 and 15 seconds.size: Video resolution,smallfor standard resolution,largefor HD resolution (only Version 1).duration: Video length, supporting 10, 15, and 25 seconds, with 25 seconds only supported bysora-2-pro(only Version 1).orientation: Aspect ratio direction, supportinglandscape(horizontal) andportrait(vertical) (only Version 1).image_urls: An array of reference image links used for image-to-video generation (only Version 1).character_url: Character ### link, real people cannot appear in the video (only Version 1).character_start/character_end: The start and end seconds for the character's appearance, with a range difference of 1-3 seconds (only Version 1).prompt: Prompt word (required).callback_url: URL for asynchronous callback results.async: Optional, set totruefor the interface to immediately returntask_id, without needing to providecallback_url, and then poll the corresponding task query interface to obtain results.version: API version,"1.0"(default) or"2.0".
After selection, you can see that the corresponding code is generated on the right side, as shown in the image:
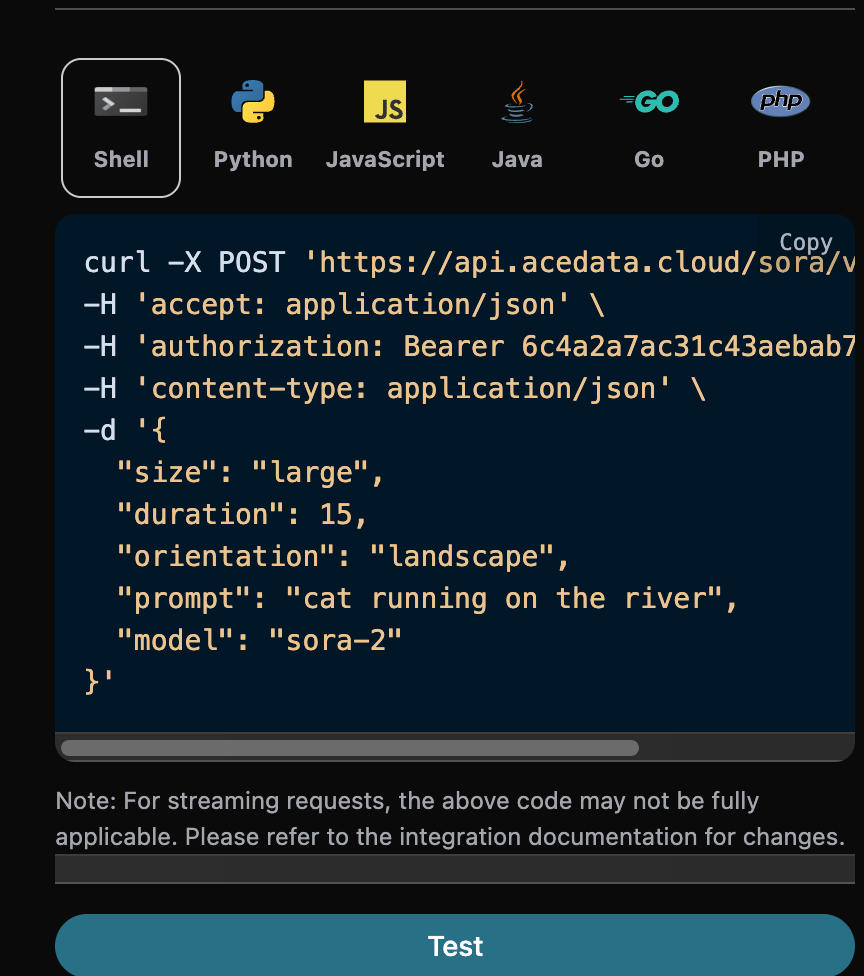
Click the "Try" button to test, as shown in the image above, and we obtained the following result:
{
  "success": true,
  "task_id": "6bf7fb83-5814-4e3e-a4ad-bfa0c26c0b33",
  "trace_id": "96166698-4b66-478d-a26b-77a7269c9e01",
  "data": [
    {
      "id": "sora-2:task_01k7770rgsevxsmtpbn7xnm5gh",
      "video_url": "https://platform.cdn.acedata.cloud/gptimage/vg-assets/assets%2Ftask_01k7770rgsevxsmtpbn7xnm5gh%2Ftask_01k7770rgsevxsmtpbn7xnm5gh_genid_0bf958d3-cae7-4298-b7b6-99ae439a1ea6_25_10_10_14_06_975715%2Fvideos%2F00000%2Fsrc.mp4?st=2025-10-10T12%3A30%3A38Z&se=2025-10-16T13%3A30%3A38Z&sks=b&skt=2025-10-10T12%3A30%3A38Z&ske=2025-10-16T13%3A30%3A38Z&sktid=a48cca56-e6da-484e-a814-9c849652bcb3&skoid=8ebb0df1-a278-4e2e-9c20-f2d373479b3a&skv=2019-02-02&sv=2018-11-09&sr=b&sp=r&spr=https%2Chttp&sig=jigY6Z5qp8%2BTXYobaW0EAJ4%2Fbx6G7t6V1P0iyDeUq48%3D&az=oaivgprodscus",
      "state": "succeeded"
    }
  ]
}
The returned result contains multiple fields, described as follows:
success: The status of the video generation task at this time.task_id: The ID of the video generation task at this time.trace_id: The tracking ID of the video generation at this time.data: The result list of the video generation task at this time.id: The video ID of the video generation task at this time.video_url: The video link of the video generation task at this time.state: The status of the video generation task at this time.
We can see that we have obtained satisfactory video information, and we only need to access the generated Sora video using the video link address in data.
Additionally, if you want to generate the corresponding integration code, you can directly copy the generated code, for example, the CURL code is as follows:
curl -X POST 'https://api.acedata.cloud/sora/videos' \
-H 'accept: application/json' \
-H 'authorization: Bearer {token}' \
-H 'content-type: application/json' \
-d '{
  "size": "large",
  "duration": 15,
  "orientation": "landscape",
  "prompt": "cat running on the river",
  "model": "sora-2"
}'
¶ Image-to-Video Task (Version 1)
If you want to perform an image-to-video task, the parameter image_urls must be passed with reference image links, allowing you to specify the following content:
image_urls: An array of reference image links used for this image-to-video task. Note that you cannot pass real images of people with faces, as this may lead to task failure.
An example of the input is as follows:
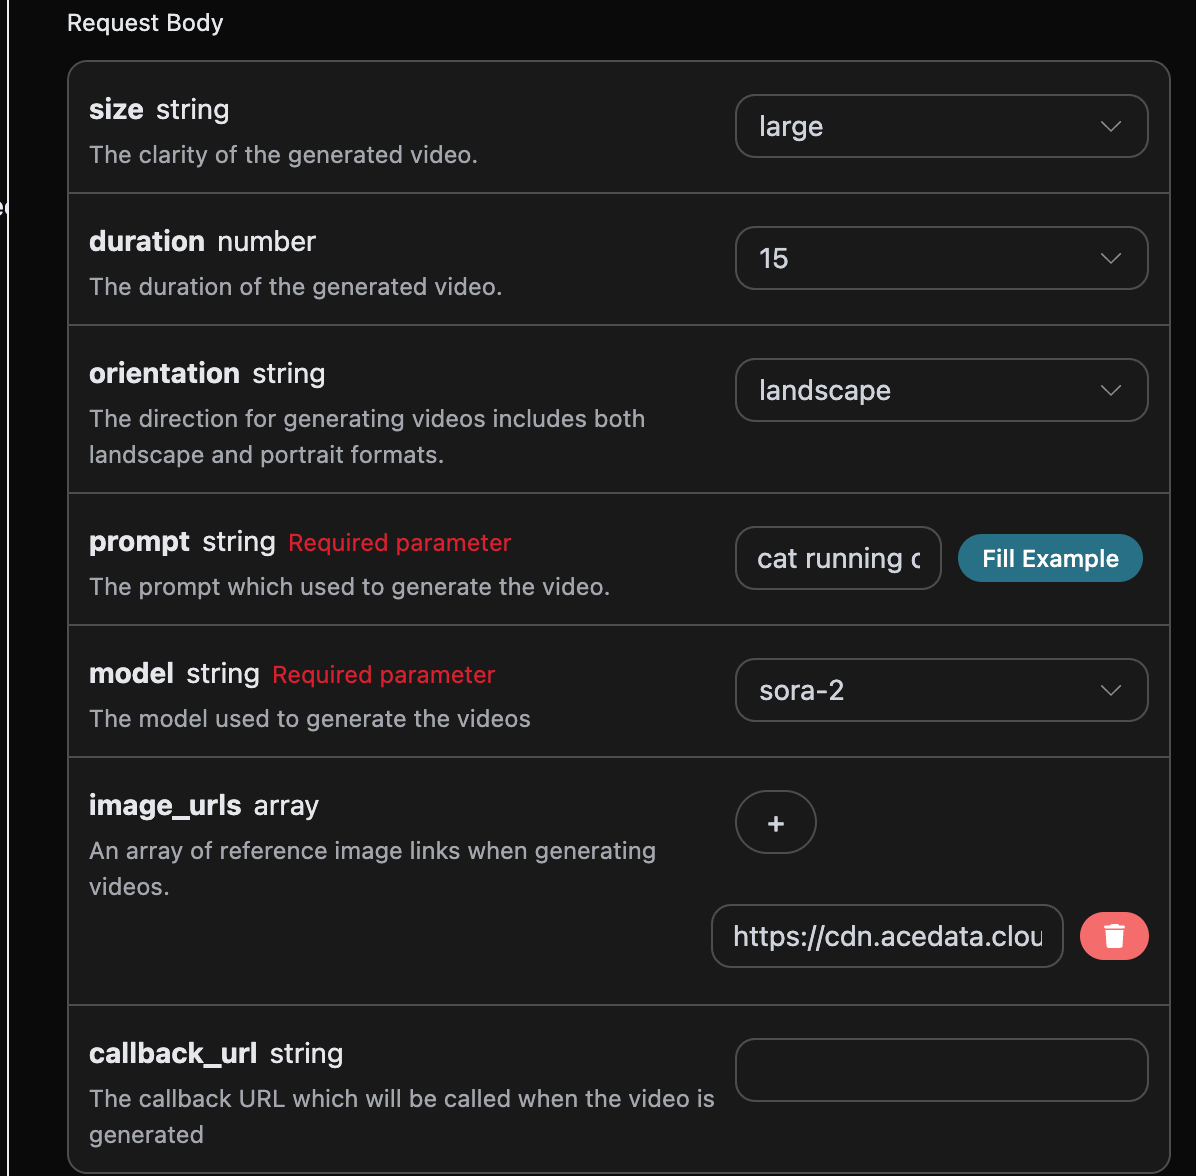
After filling in, the code is automatically generated as follows:
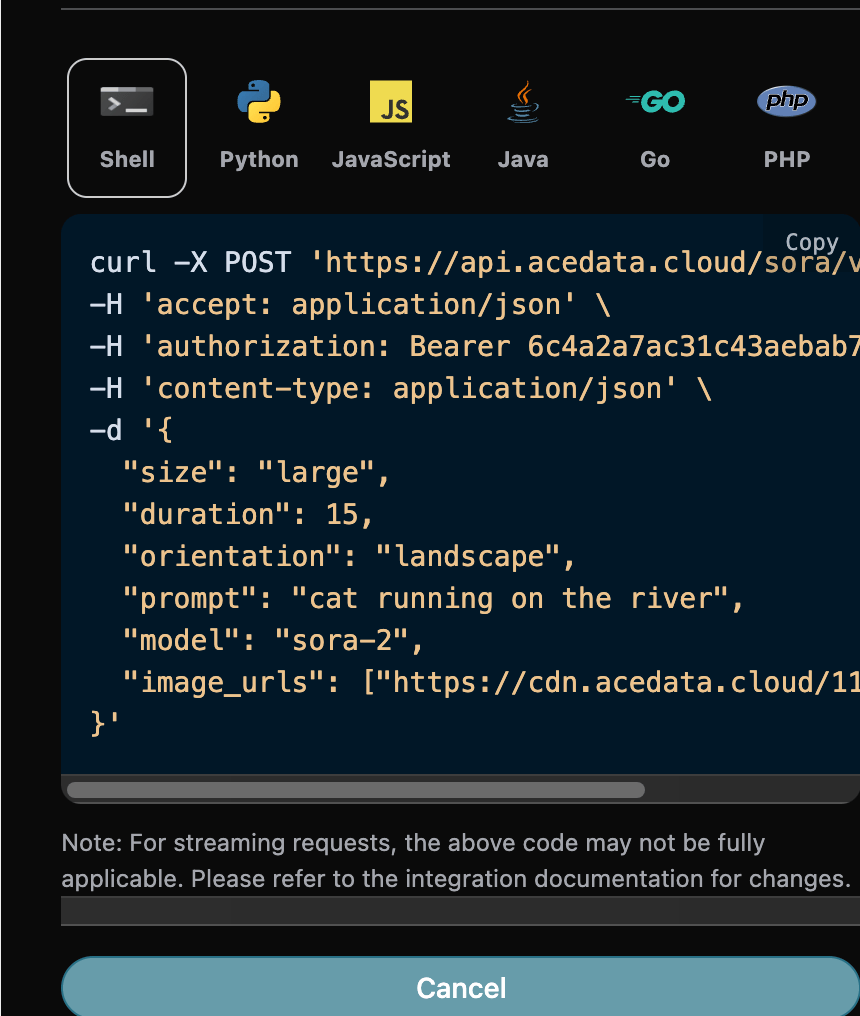
The corresponding code:
import requests

url = "https://api.acedata.cloud/sora/videos"

headers = {
    "accept": "application/json",
    "authorization": "Bearer {token}",
    "content-type": "application/json"
}

payload = {
    "size": "large",
    "duration": 15,
    "orientation": "landscape",
    "prompt": "cat running on the river",
    "model": "sora-2",
    "image_urls": ["https://cdn.acedata.cloud/11wfp4.png"]
}

response = requests.post(url, json=payload, headers=headers)
print(response.text)
Click to run, and you will find that you will immediately get a result as follows:
{
  "success": true,
  "task_id": "dd392ff0-dcb7-4c7a-afd0-9bd4f65c803a",
  "trace_id": "04fd151c-e942-4c1c-a6ab-9a1b1fe54172",
  "data": [
    {
      "id": "sora-2:task_01k777af4hfmg9g7yfvwsc6zws",
      "video_url": "https://platform.cdn.acedata.cloud/gptimage/vg-assets/assets%2Ftask_01k777af4hfmg9g7yfvwsc6zws%2Ftask_01k777af4hfmg9g7yfvwsc6zws_genid_92bae0c5-1703-4a5f-9d9f-c9ed2f9e7176_25_10_10_14_12_924695%2Fvideos%2F00000%2Fsrc.mp4?st=2025-10-10T12%3A37%3A32Z&se=2025-10-16T13%3A37%3A32Z&sks=b&skt=2025-10-10T12%3A37%3A32Z&ske=2025-10-16T13%3A37%3A32Z&sktid=a48cca56-e6da-484e-a814-9c849652bcb3&skoid=aa5ddad1-c91a-4f0a-9aca-e20682cc8969&skv=2019-02-02&sv=2018-11-09&sr=b&sp=r&spr=https%2Chttp&sig=5j4dibeaSsDmEka5c%2B9CKHZhRPdqfClQ0tIh03TWXsM%3D&az=oaivgprodscus",
      "state": "succeeded"
    }
  ]
}
It can be seen that the generated effect is a video generated from an image, and the result is similar to the above.
¶ Character Generation Video Task (Version 1)
If you want to perform a character generation video task, the parameter character_url must first be passed in the video link needed to create the character. Note that there must be no real people appearing in the video, otherwise it will fail. You can specify the following content:
- character_url: The video link needed to create the character. Note that there must be no real people appearing in the video, otherwise it will fail.
An example of filling in is as follows:
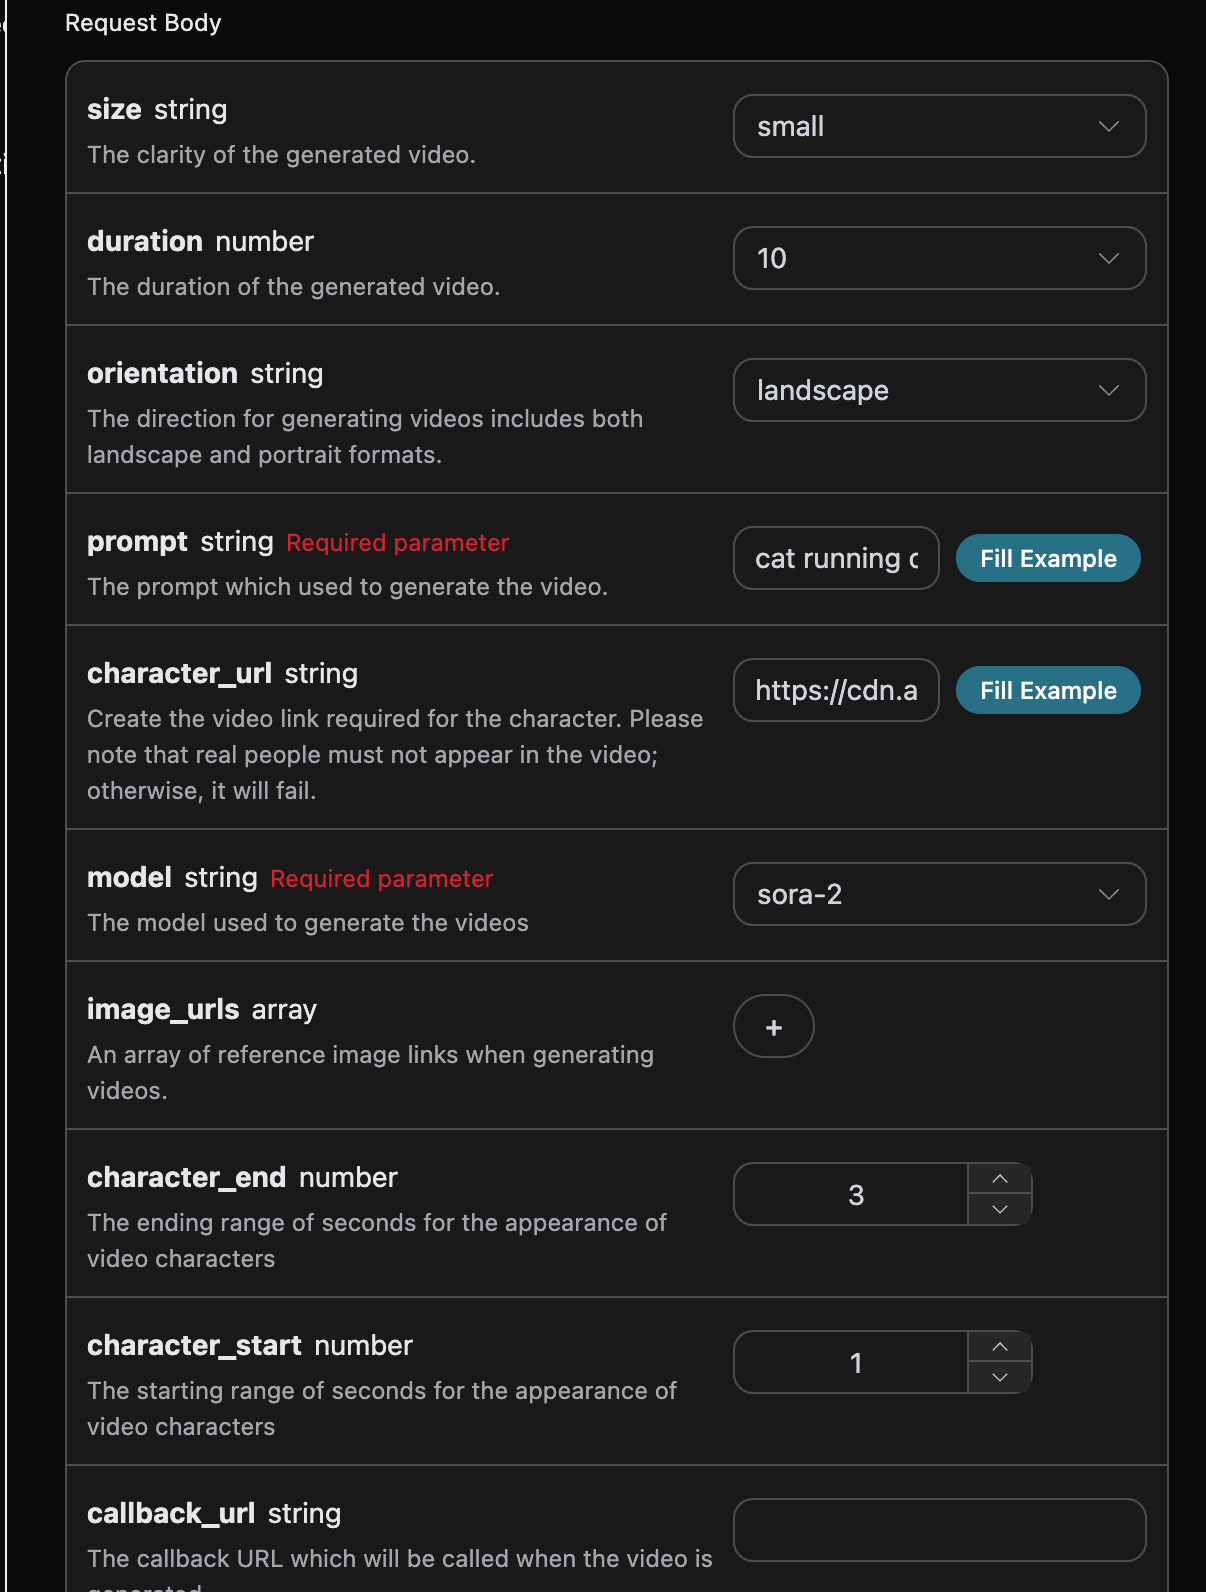
After filling it out, the code is automatically generated as follows:
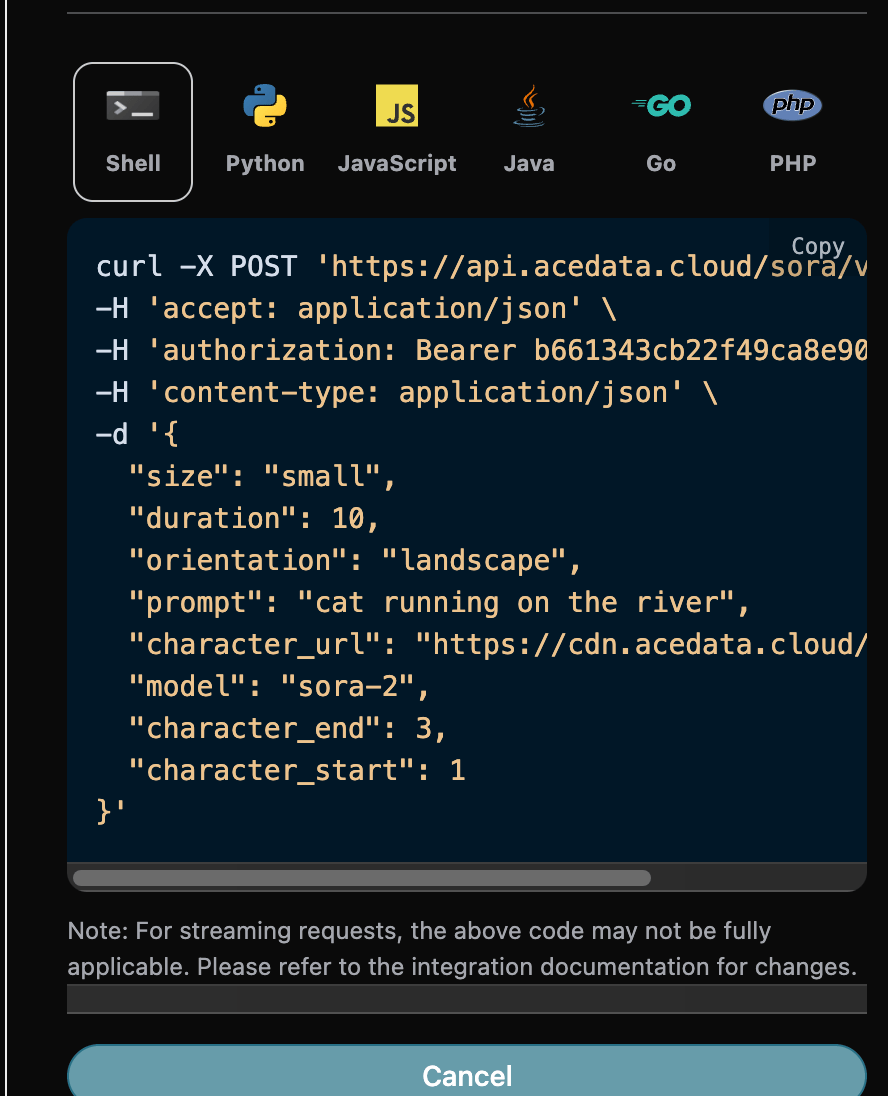
The corresponding code:
import requests

url = "https://api.acedata.cloud/sora/videos"

headers = {
    "accept": "application/json",
    "authorization": "Bearer {token}",
    "content-type": "application/json"
}

payload = {
    "size": "small",
    "duration": 10,
    "orientation": "landscape",
    "prompt": "cat running on the river",
    "character_url": "https://cdn.acedata.cloud/pdidf5.mp4",
    "model": "sora-2",
    "character_end": 3,
    "character_start": 1
}

response = requests.post(url, json=payload, headers=headers)
print(response.text)
Click to run, and you will find that you will immediately get a result as follows:
{
  "success": true,
  "task_id": "d9bf5461-29b5-47fd-be90-1fe9197df259",
  "trace_id": "b7992643-9207-40d6-956b-7577728acc67",
  "data": [
    {
      "id": "sora-2:task_01k8ykrztefavaypw6xanw305b",
      "video_url": "https://platform.cdn.acedata.cloud/20251101/bee4eeeb4c4660b46dac4548a1ffbc.mp4",
      "state": "succeeded"
    }
  ]
}
It can be seen that the generated effect is a character generation video, and the result is similar to the above.
¶ Version 2.0 Mode
In addition to the above Version 1.0 mode, this API also supports Version 2.0 mode, which can be enabled by setting the version parameter to "2.0". Version 2.0 mode supports shorter video durations and pixel-level resolution control.
¶ Version 2.0 Parameter Description
| Parameter | Type | Required | Description |
|---|---|---|---|
version |
string | Yes | Set to "2.0" |
prompt |
string | Yes | The prompt for generating the video |
model |
string | No | sora-2 (default) or sora-2-pro |
duration |
integer | No | Video duration: 4 (default), 8, 12 seconds |
size |
string | No | Resolution: 720x1280 (default), 1280x720, 1024x1792, 1792x1024 |
image_urls |
array | No | Array of reference image URLs, only the first image is used, and the image size must match the size parameter |
callback_url |
string | No | Asynchronous callback URL |
¶ Basic Example
curl -X POST 'https://api.acedata.cloud/sora/videos' \
-H 'accept: application/json' \
-H 'authorization: Bearer {token}' \
-H 'content-type: application/json' \
-d '{
  "version": "2.0",
  "prompt": "cat running on the river",
  "model": "sora-2",
  "duration": 8,
  "size": "1280x720"
}'
The corresponding Python code:
import requests

url = "https://api.acedata.cloud/sora/videos"

headers = {
    "accept": "application/json",
    "authorization": "Bearer {token}",
    "content-type": "application/json"
}

payload = {
    "version": "2.0",
    "prompt": "cat running on the river",
    "model": "sora-2",
    "seconds": 8,
    "size": "1280x720"
}

response = requests.post(url, json=payload, headers=headers)
print(response.text)
The corresponding JavaScript code:
const response = await fetch('https://api.acedata.cloud/sora/videos', {
  method: 'POST',
  headers: {
    'accept': 'application/json',
    'authorization': 'Bearer {token}',
    'content-type': 'application/json'
  },
  body: JSON.stringify({
    version: '2.0',
    prompt: 'cat running on the river',
    model: 'sora-2',
    seconds: 8,
    size: '1280x720'
  })
});
const data = await response.json();
console.log(data);
The return result format is the same as Version 1.
{
  "success": true,
  "task_id": "6bf7fb83-5814-4e3e-a4ad-bfa0c26c0b33",
  "trace_id": "96166698-4b66-478d-a26b-77a7269c9e01",
  "data": [
    {
      "id": "c0cc8dad-0954-421f-be8d-02eb063b3263",
      "video_url": "https://platform.cdn.acedata.cloud/sora/xxxxx.mp4",
      "state": "succeeded"
    }
  ]
}
¶ Use Reference Image (Version 2.0)
In Version 2.0 mode, you can pass reference images through the image_urls parameter to guide video generation (only the first image is used):
import requests

url = "https://api.acedata.cloud/sora/videos"

headers = {
    "accept": "application/json",
    "authorization": "Bearer {token}",
    "content-type": "application/json"
}

payload = {
    "version": "2.0",
    "prompt": "a person walking through a beautiful garden",
    "model": "sora-2",
    "duration": 4,
    "size": "1280x720",
    "image_urls": ["https://cdn.acedata.cloud/11wfp4.png"]
}

response = requests.post(url, json=payload, headers=headers)
print(response.text)
Note: The size of the reference image should match the
sizeparameter, for example, whensizeis1280x720, the reference image size should be 1280×720.
¶ Comparison of Parameters Between Version 1.0 and Version 2.0
| Parameter | Version 1.0 | Version 2.0 |
|---|---|---|
version |
1.0 (default) | 2.0 |
prompt |
✅ | ✅ |
model |
✅ sora-2 / sora-2-pro | ✅ sora-2 / sora-2-pro |
duration |
✅ 10/15/25 seconds | ✅ 4/8/12 seconds |
orientation |
✅ landscape/portrait | ❌ |
size |
✅ small/large | ✅ 720x1280/1280x720/1024x1792/1792x1024 |
image_urls |
✅ multiple reference images | ✅ only the first one |
character_url |
✅ | ❌ |
callback_url |
✅ | ✅ |
¶ Asynchronous Callback
Due to the relatively long generation time of the Sora Videos Generation API, which takes about 1-2 minutes, if the API does not respond for a long time, the HTTP request will keep the connection open, leading to additional system resource consumption. Therefore, this API also provides support for asynchronous callbacks.
The overall process is: when the client initiates a request, an additional callback_url field is specified. After the client initiates the API request, the API will immediately return a result containing a task_id field, representing the current task ID. When the task is completed, the result of the generated video will be sent to the client-specified callback_url in the form of a POST JSON, which also includes the task_id field, allowing the task result to be associated by ID.
Let's understand how to operate specifically through an example.
First, the Webhook callback is a service that can receive HTTP requests, and developers should replace it with the URL of their own HTTP server. For demonstration purposes, we use a public Webhook sample site https://webhook.site/, where you can open the site to get a Webhook URL, as shown in the image:
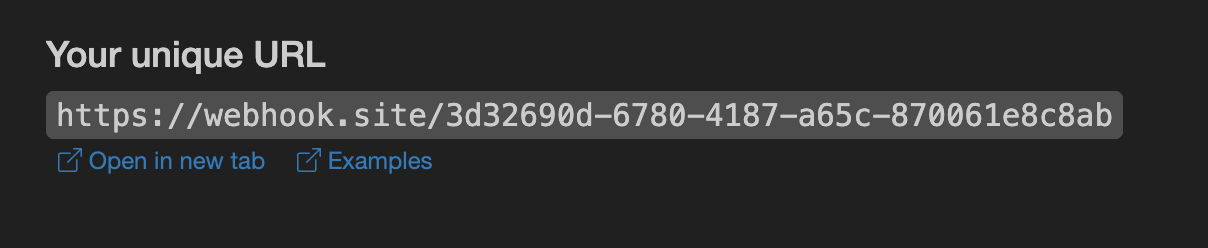
Copy this URL, and it can be used as a Webhook. The sample here is https://webhook.site/eb238c4f-da3b-47a5-a922-a93aa5405daa.
Next, we can set the callback_url field to the above Webhook URL, while filling in the corresponding parameters, as shown in the image:

Clicking run, you can find that an immediate result is obtained, as follows:
{
  "task_id": "b8976e18-32dc-4718-9ed8-1ea090fcb6ea"
}
After a moment, we can observe the result of the generated video at https://webhook.site/eb238c4f-da3b-47a5-a922-a93aa5405daa, as shown in the image:
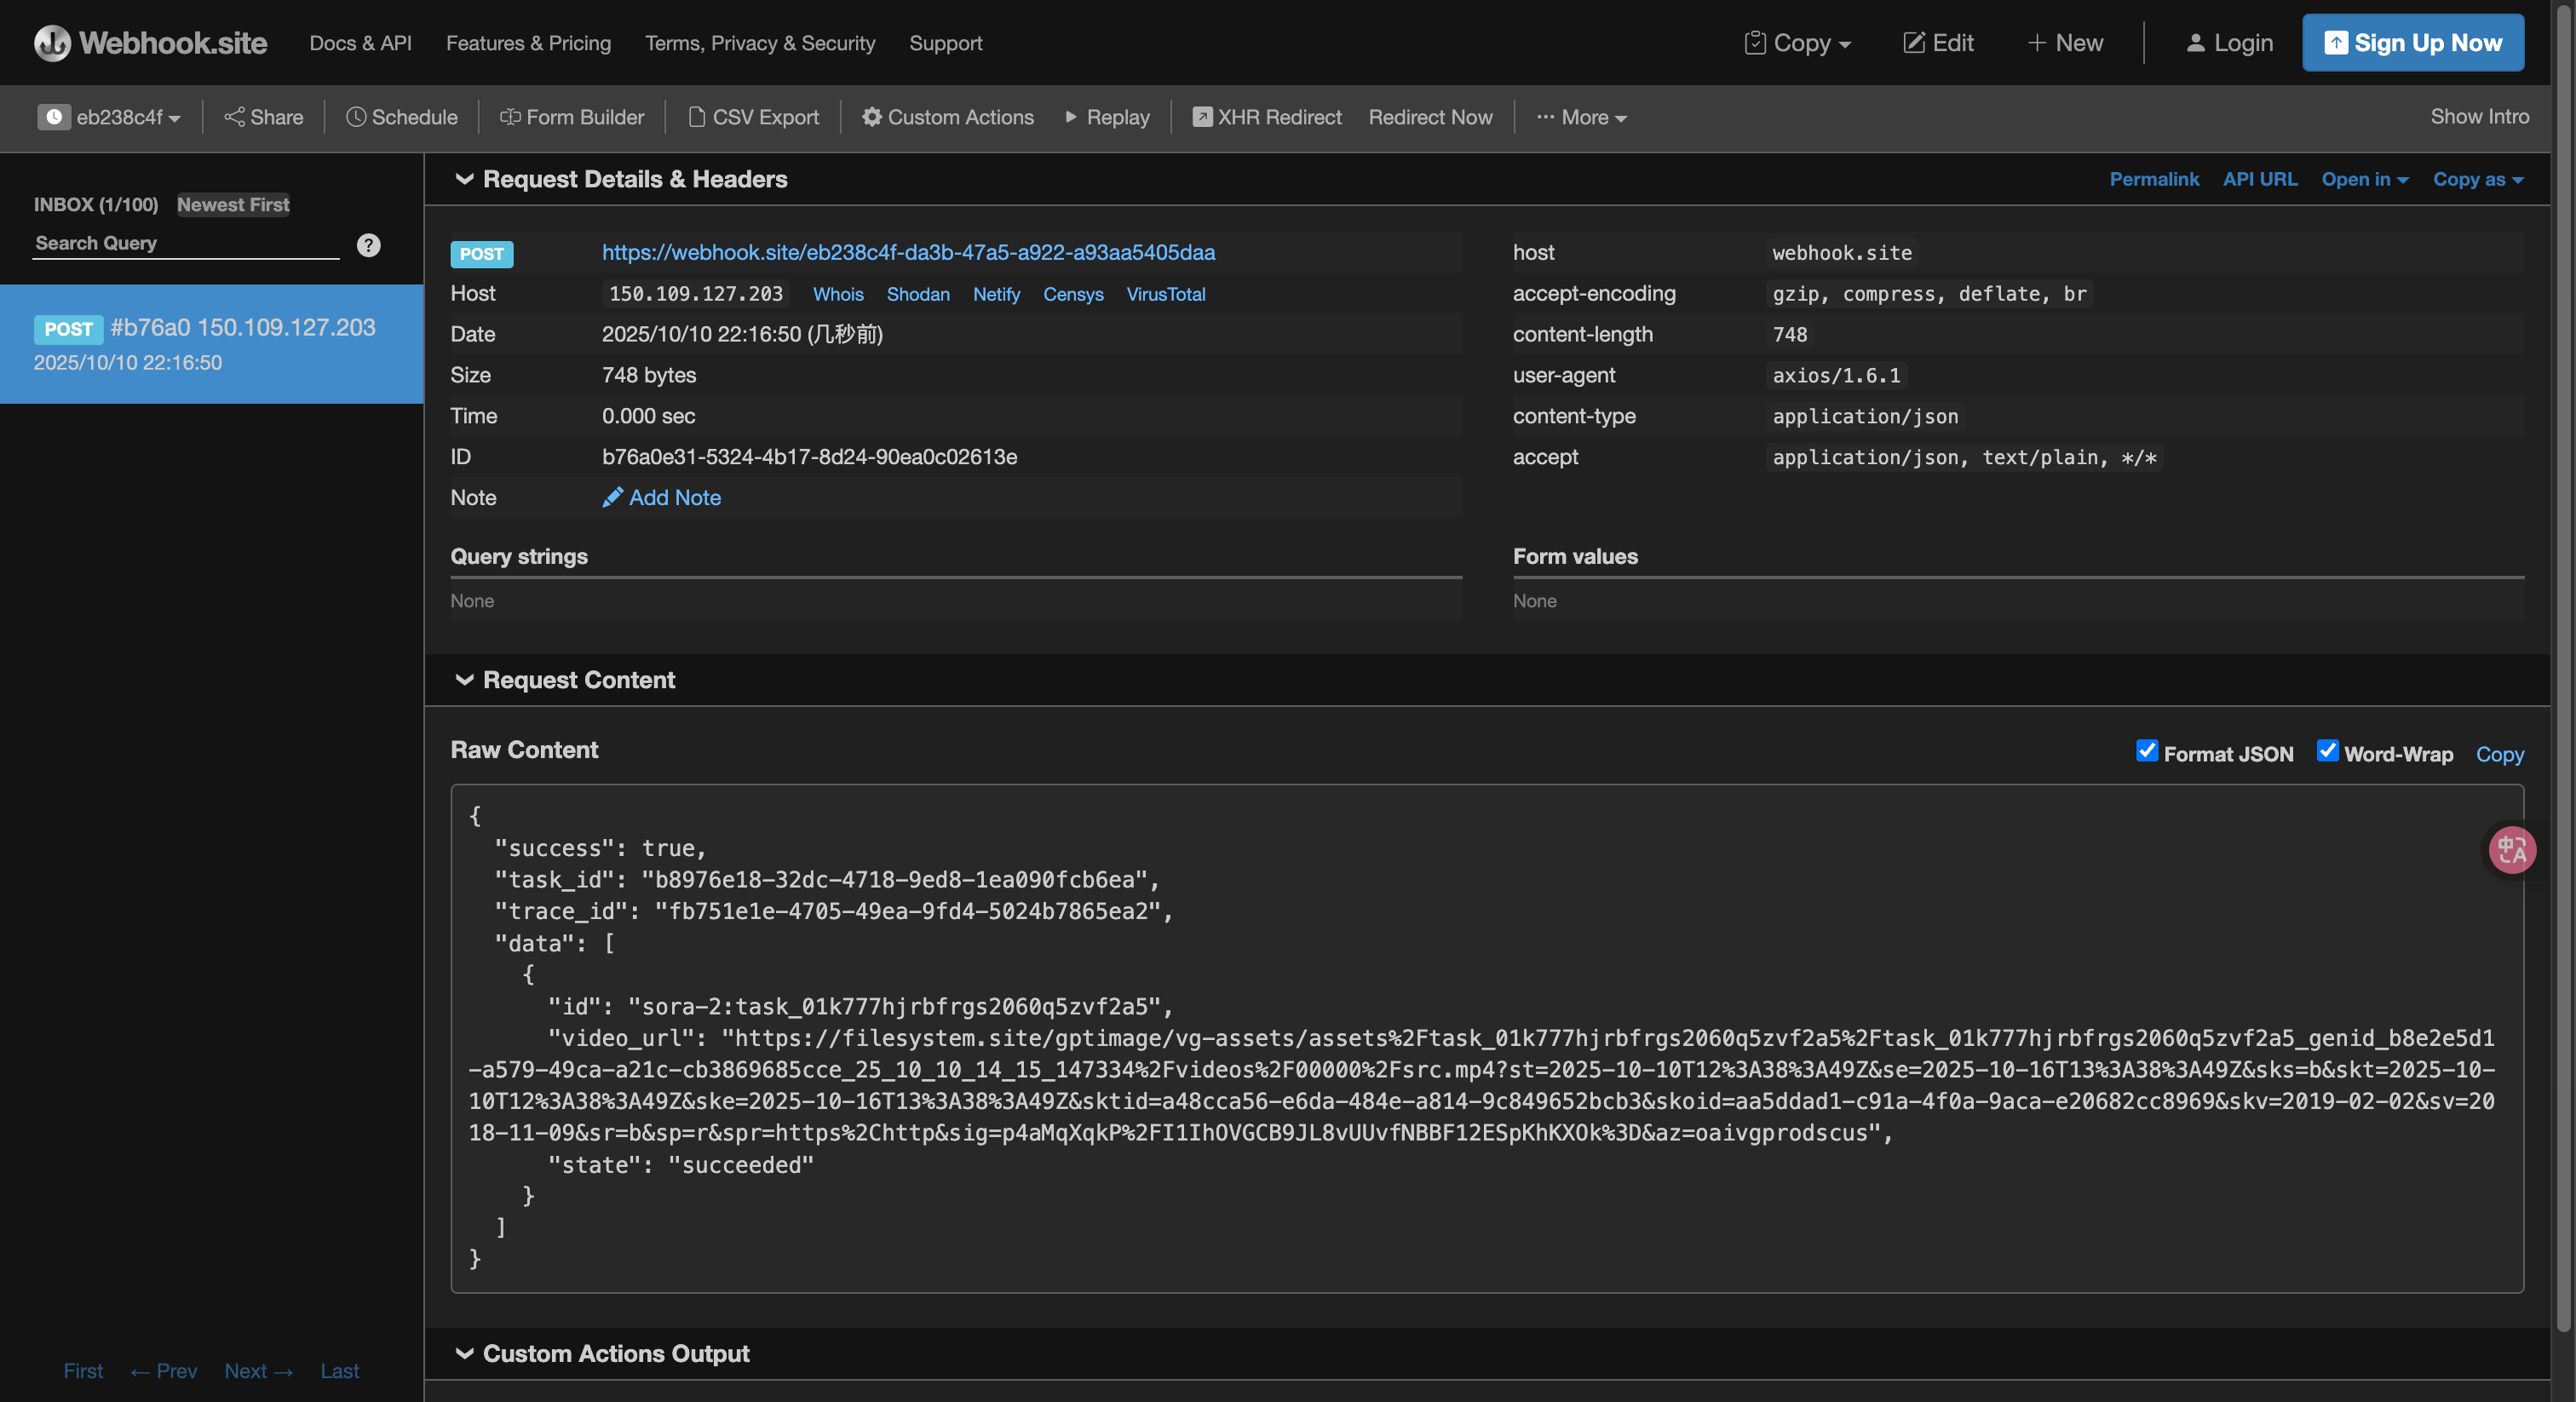
The content is as follows:
{
    "success": true,
    "task_id": "b8976e18-32dc-4718-9ed8-1ea090fcb6ea",
    "trace_id": "fb751e1e-4705-49ea-9fd4-5024b7865ea2",
    "data": [
        {
            "id": "sora-2:task_01k777hjrbfrgs2060q5zvf2a5",
            "video_url": "https://platform.cdn.acedata.cloud/gptimage/vg-assets/assets%2Ftask_01k777hjrbfrgs2060q5zvf2a5%2Ftask_01k777hjrbfrgs2060q5zvf2a5_genid_b8e2e5d1-a579-49ca-a21c-cb3869685cce_25_10_10_14_15_147334%2Fvideos%2F00000%2Fsrc.mp4?st=2025-10-10T12%3A38%3A49Z&se=2025-10-16T13%3A38%3A49Z&sks=b&skt=2025-10-10T12%3A38%3A49Z&ske=2025-10-16T13%3A38%3A49Z&sktid=a48cca56-e6da-484e-a814-9c849652bcb3&skoid=aa5ddad1-c91a-4f0a-9aca-e20682cc8969&skv=2019-02-02&sv=2018-11-09&sr=b&sp=r&spr=https%2Chttp&sig=p4aMqXqkP%2FI1IhOVGCB9JL8vUUvfNBBF12ESpKhKXOk%3D&az=oaivgprodscus",
            "state": "succeeded"
        }
    ]
}
You can see that the result contains a task_id field, and other fields are similar to the above text, allowing the task to be associated through this field.
¶ Error Handling
When calling the API, if an error occurs, the API will return the corresponding error code and message. For example:
400 token_mismatched: Bad request, possibly due to missing or invalid parameters.400 api_not_implemented: Bad request, possibly due to missing or invalid parameters.401 invalid_token: Unauthorized, invalid or missing authorization token.429 too_many_requests: Too many requests, you have exceeded the rate limit.500 api_error: Internal server error, something went wrong on the server.
¶ Error Response Example
{
  "success": false,
  "error": {
    "code": "api_error",
    "message": "fetch failed"
  },
  "trace_id": "2cf86e86-22a4-46e1-ac2f-032c0f2a4e89"
}
¶ Conclusion
Through this document, you have learned how to use the Sora Videos Generation API to generate videos by inputting prompts and reference images. We hope this document helps you better integrate and use the API. If you have any questions, please feel free to contact our technical support team.