
Want to generate images in WorkBuddy through Ace Data Cloud's OpenAI MCP? Prepare your API Token and MCP service address, then follow the three parts below.
This article uses WorkBuddy 5.7.6 for Windows as an example. After completing the integration, test it with a colorful cat image, then verify the call records on the platform.
Note: What is configured here is an MCP connector, not a custom model in WorkBuddy.
¶ Part 1. Initiate Installation Through a Conversation
Open WorkBuddy and send the following in the task chat box:
https://openai.mcp.acedata.cloud/mcp
Install this mcp
Wait for WorkBuddy to return the configuration instructions. It will prompt you to provide an API Token, then complete the authentication configuration.
During this process, there was also a confirmation asking “whether to allow the model to access sensitive credentials,” and the interface provided “Allow encrypted access (recommended)”. First confirm the service address and the purpose of the credentials, then authorize as needed; for regular configuration, you can refer to the recommended option, but do not directly allow all permission prompts.
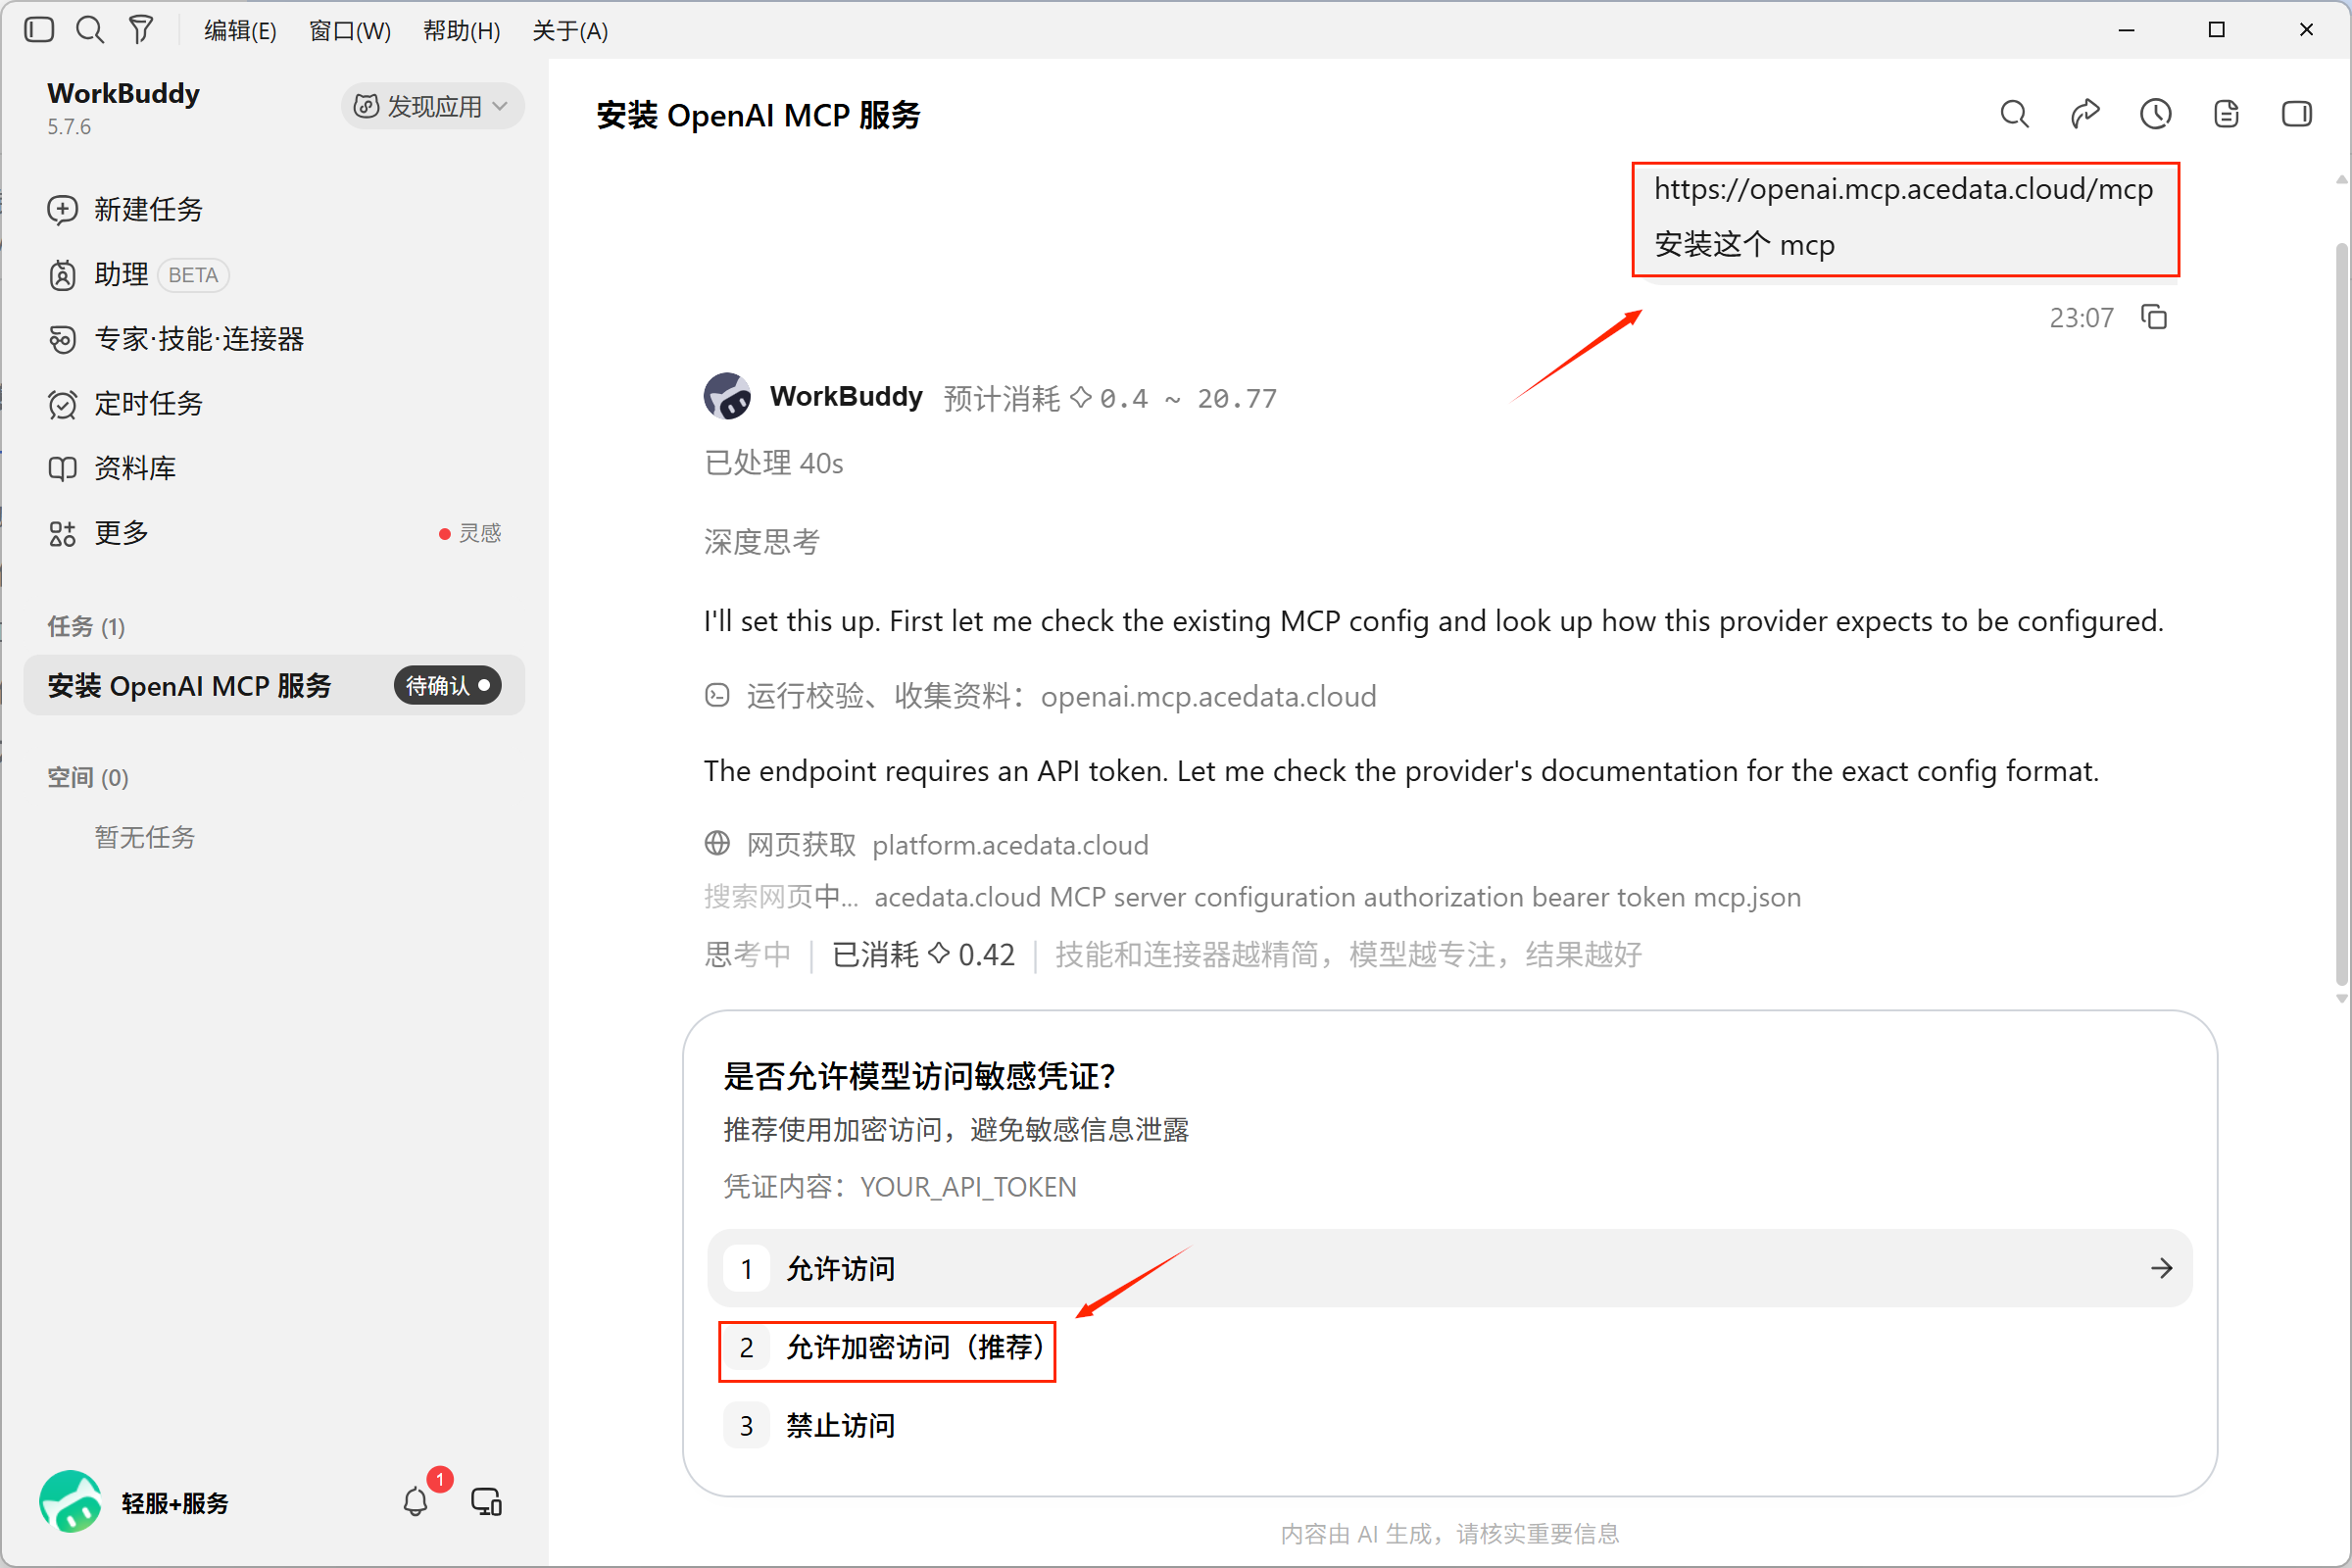
Initiate installation through a conversation; credential access requires separate confirmation.
This step only initiates the integration. The end of the chat task does not mean the MCP is already available; you still need to enter the token and enable the service.
¶ Part 2. Enter the API Token and Enable the Connector
¶ 1. Obtain an API Token
Log in to Ace Data Cloud and open the “Credentials” page:
https://platform.acedata.cloud/console/credentials
Copy the API Token you plan to use for this call. It is recommended to use an easily identifiable credential name, which will make it more convenient to verify call records later.
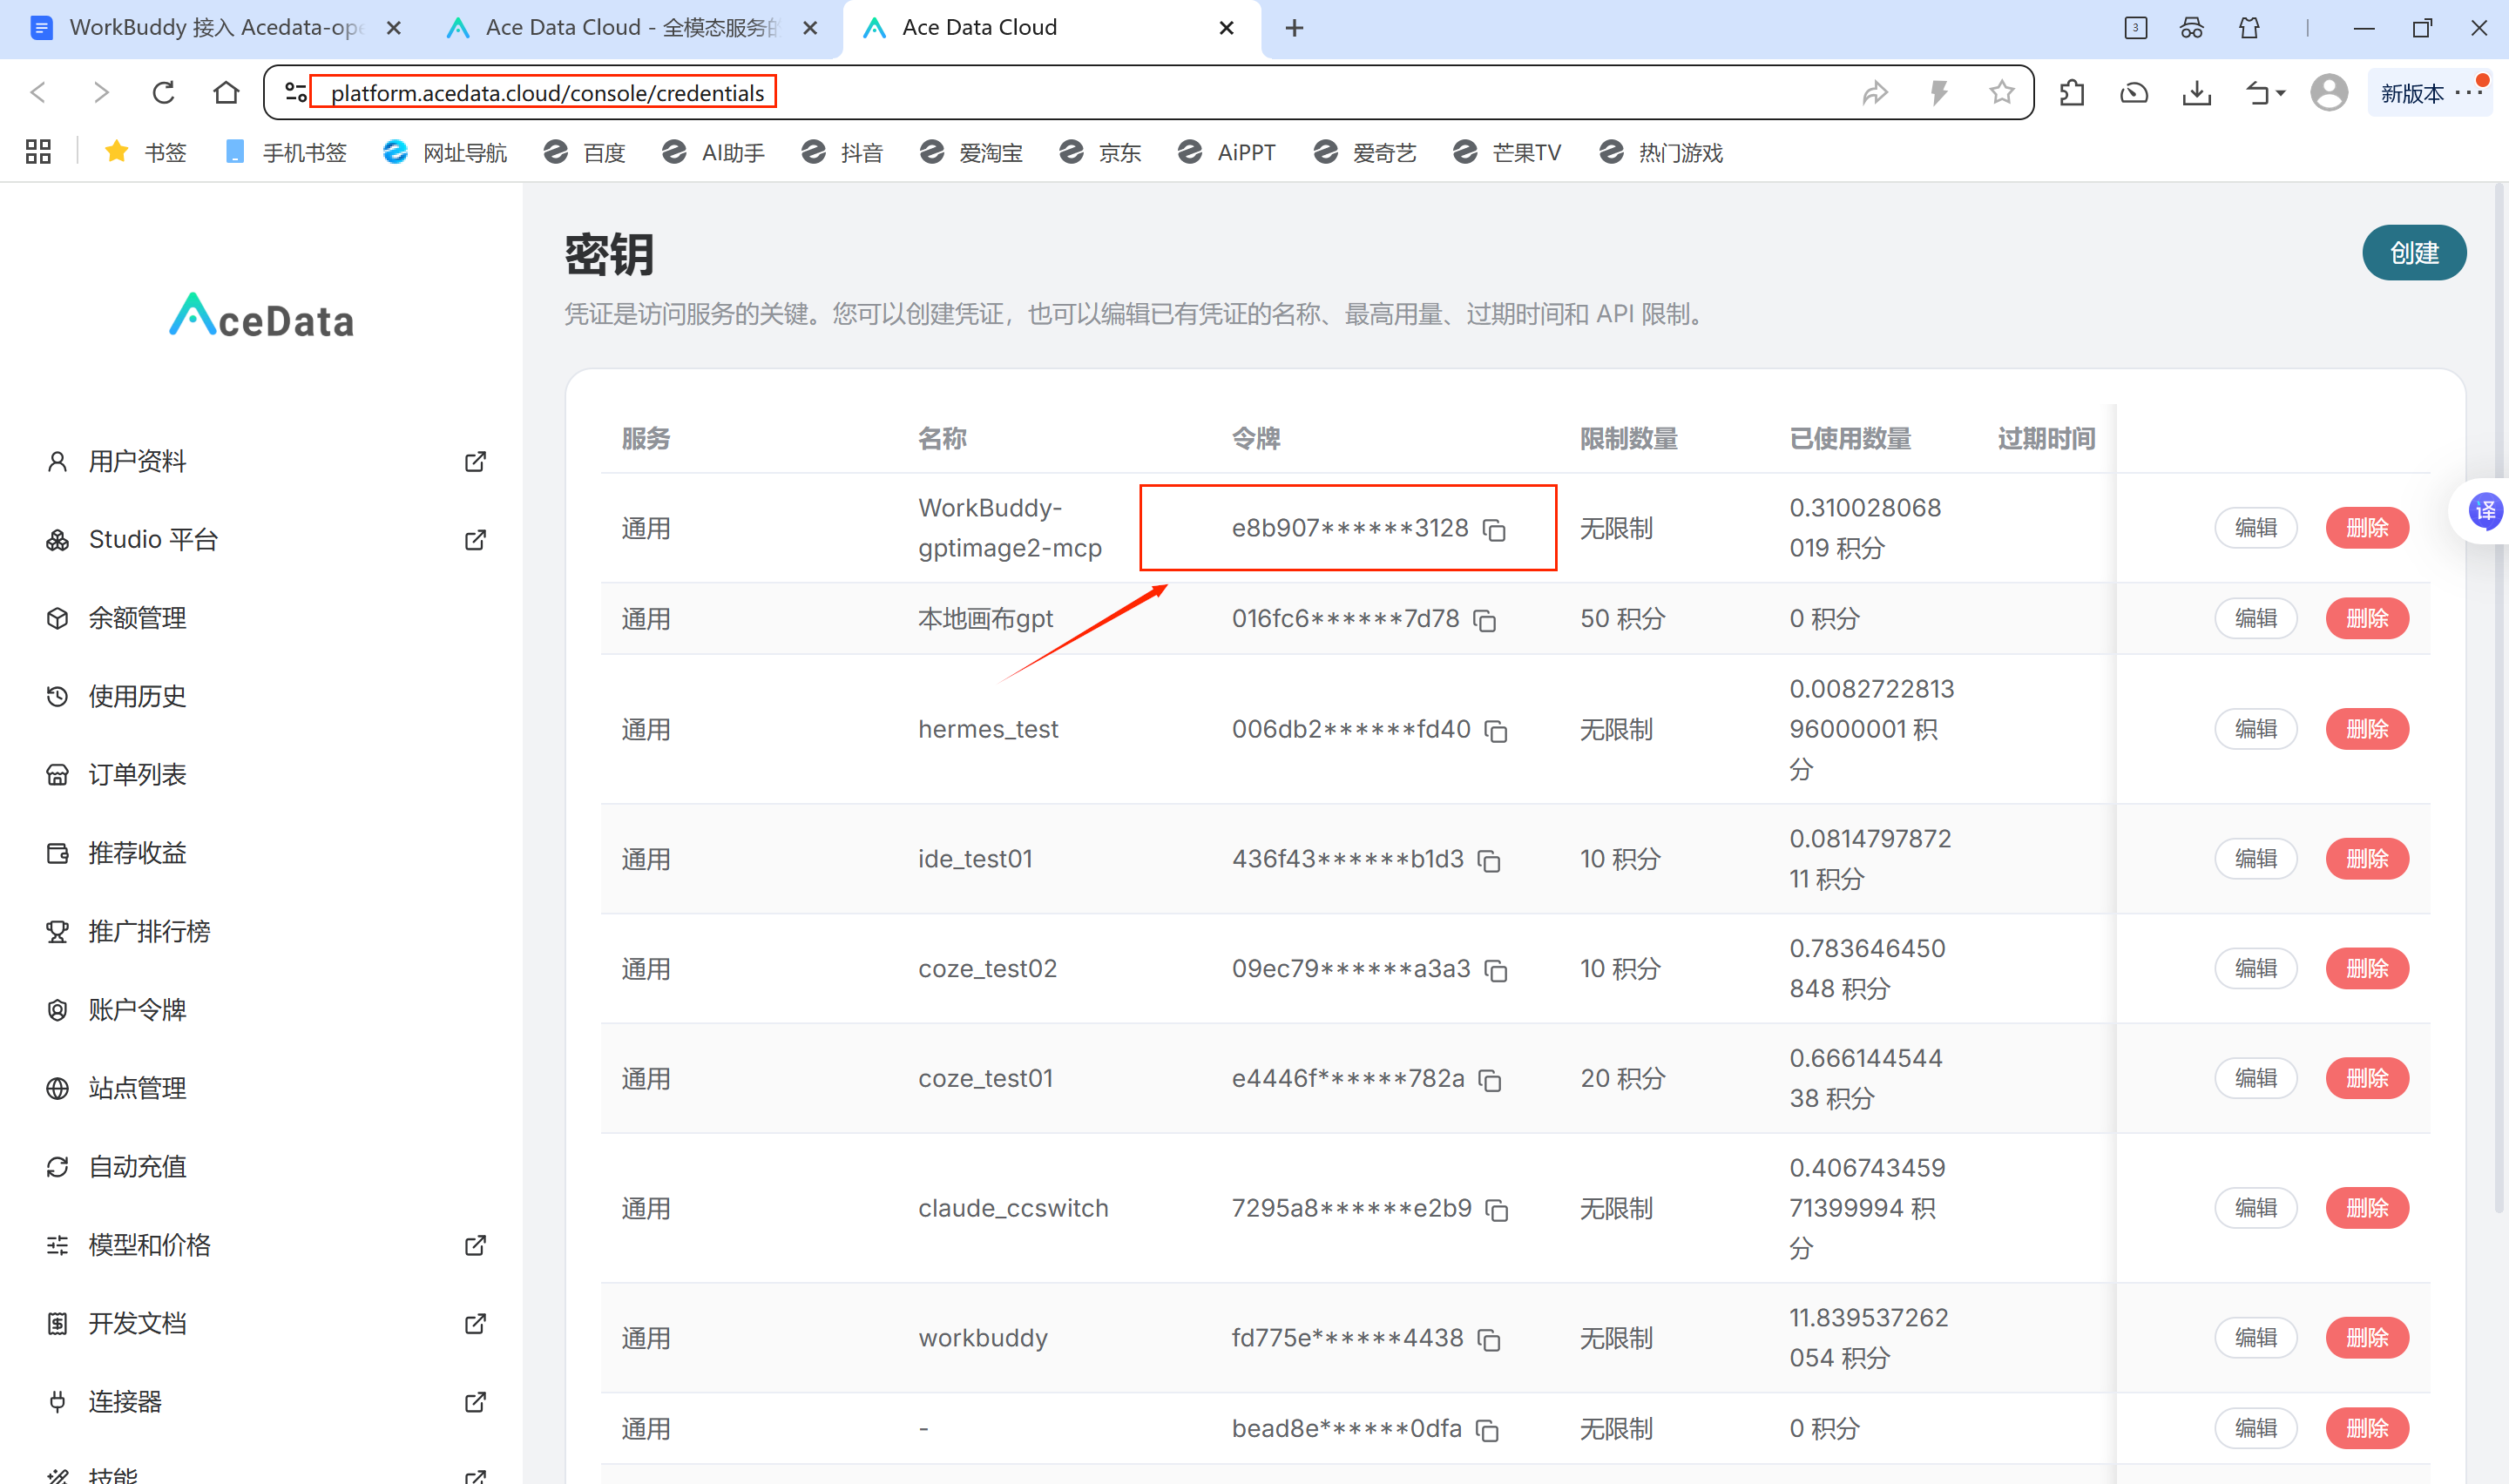
Copy your own API Token; do not use the content shown in the screenshot.
¶ 2. Open Custom Connectors
This time, use the manual entry method. The path is as follows:
Expert · Skills · Connectors → Connectors → Custom Connectors
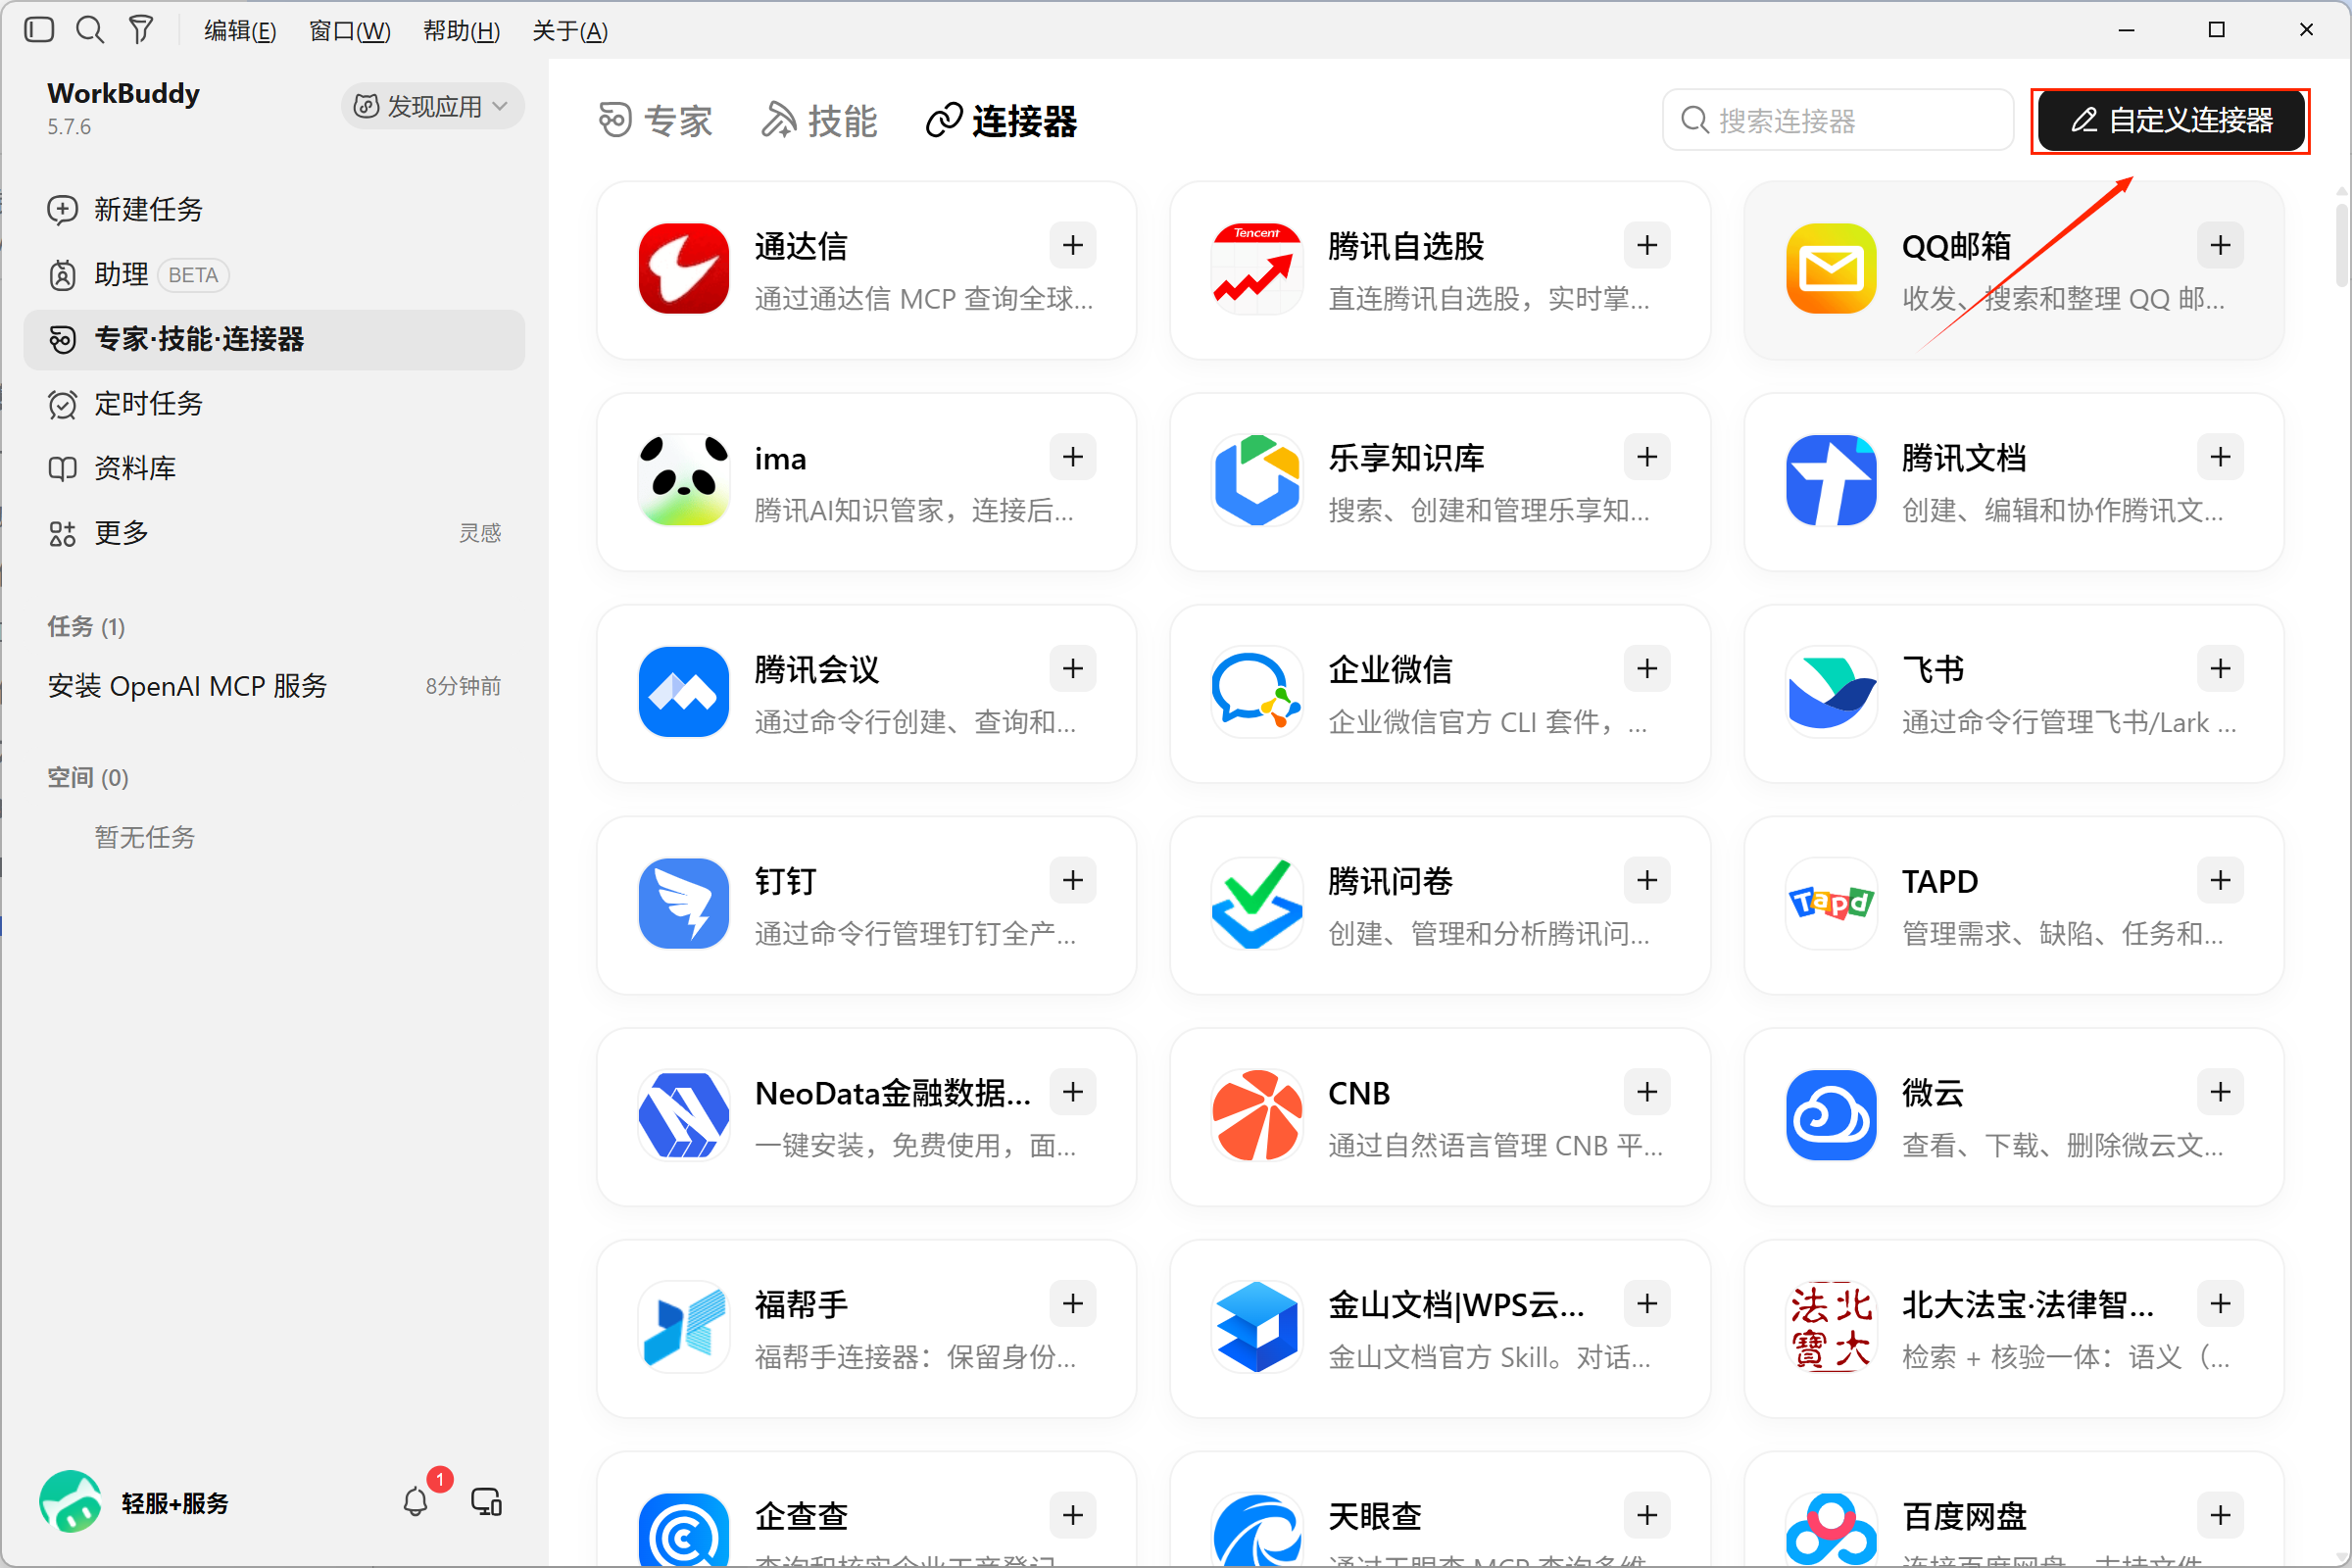
Enter “Connectors” and click “Custom Connectors” in the upper-right corner.
If openai is not yet in the list, click “Add MCP”; if it already exists, modify the corresponding configuration.
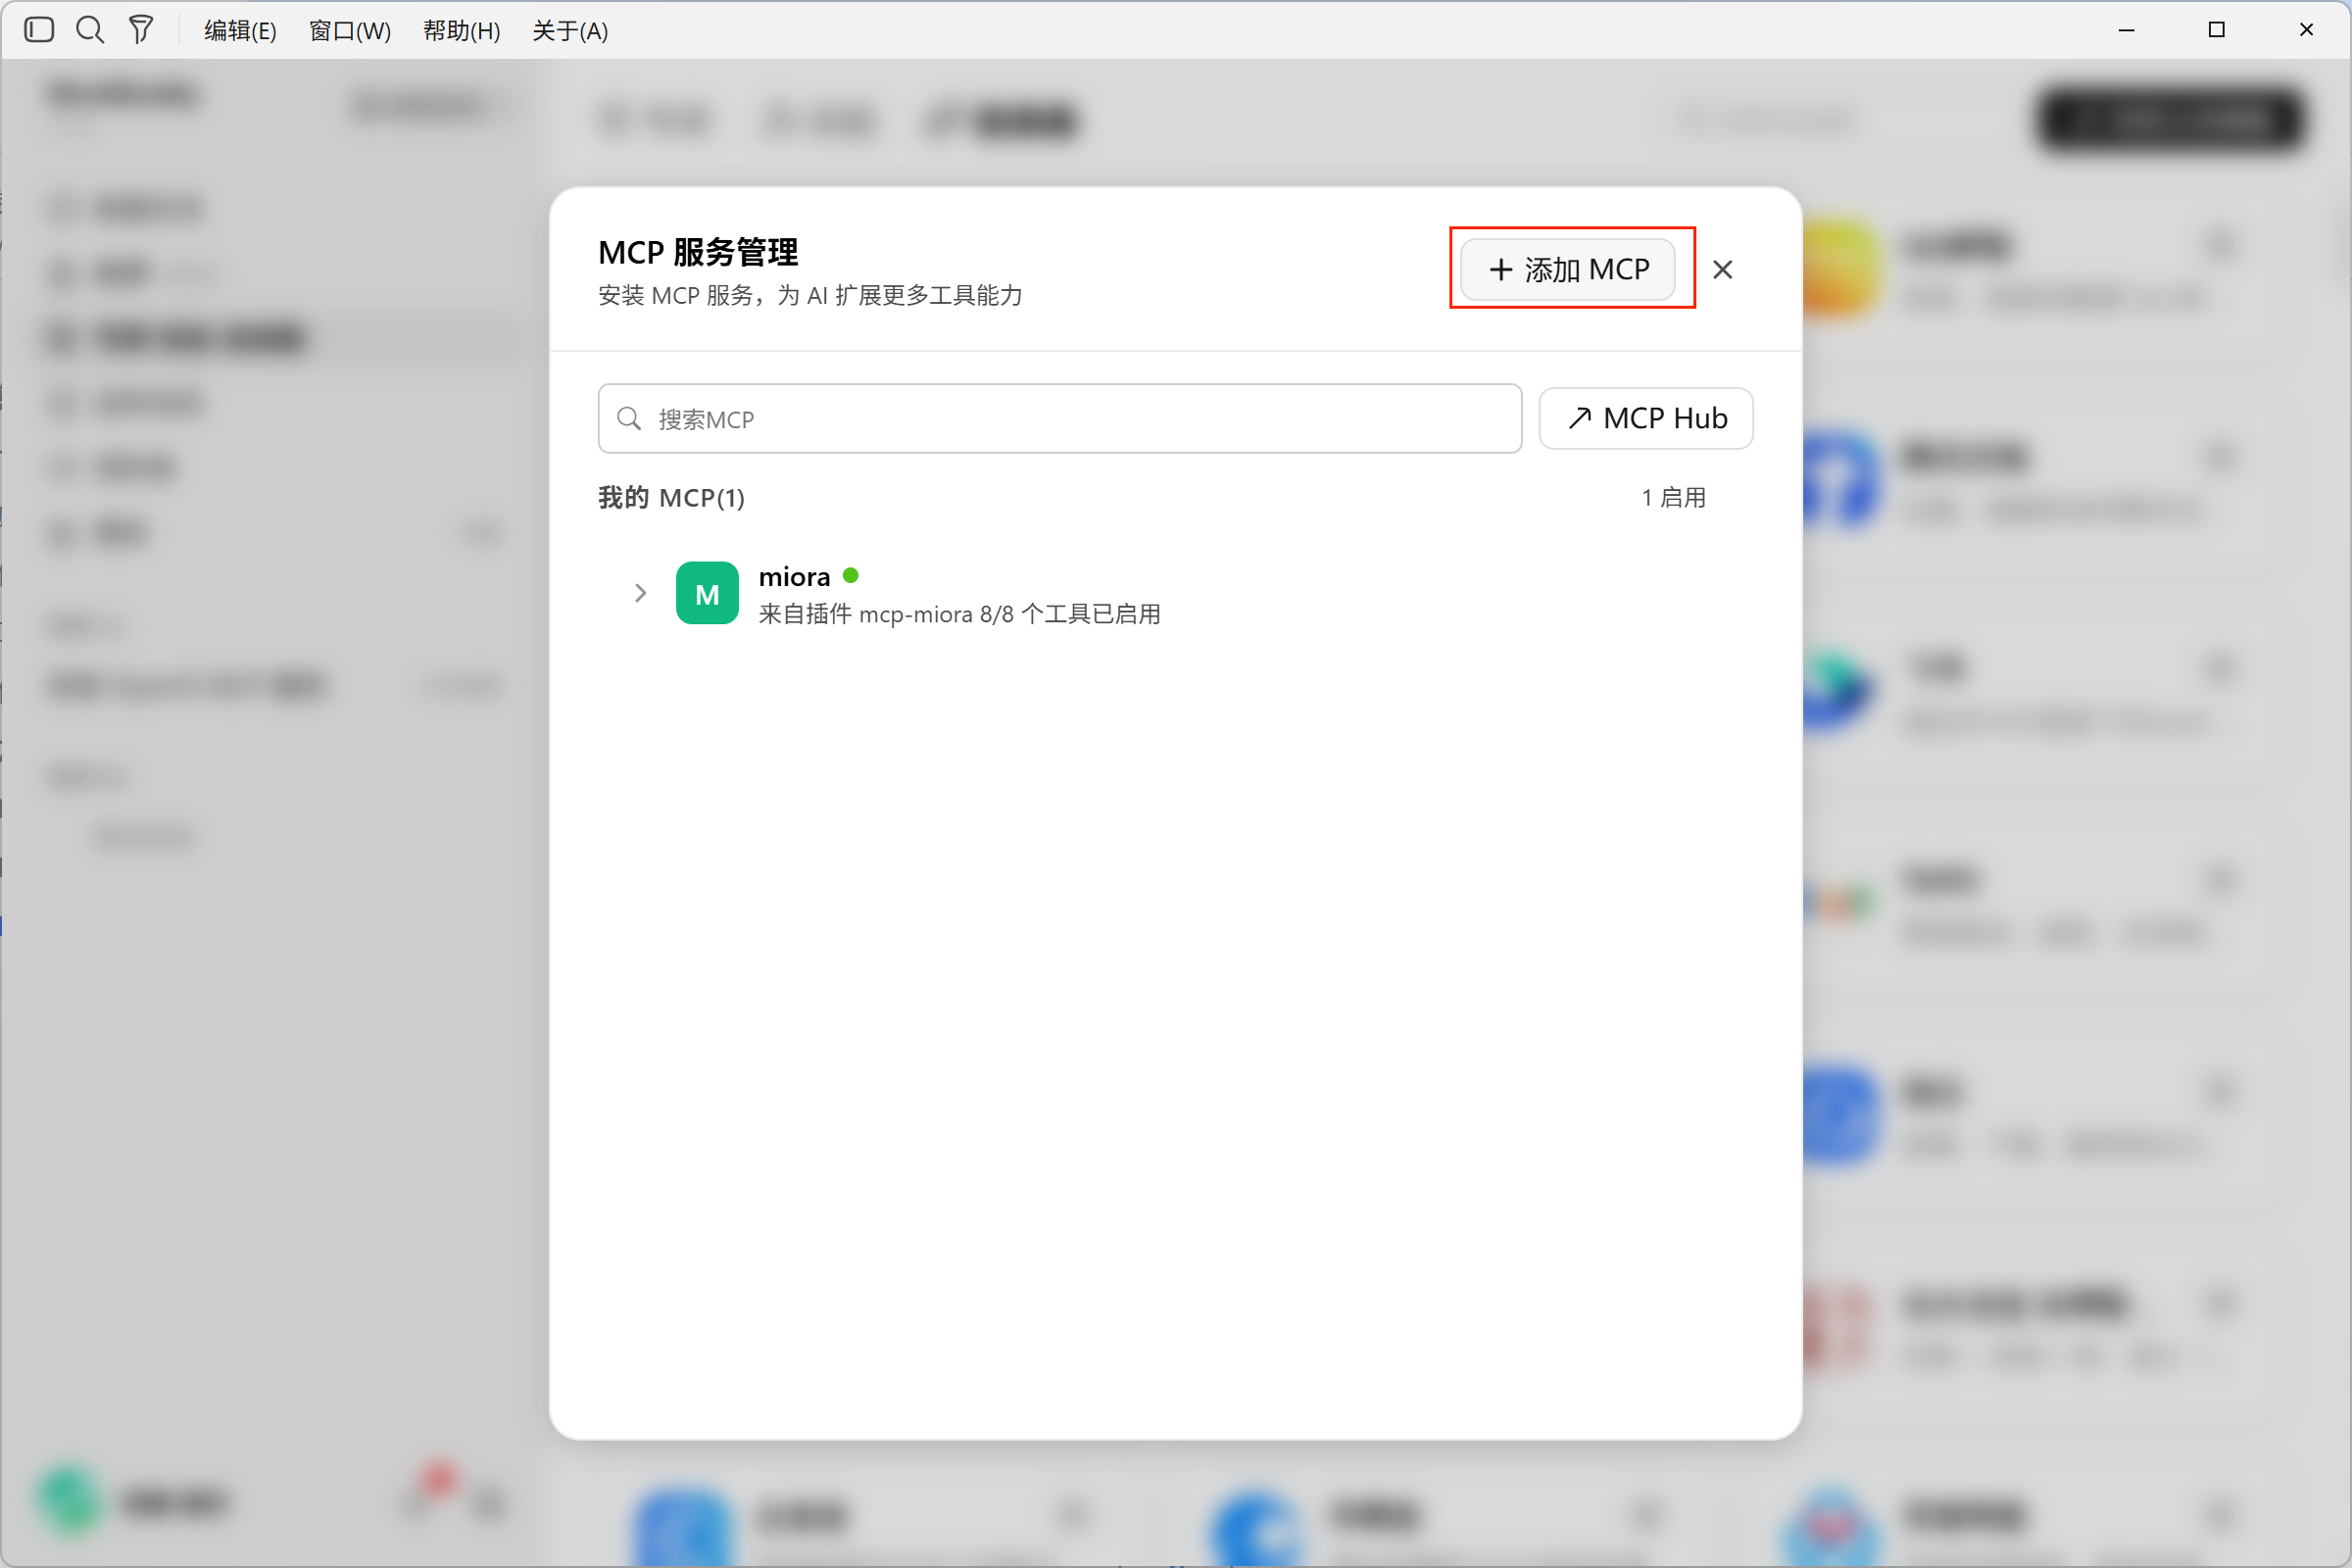
When there is no corresponding connection item, click “Add MCP.”
¶ 3. Enter the Authentication Configuration
The key parameters for this configuration are as follows:
| Parameter | Value to Enter |
|---|---|
| Connection name | openai |
| Connection method | streamable-http |
| Service address | https://openai.mcp.acedata.cloud/mcp |
| Request header | Authorization: Bearer YOUR_API_TOKEN |
Configuration example:
{
  "mcpServers": {
    "openai": {
      "type": "streamable-http",
      "url": "https://openai.mcp.acedata.cloud/mcp",
      "headers": {
        "Authorization": "Bearer YOUR_API_TOKEN"
      }
    }
  }
}
Replace YOUR_API_TOKEN with the token you just copied, keep the preceding Bearer, and keep one space between it and the token, then click “Save.”
If there are already other MCP configurations, keep the original connection items and only add or modify this openai configuration. Do not overwrite the entire file with the example.
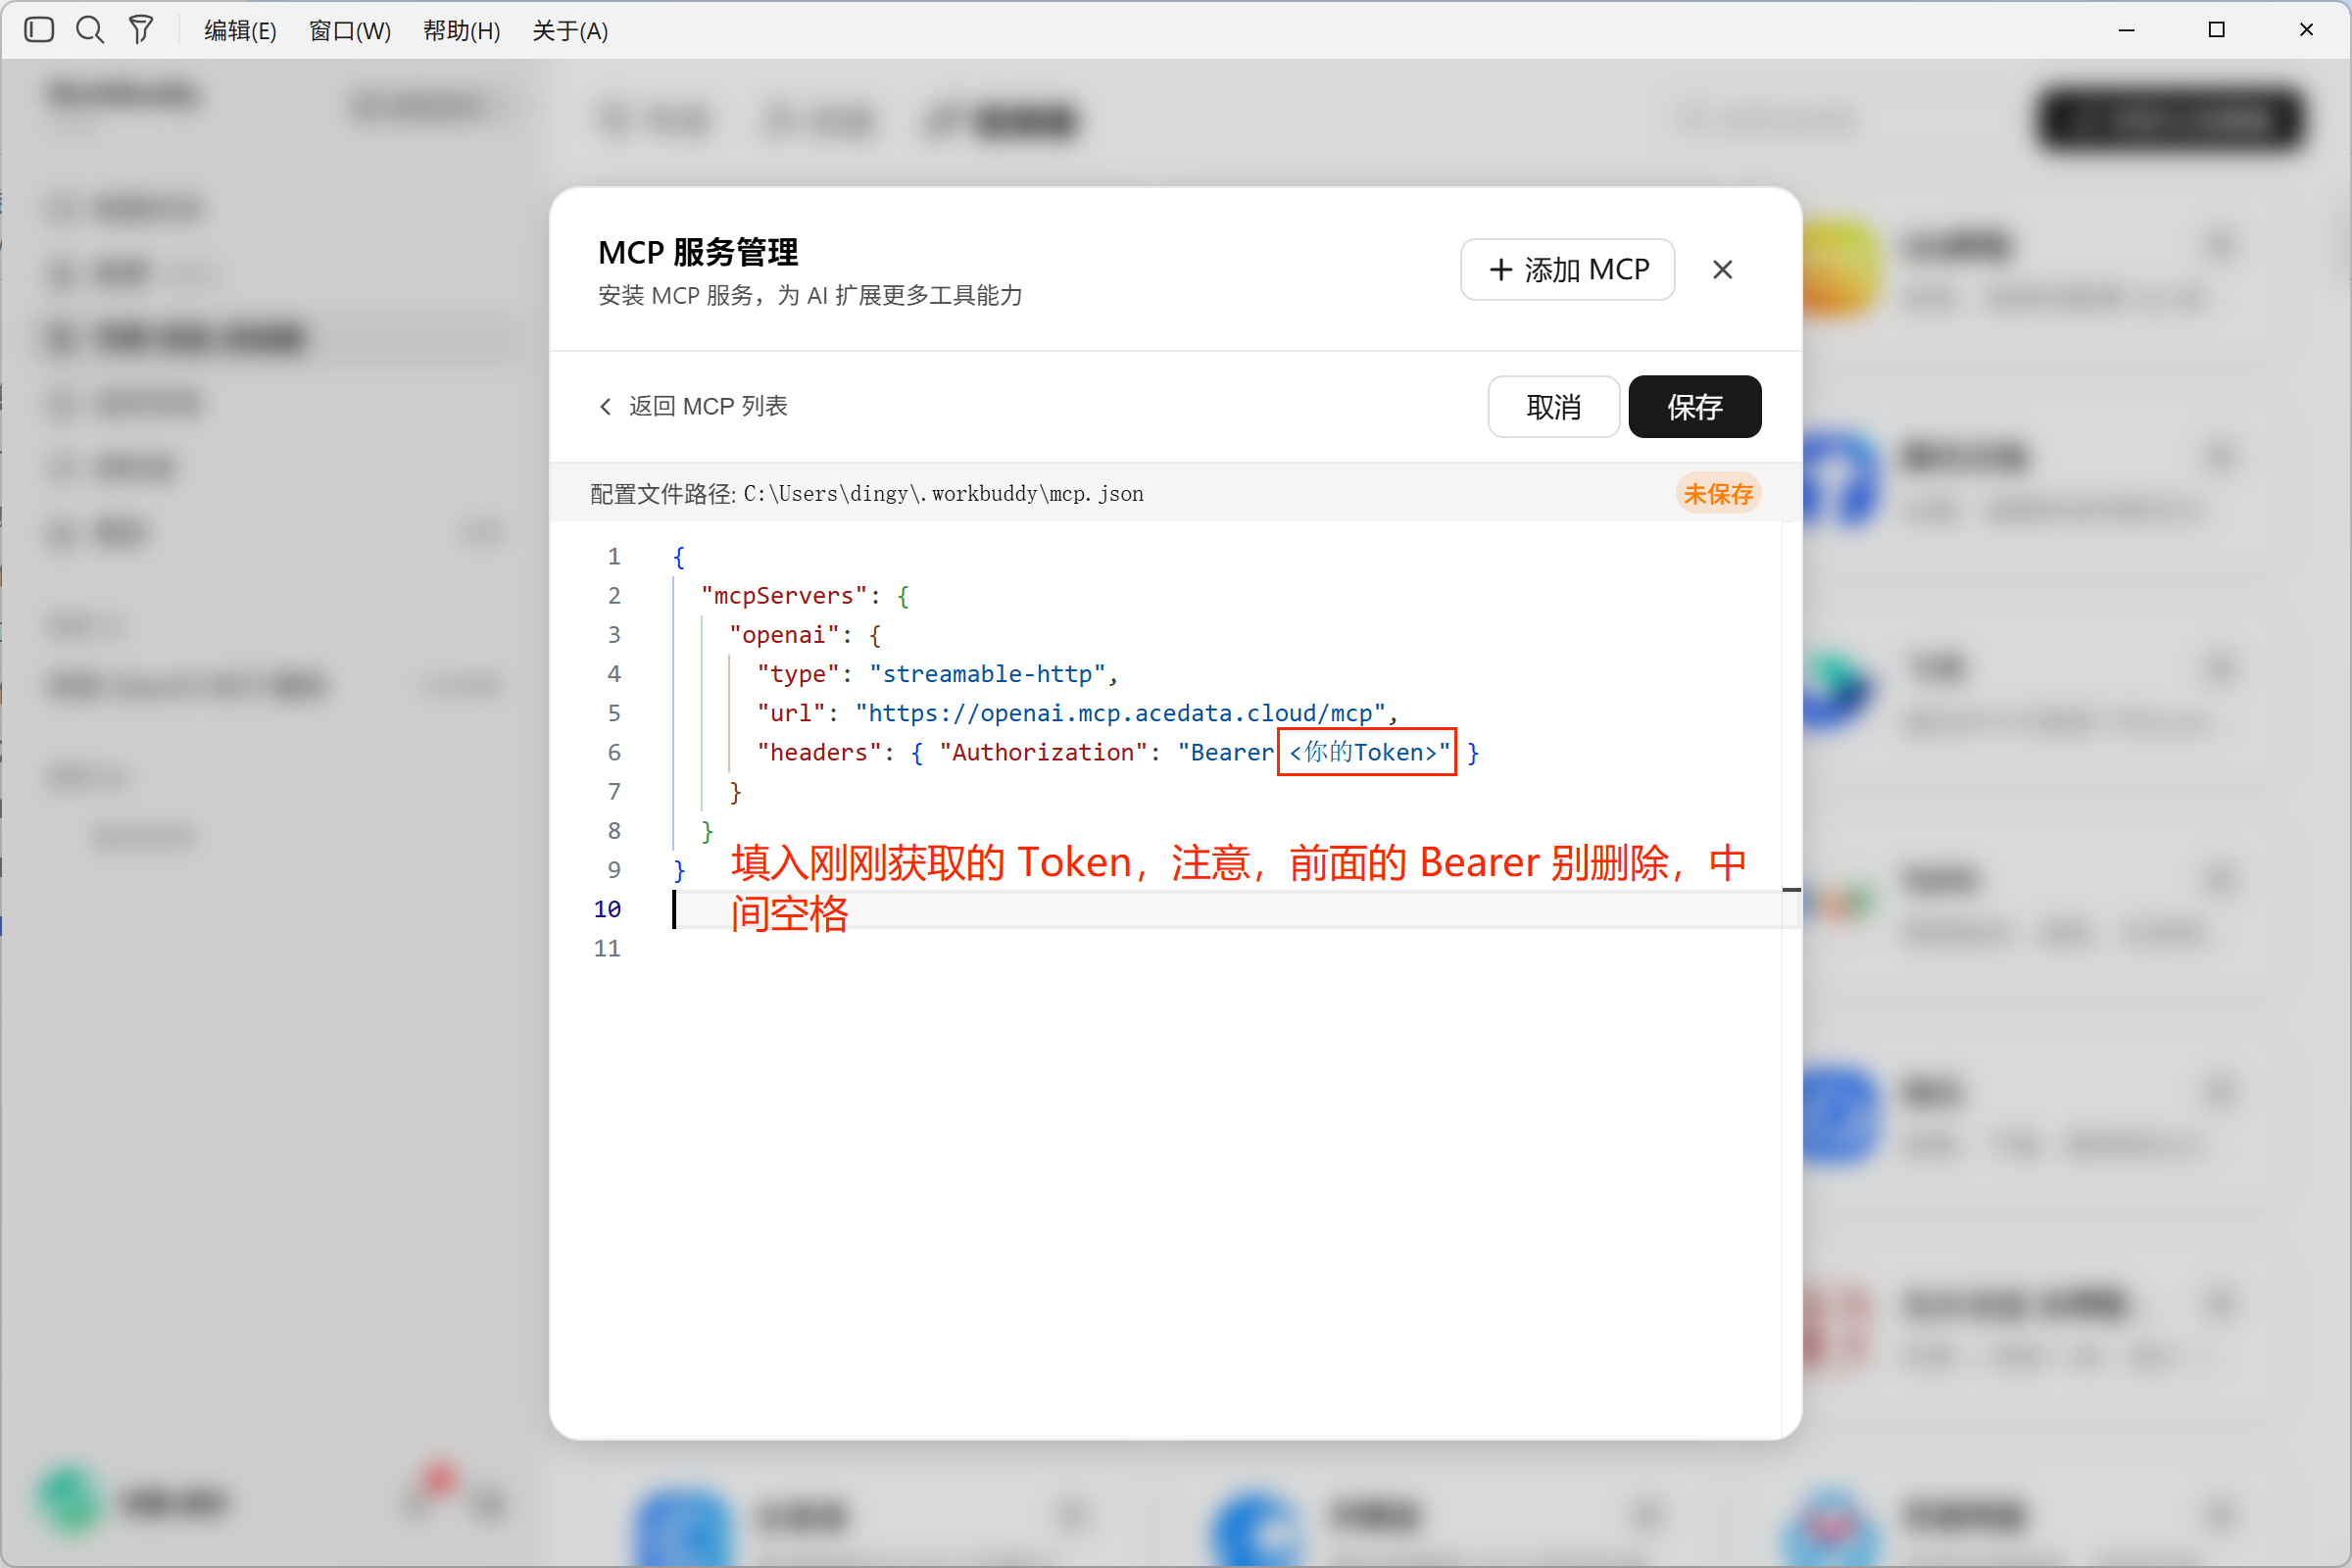
The red text is only used to indicate where to enter the content and is not part of the JSON configuration.
¶ 4. Trust and Enable the Service
After saving, return to the MCP list. When connecting for the first time, this interface prompts for trust confirmation.
After confirming that this is the service you just added, click “Trust”, then check whether the service is enabled.
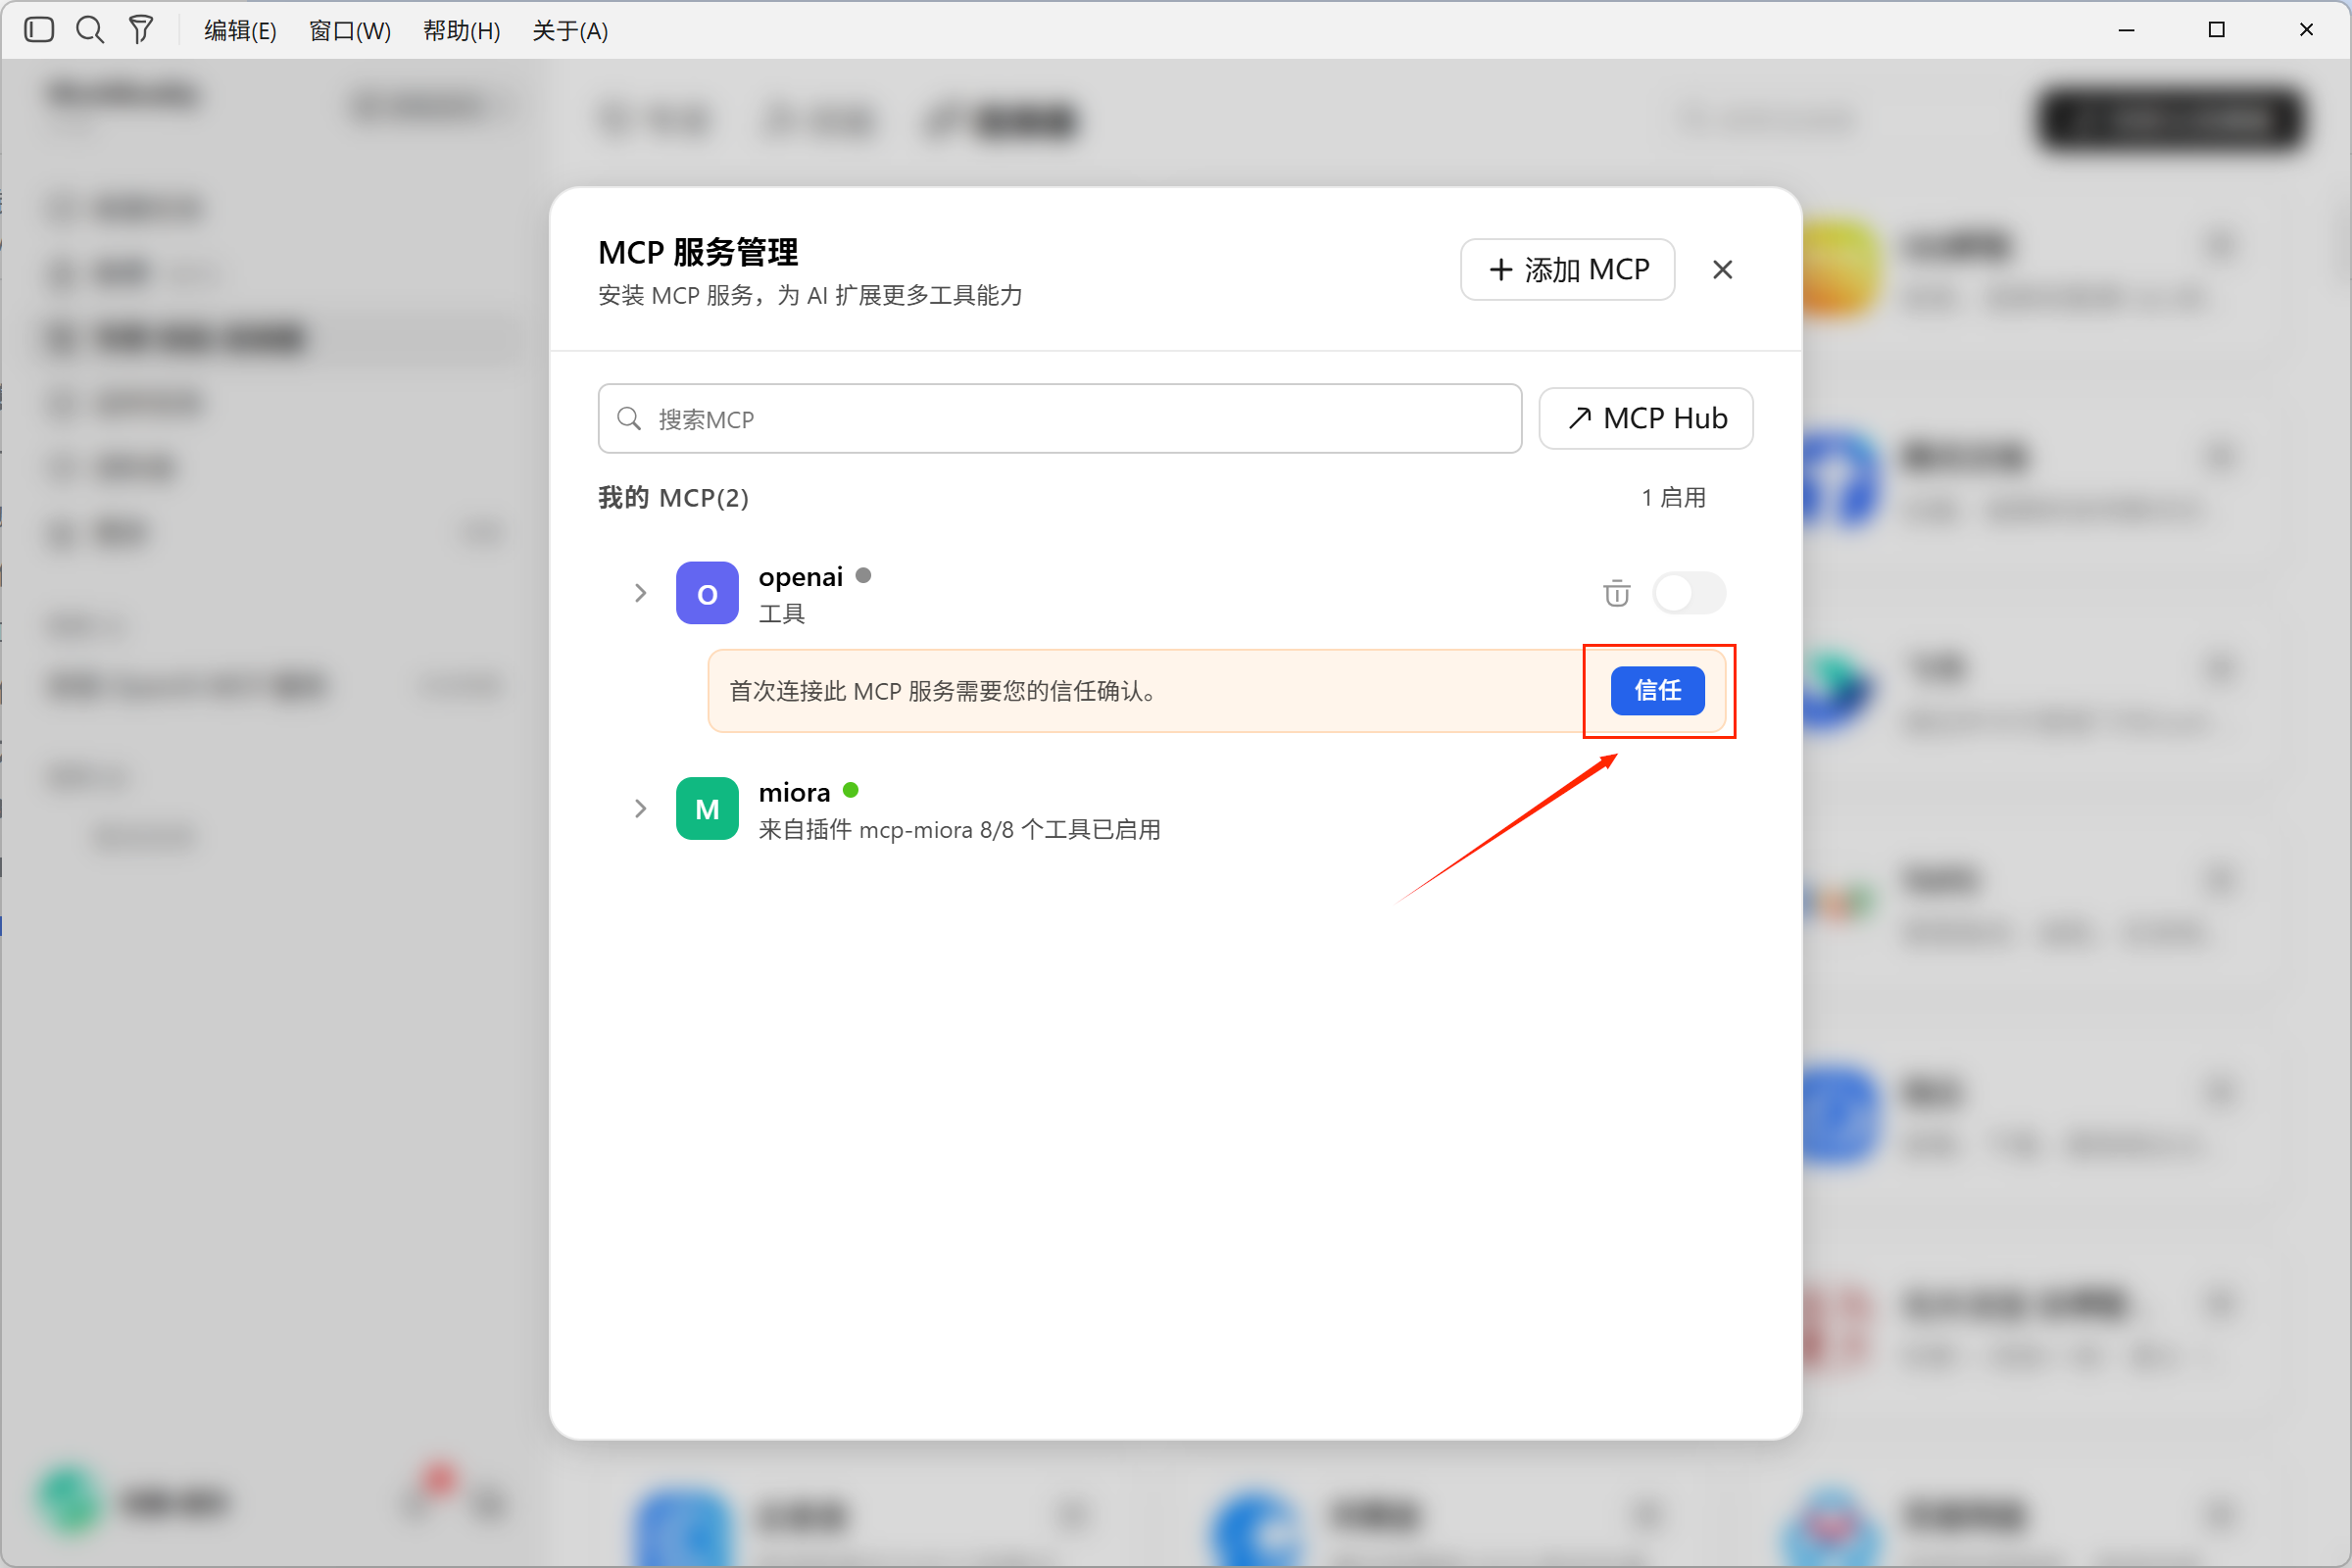
After confirming the service source, click “Trust.”
In this screenshot, openai shows a green status dot, an enable toggle, and 15/15 tools enabled; after expanding it, you can see tools such as openai_generate_image.
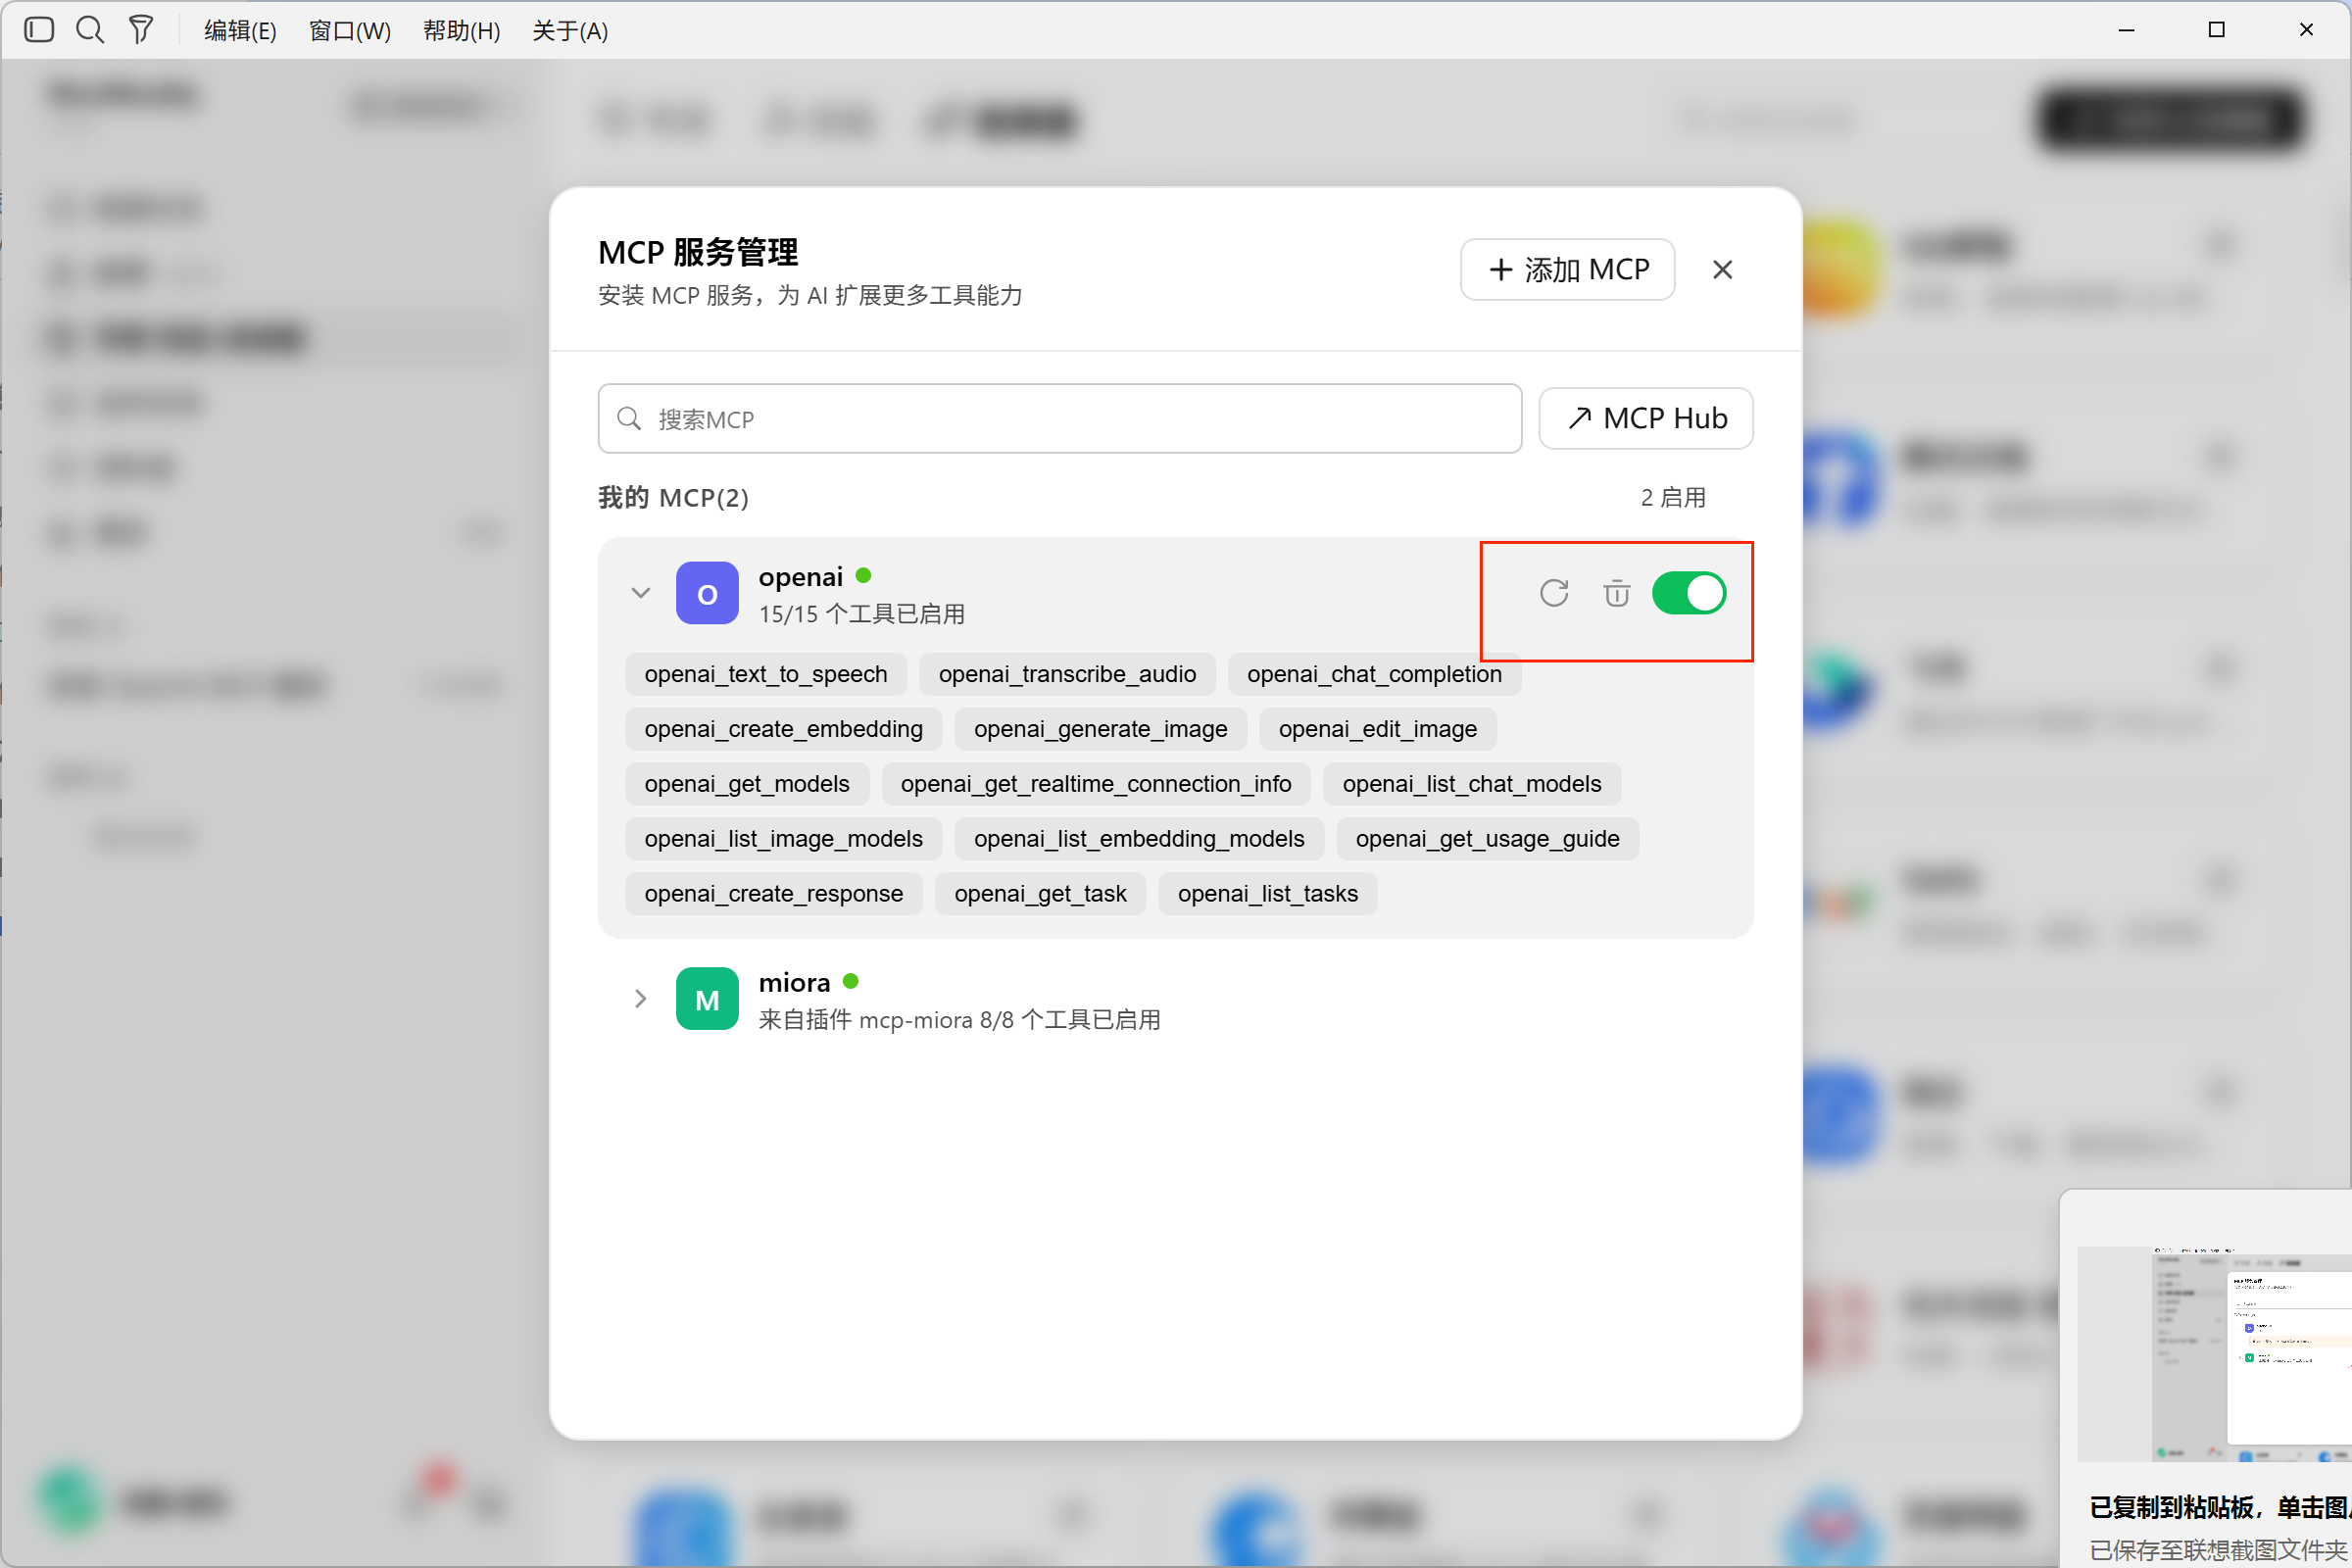
The service is enabled; next, verify it through an actual task.
¶ Part 3. Generate an Image and Verify Platform Call Records
¶ 1. Test Image Generation in WorkBuddy
Return to the task chat. The test prompt used this time is:
I have configured it. Now please use ace mcp to draw a colorful cat, 16:9
This explicitly requires using the MCP that was just configured, rather than merely asking WorkBuddy to generate an image at will.
Wait for the task to complete. In this example, WorkBuddy returned the following colorful cat image:
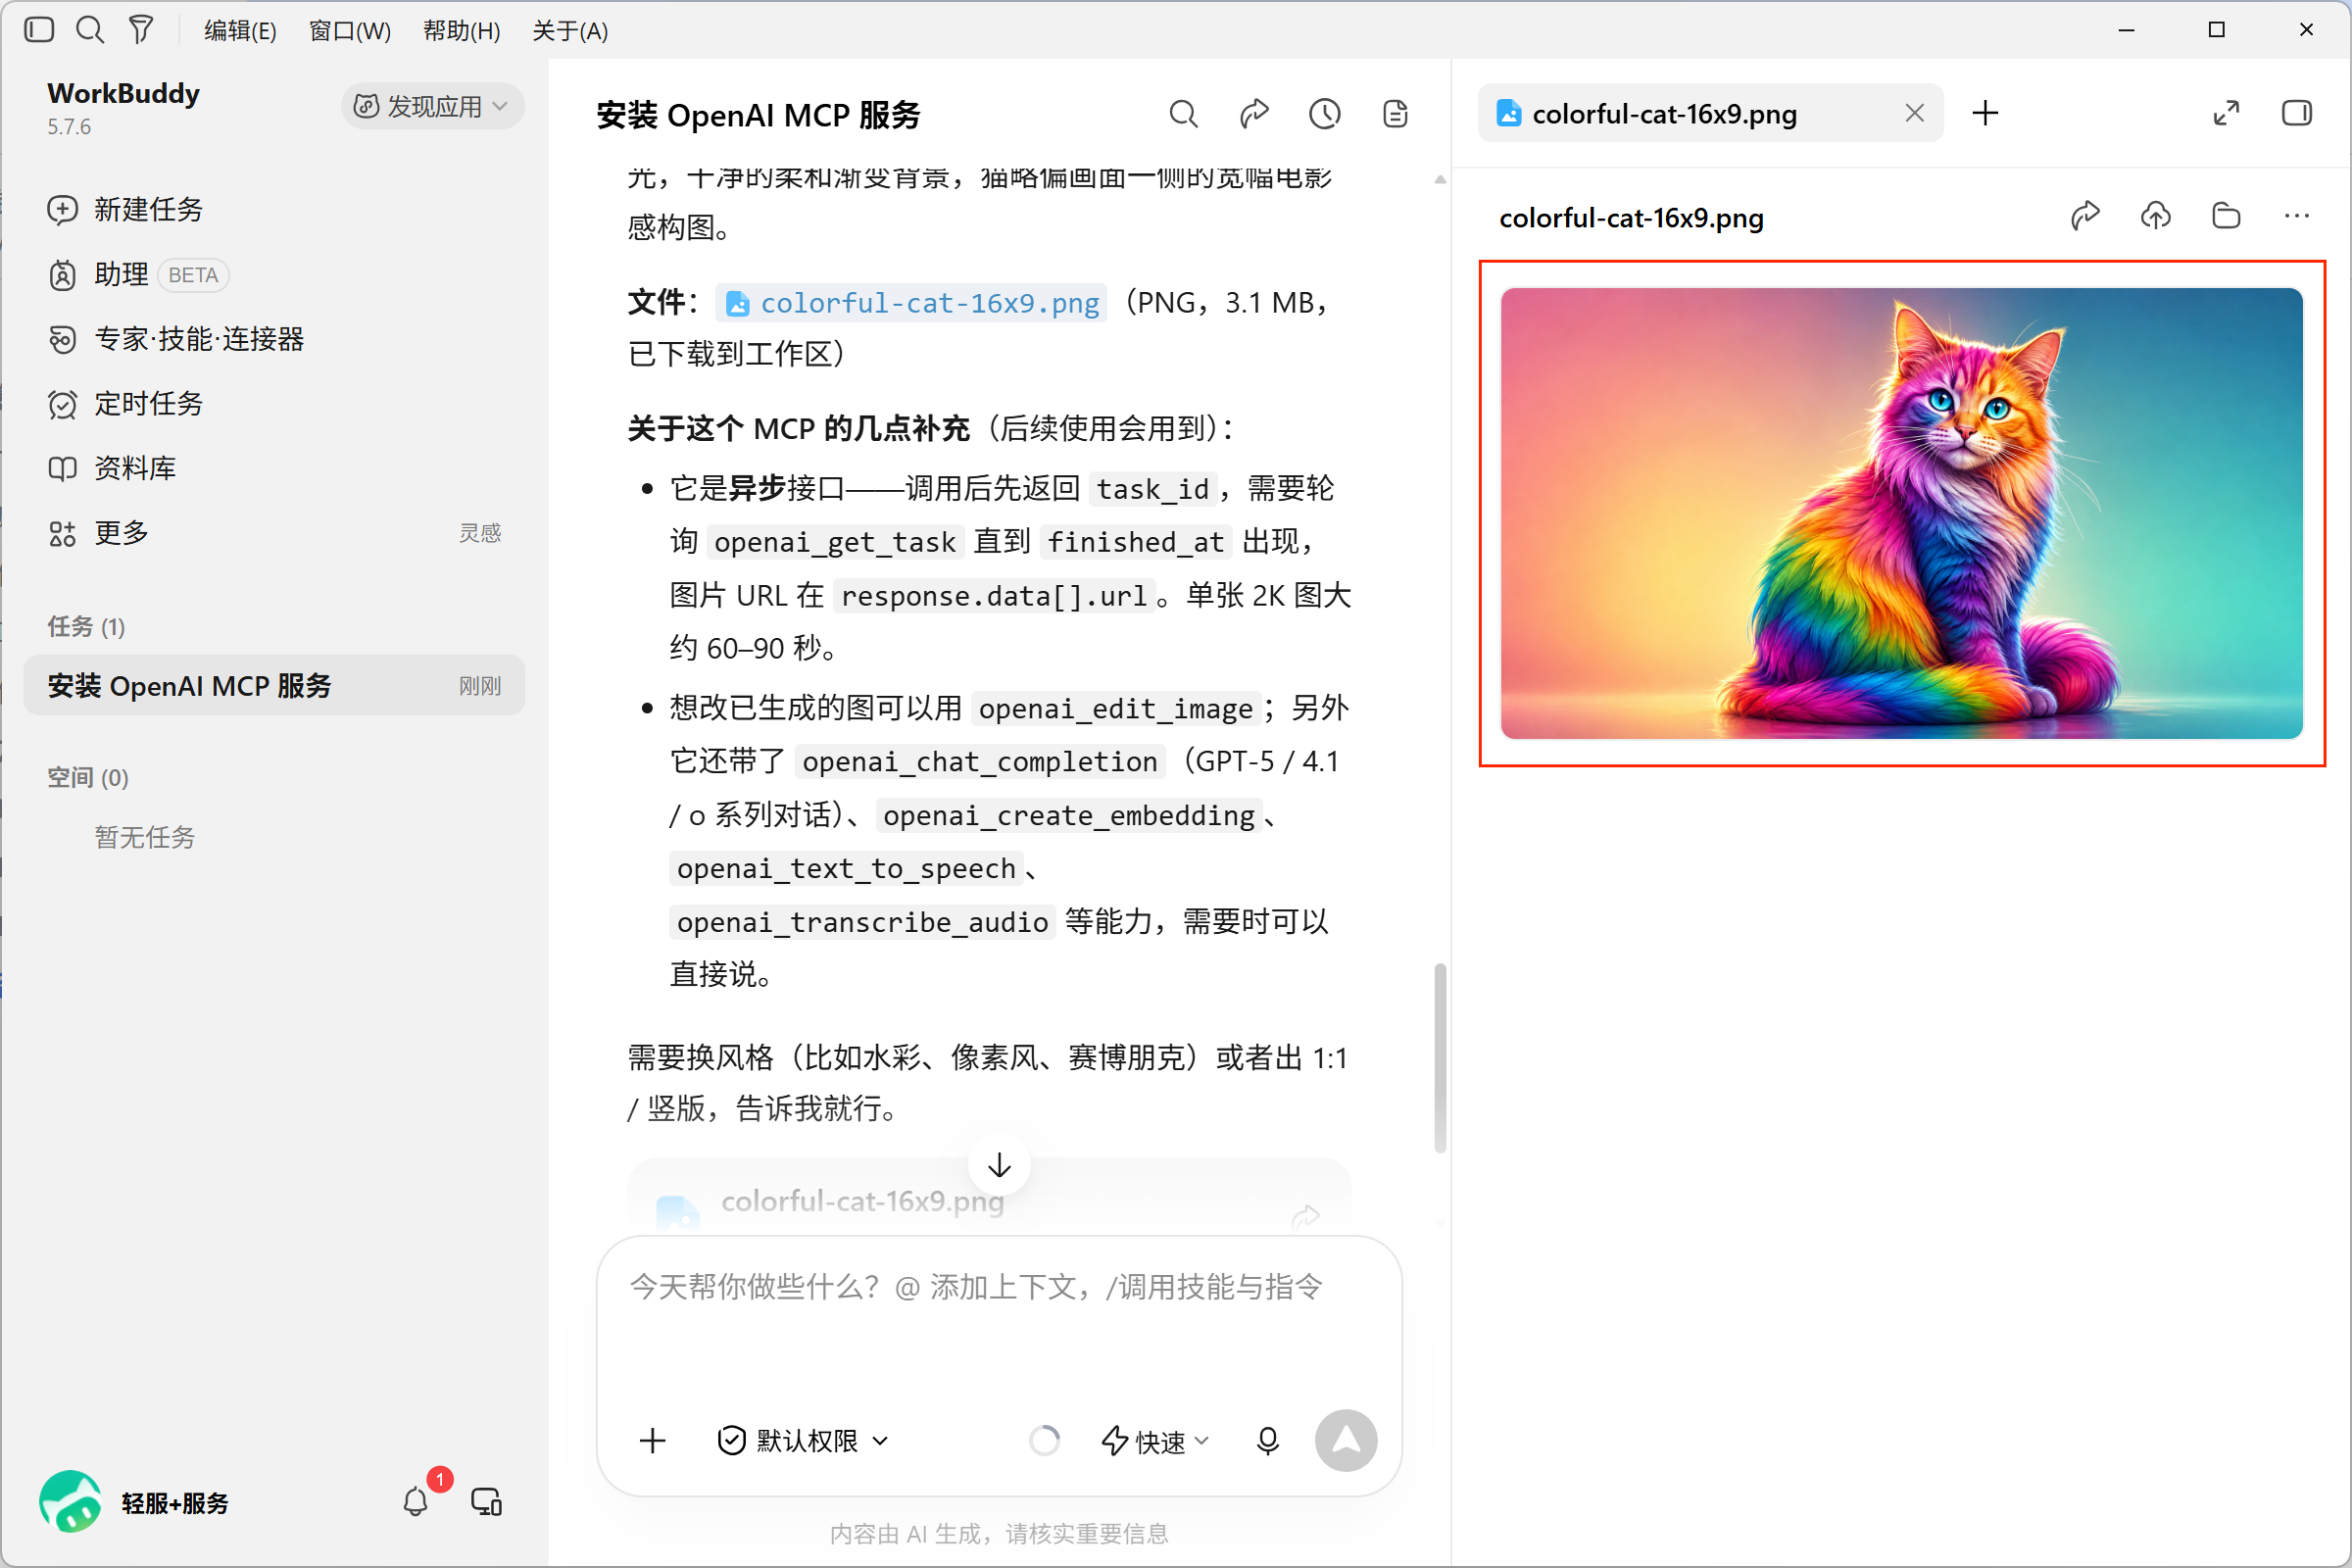
The image result returned by this test.
¶ 2. Confirm the Call Went Through Ace Data Cloud
After seeing the image, you still need to verify the call records. Open the “Usage History” page in Ace Data Cloud:
https://platform.acedata.cloud/console/usages
Use the credential name corresponding to this token and the call time to verify the task just performed.
In the example screenshot, you can see the call record corresponding to the WorkBuddy-gptimage2-mcp credential used this time. This name is customized in the example account; when verifying, use your own credential name as the reference.
![A call record corresponding to the credential used this time appears in the platform usage history; unrelated identifiers are masked]](https://cdn.acedata.cloud/uploads/386114da-6797-4f7a-b9a4-ad2075be0518)
Verify the credential name and call time to confirm that there is a corresponding record on the platform side.
Check the connector enabled status, image result, and platform call records together to verify this integration more completely, rather than only looking at “Completed” in the conversation.
¶ Final Reminders
- Do not disclose the API Token or include it in screenshots that have not been sanitized.
- Before making calls, confirm account quota and related billing. Start with a simple task when testing.
- If the call cannot be made, first check the token, the space after
Bearer, and whether the connector has been trusted and enabled. The entire process can be remembered in one sentence: Initiate installation through the conversation → Fill in the token → Trust and enable → Test image generation → Verify call records.